Overview
1 Deploy Server Node
2 Power On & Complete Server Node VM Configuration
3 Login to Pulse IoT Center
4 (Optional) Deploy Remaining Server Nodes
Deploy Server Node(s)
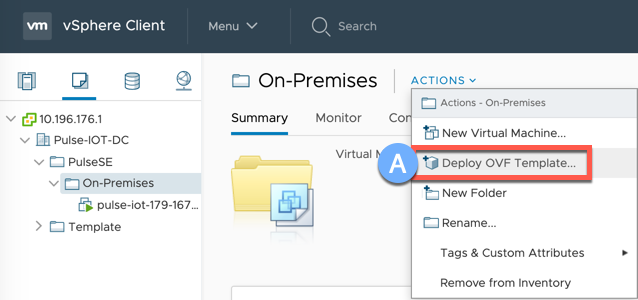
1A Select Actions\Deploy OVF Template…
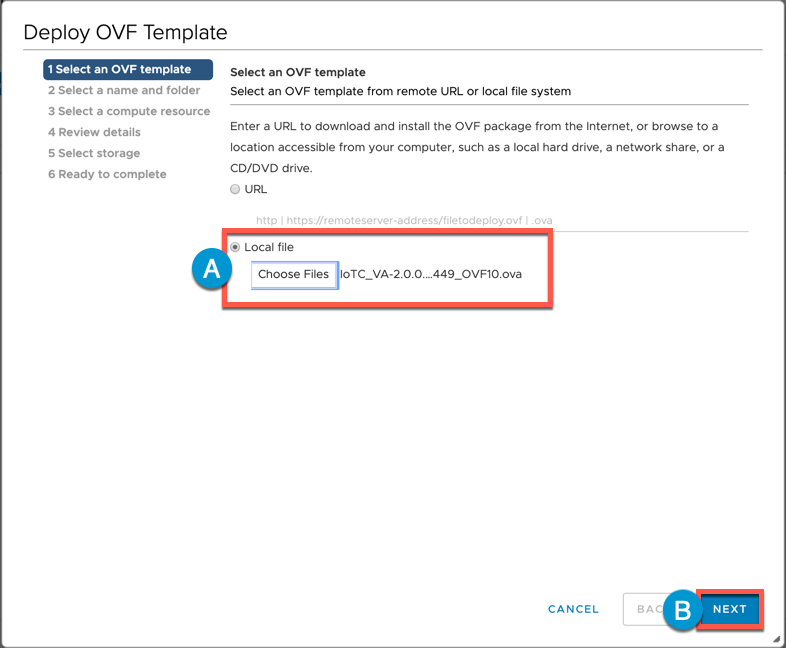
2A Enable Local file radial button and select IoTC_VA-2.0.0…449_OVF10.ova
2B Click NEXT
3A Specify Virtual machine name
3B Click NEXT

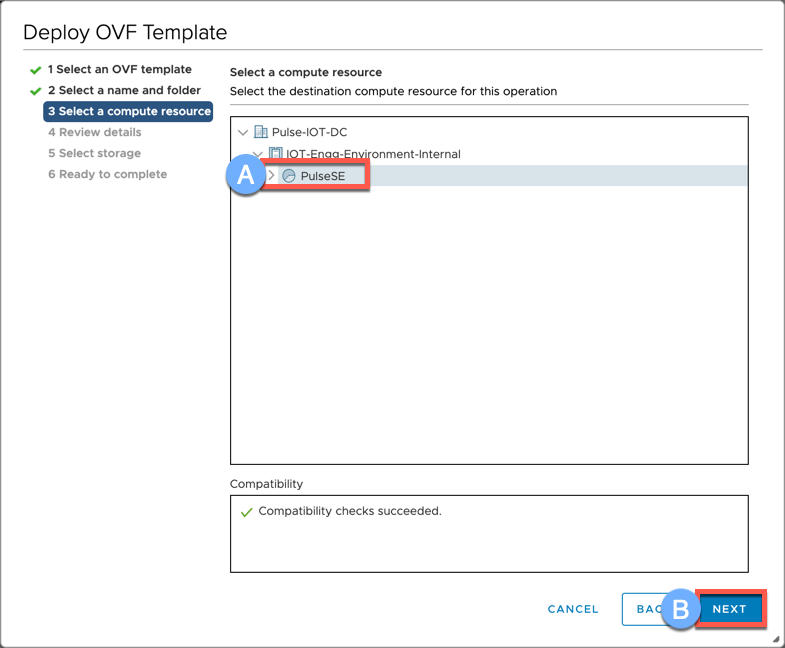
4A Select destination
4B Click NEXT
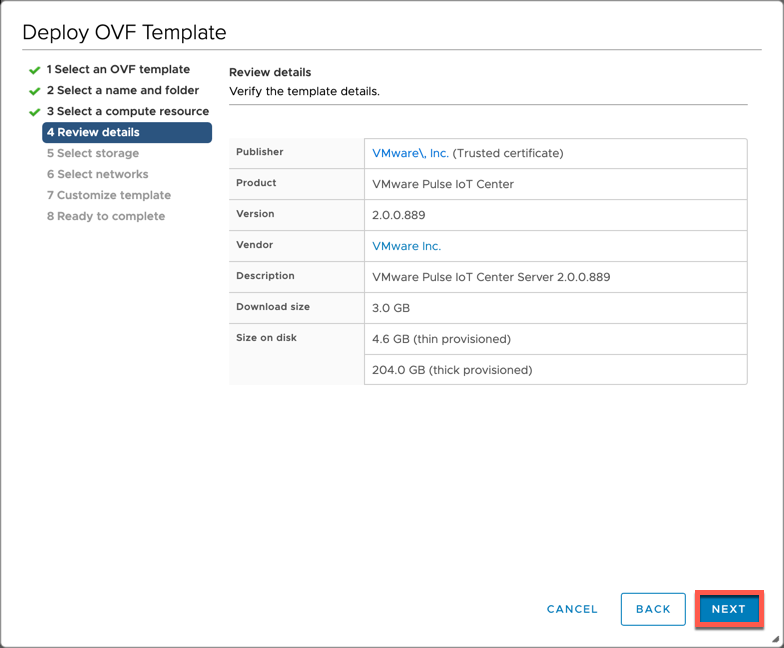
5A Review details and click NEXT
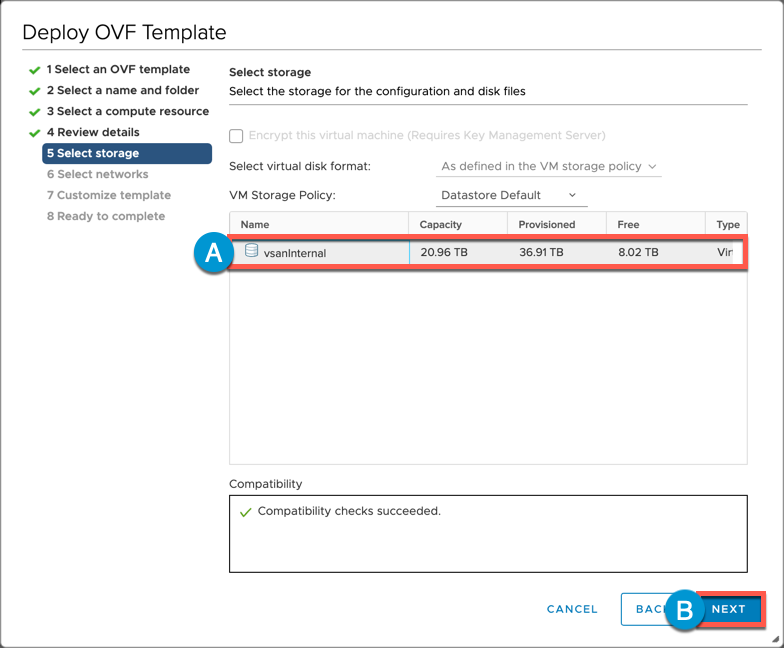
6A Select storage
6B Click NEXT
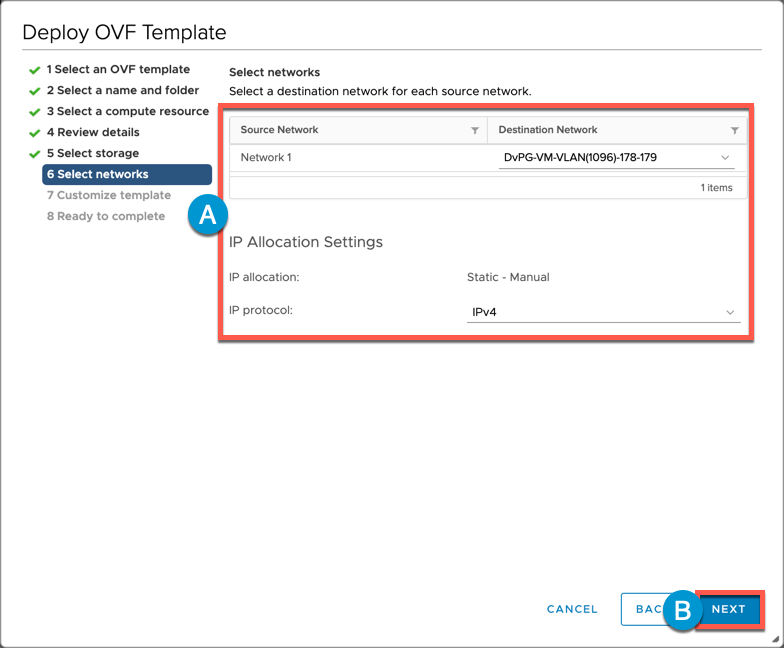
7A Select networks options
7B Click NEXT
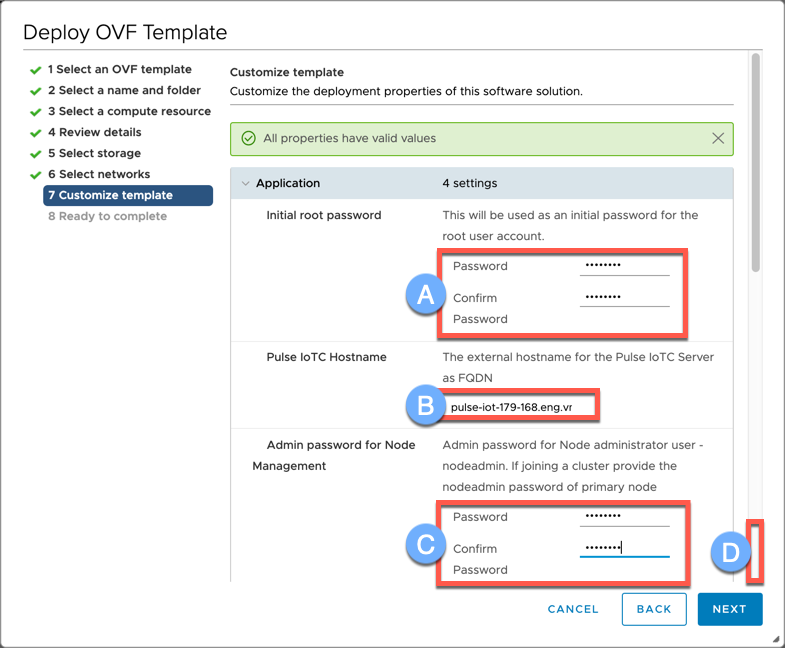
8A Enter root password/confirm
8B Enter Pulse IoTC Hostname (FQDN)
8C Enter Admin password/confirm
8D Scroll Down
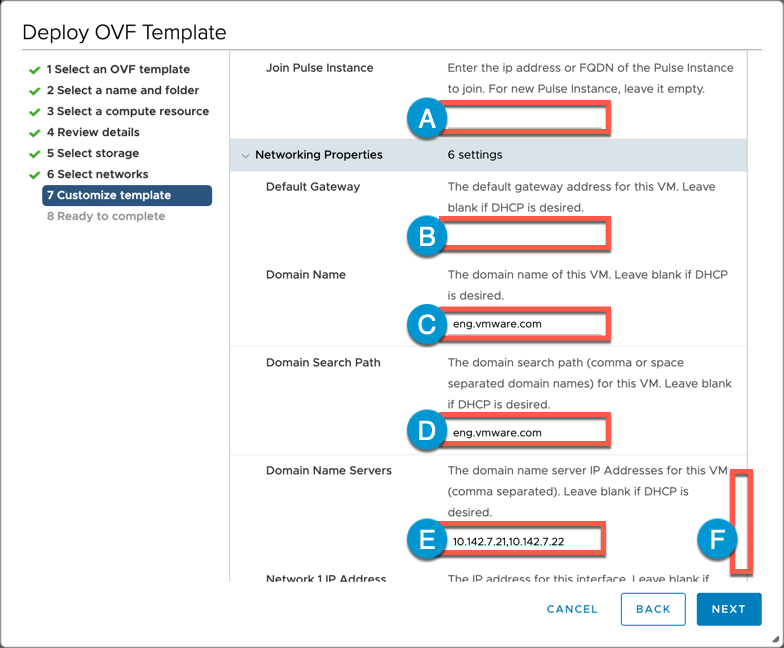
9A Enter Join Pulse Instance value only if deploying Server Node 2 or 3 (this is NOT the Load Balancer Node 1 that you previously deployed. This only applies to Server Nodes 2 and 3, where you would specify Server Node 1 as this value)
9B Enter Default Gateway
9C Enter Domain Name
9D Enter Domain Search Path
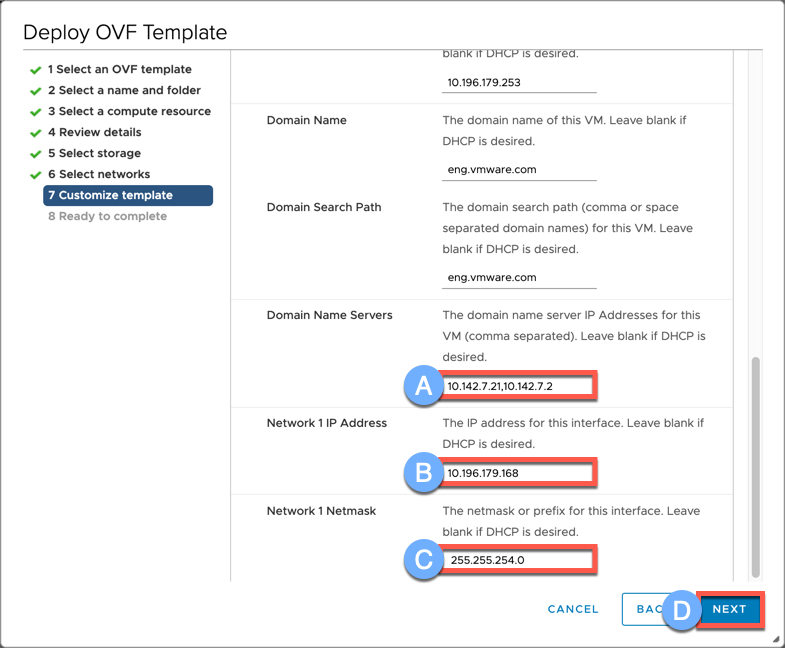
9E Enter Domain Name Servers (comma separated)
9F Scroll Down
10A Enter Domain Name Servers
10B Enter Network 1 IP Address
10C Enter Network 1 Netmask
10D Click NEXT
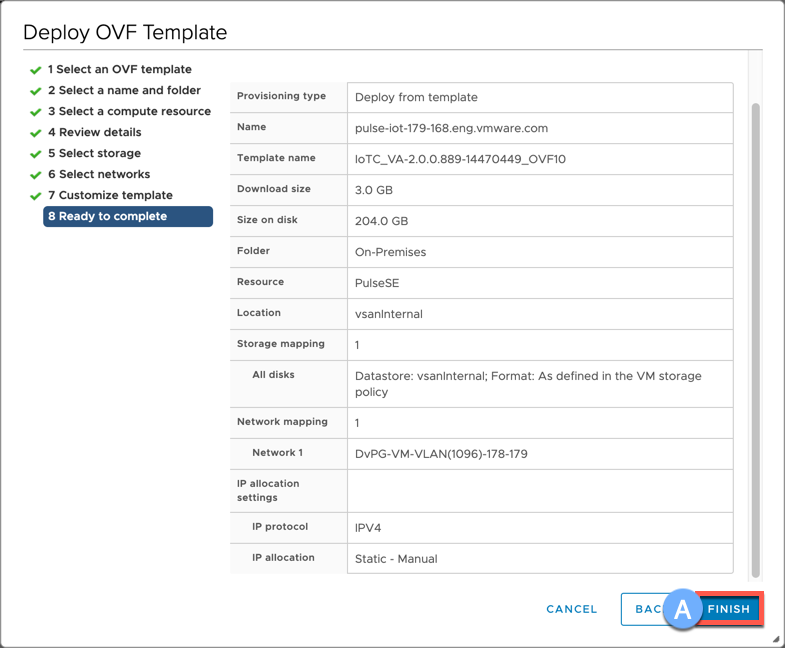
11A Review Details and Click FINISH
Power On & Complete Server Nodes configuration
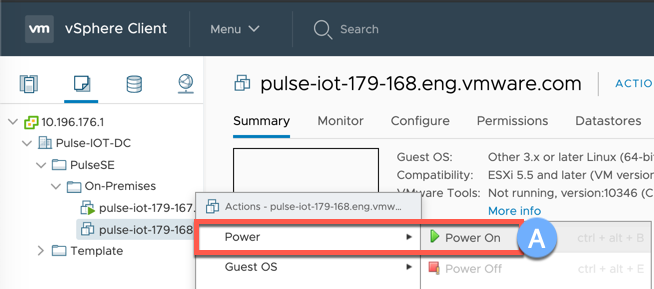
1A Power\Power On Virtual Machine
2A Validate IP Assignment

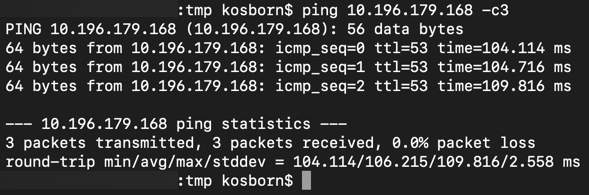
3A (Optional) Ping Test
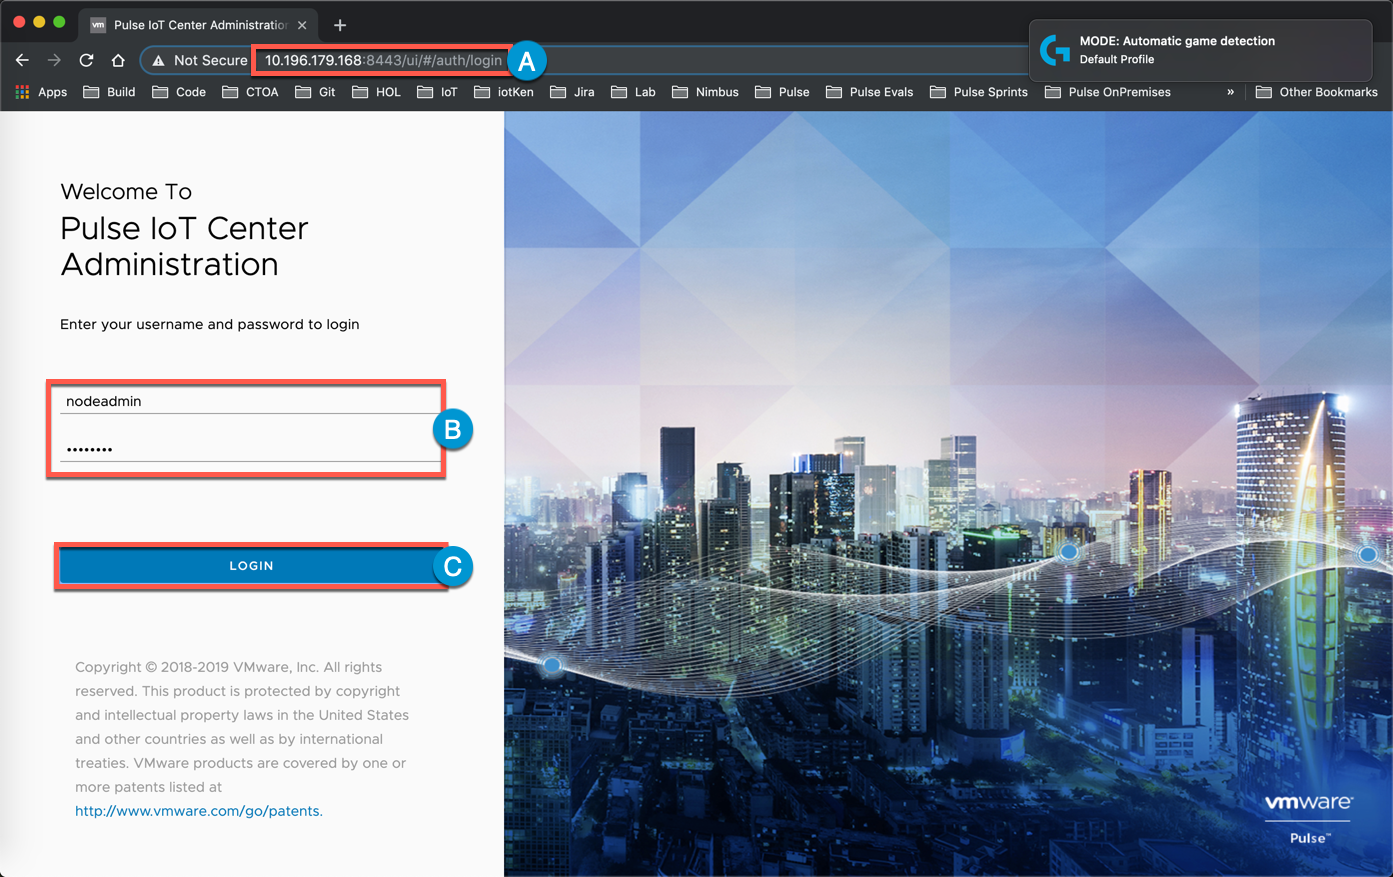
4A Connect to Pulse Management Interface and complete the Configuration (https://[host or ip]:8443)
4B Enter Username (nodeadmin) and Password (utilizing the password you specified during ova import)
4C Click LOGIN
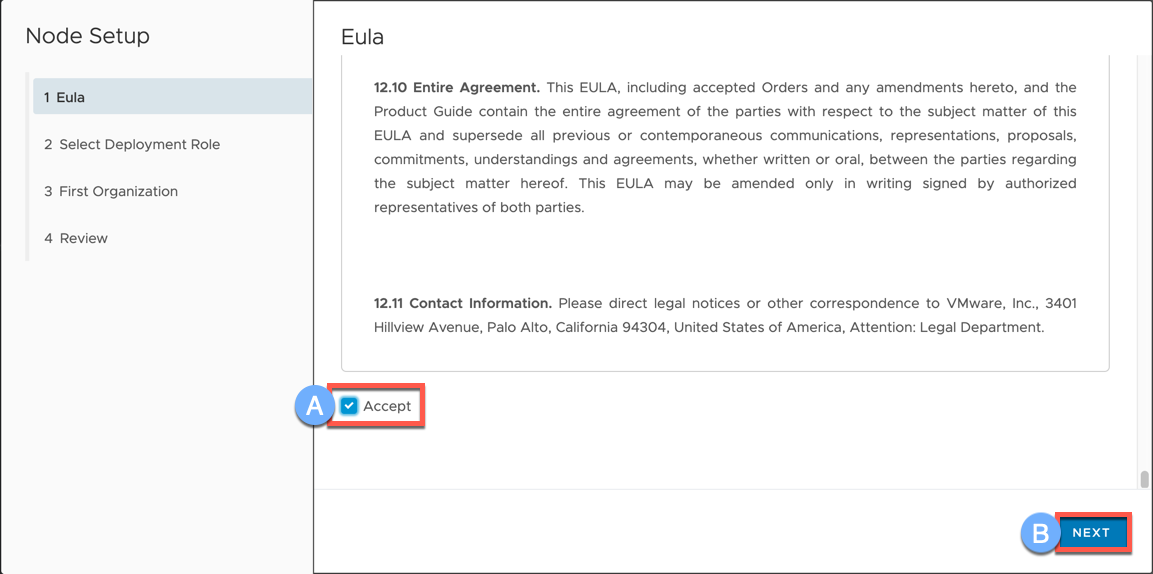
5A Scroll down, Accept License Agreement then click NEXT
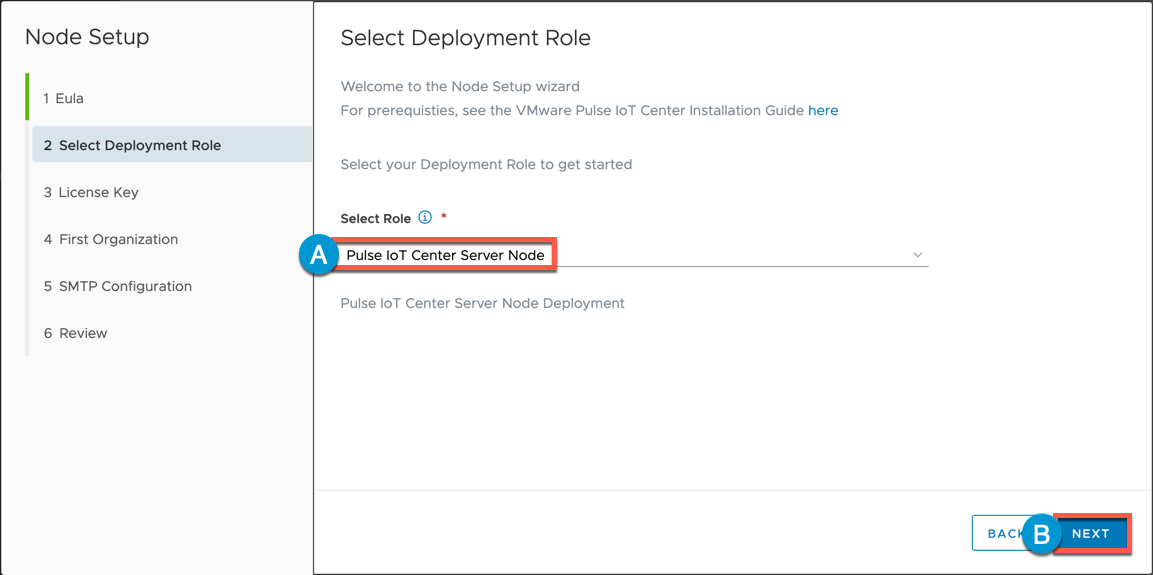
 6A Select Role: Pulse IoT Center Server Node
6B Click NEXT
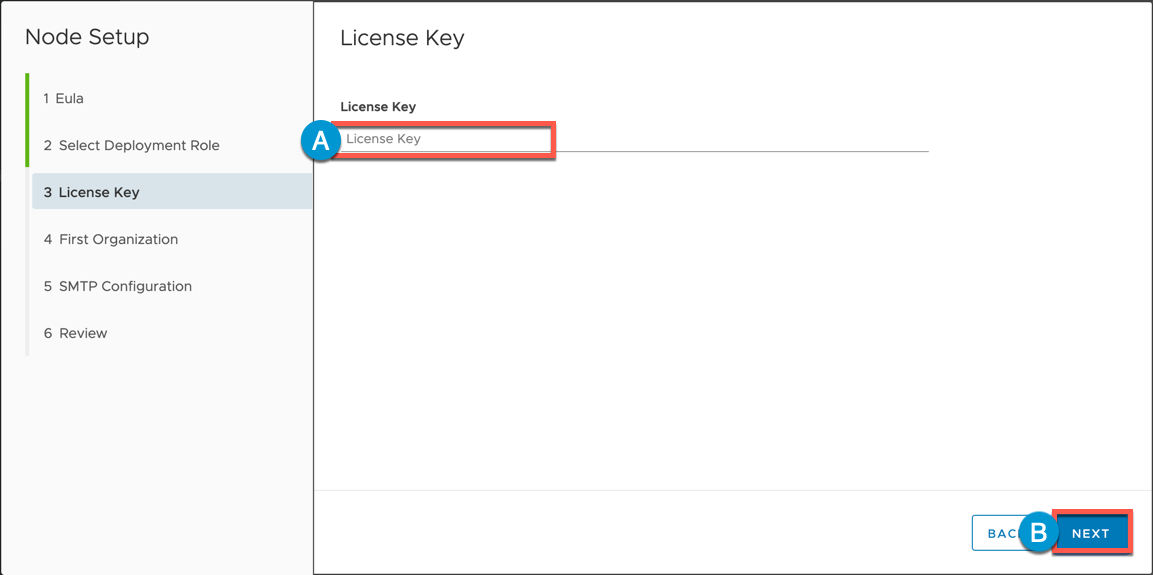
7A Enter License Key (this step can be skipped with License Key entered post-deployment)
7B Click NEXT
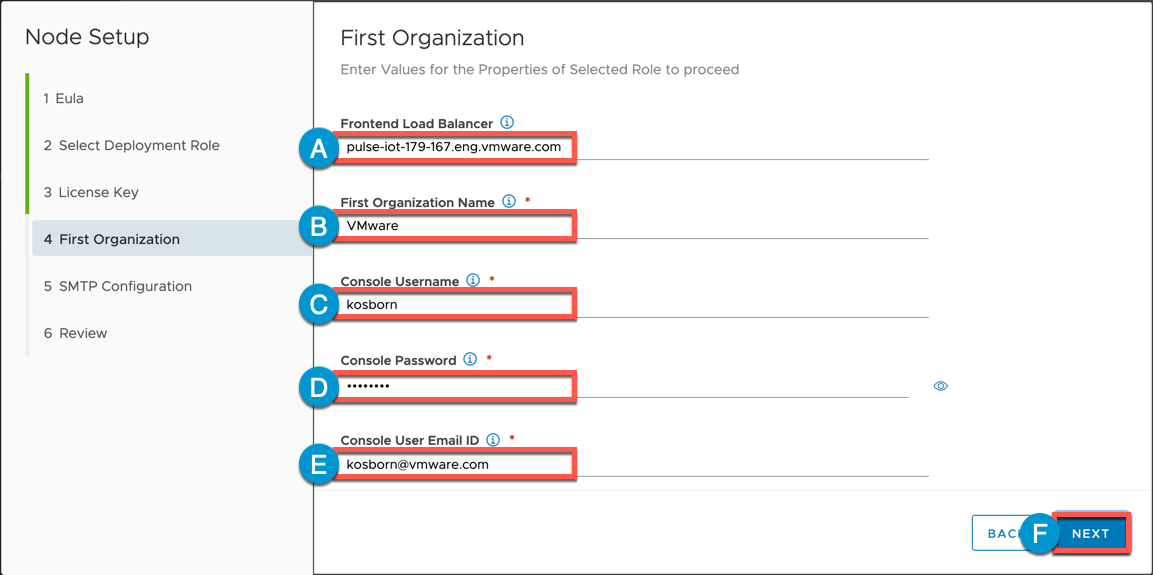
8A Enter Frontend Load Balancer (FQDN or IP)
8B Enter First Organization Name
8C Enter Console Username
8D Enter Console Password
8E Enter Console User Email ID
8F Click NEXT
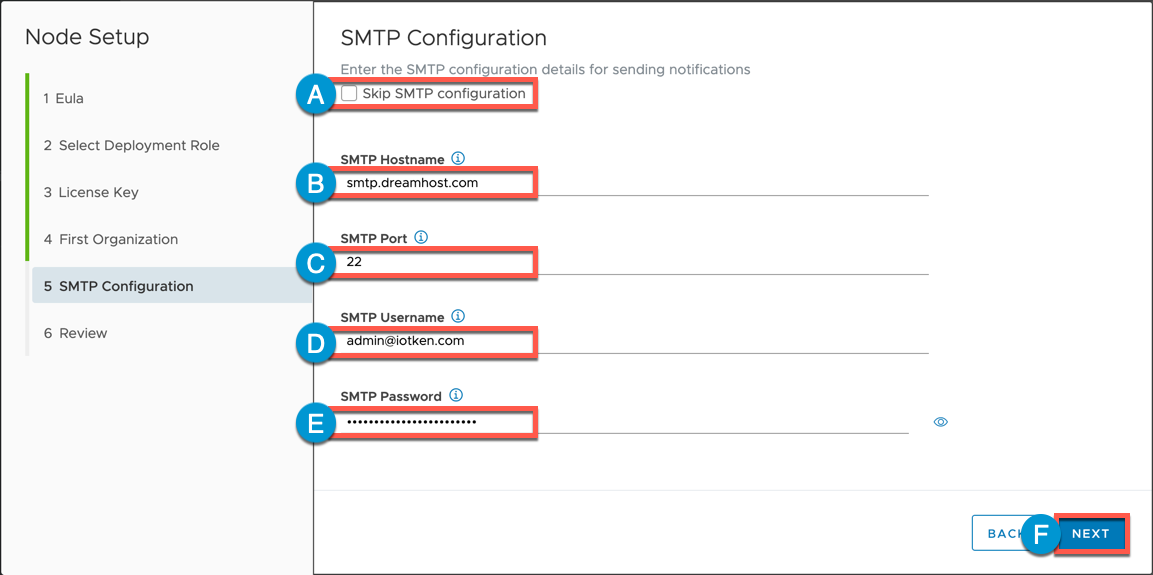
9A (Optional) Enable Skip STMP configuration (to receive welcome email and alert notifications, you must enter SMTP details)
9B Enter SMTP Hostname
9C Enter SMTP Port
9D Enter SMTP Username
9E Enter SMTP Password
9F Click NEXT
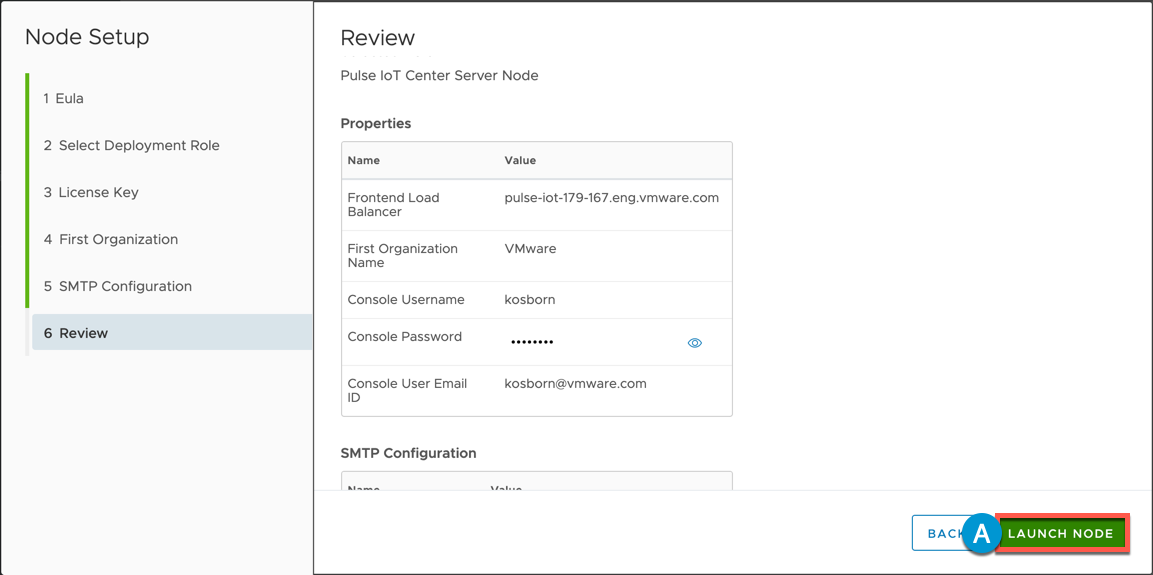
10A Review Settings then click LAUNCH NODE
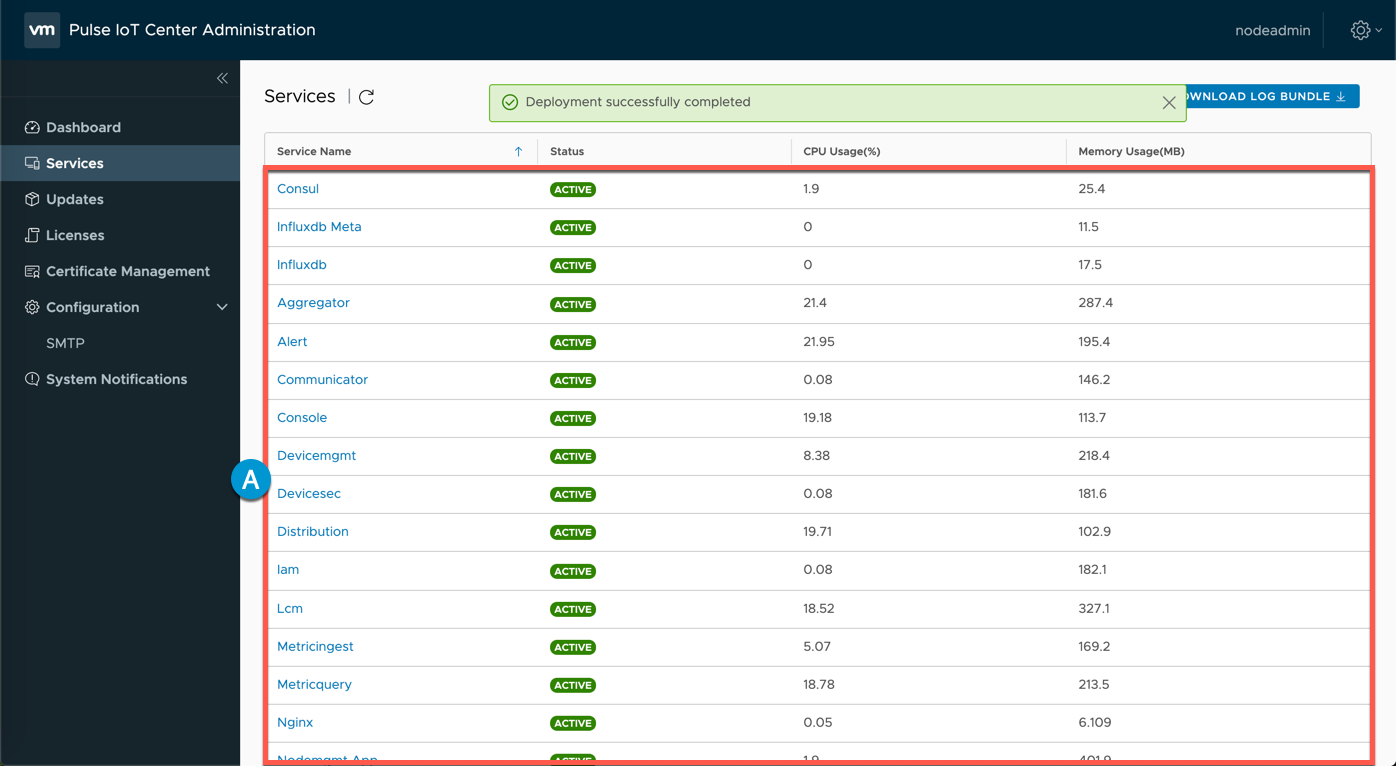
11A Monitor while Deployment is in Progress… (this can take several minutes to complete aka Coffee Break)

12A After Deployment Successfully completed, scroll down and verify that all Services are reporting ACTIVE
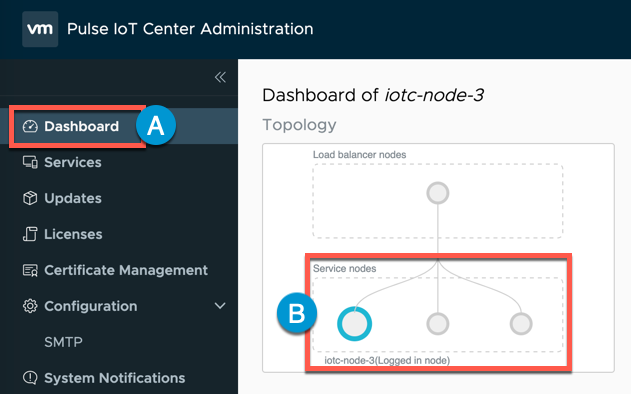
13A Select Dashboard
13B Note that we can see a visual representation of the Load Balancer node/role that we just deployed in the Topology image

Login to Pulse IoT Center
1A Navigate to Pulse IoT Center login URL by FQDN or IP (this is your Load Balancer address) [https://fqdn-or-ip]
1B Enter Username/Password (utilizing the values you specified above)
1C Click NEXT
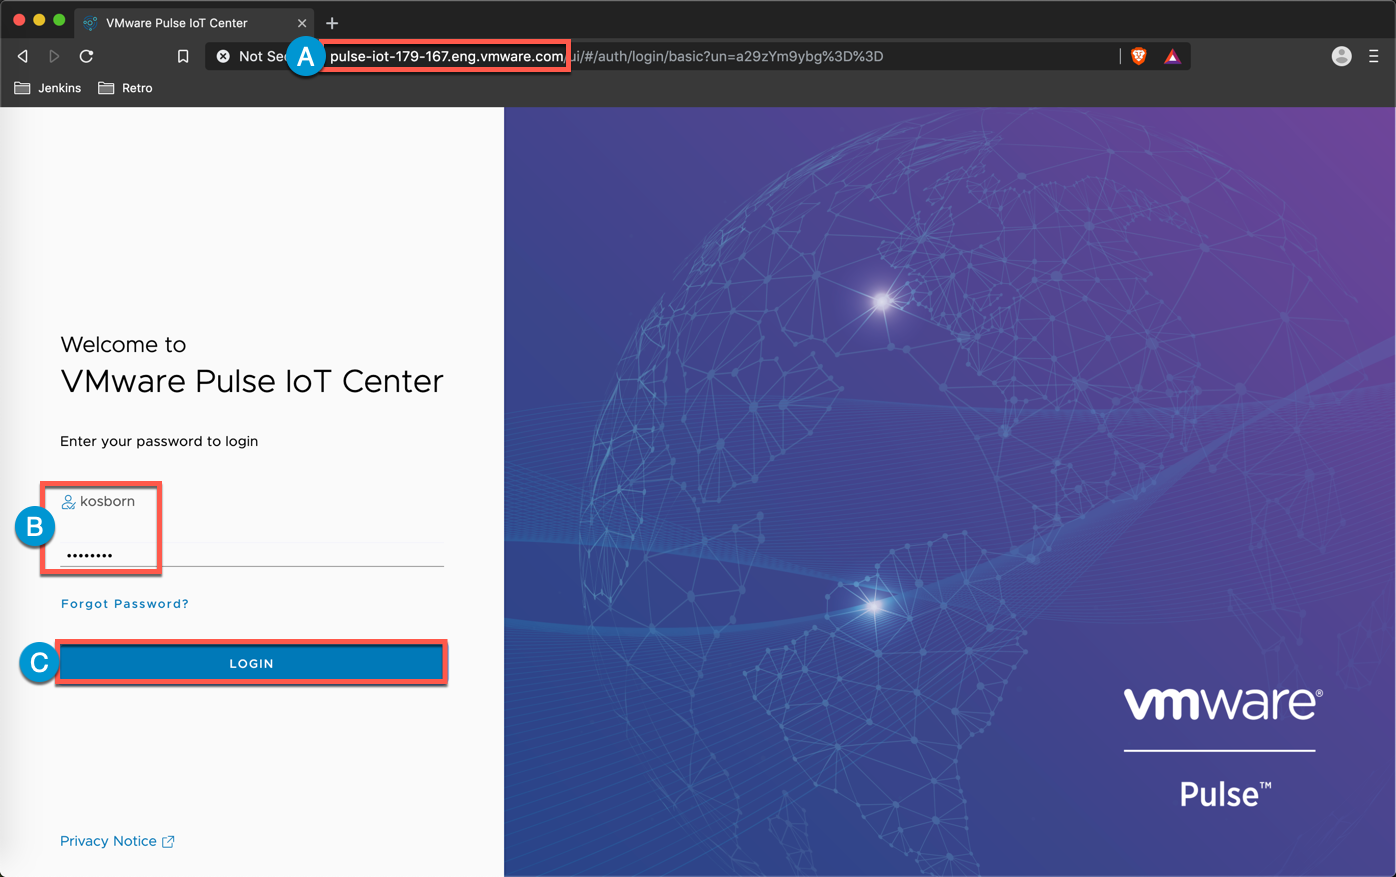
2A Validate Successful Login

(Optional) Deploy Remaining Server Nodes
1 Repeat Step 1 Deploy Server Node for each remaining Server Node utilizing unique values for each Server (name/ip/etc.) and Power On these Nodes
2 You do not need to complete the post deployment configuration steps for Server Nodes 2 and 3
3 After the remaining Pulse Server Nodes are online you can confirm their presence via one of the Server Nodes :8443 (admin interface):
<Thank you - this concludes our ’Server Nodes’ Lesson, please return to Guide Contents>
comments powered by Disqus