Overview
1 Create Thing Template (IoT Sensor) in Pulse
2 Onboard Thing (Virtual IoT Sensor)
3 Utilize Script to send Metrics
4 Configure Linux Service to send Metrics
Create Thing Template (IoT Sensor) in Pulse
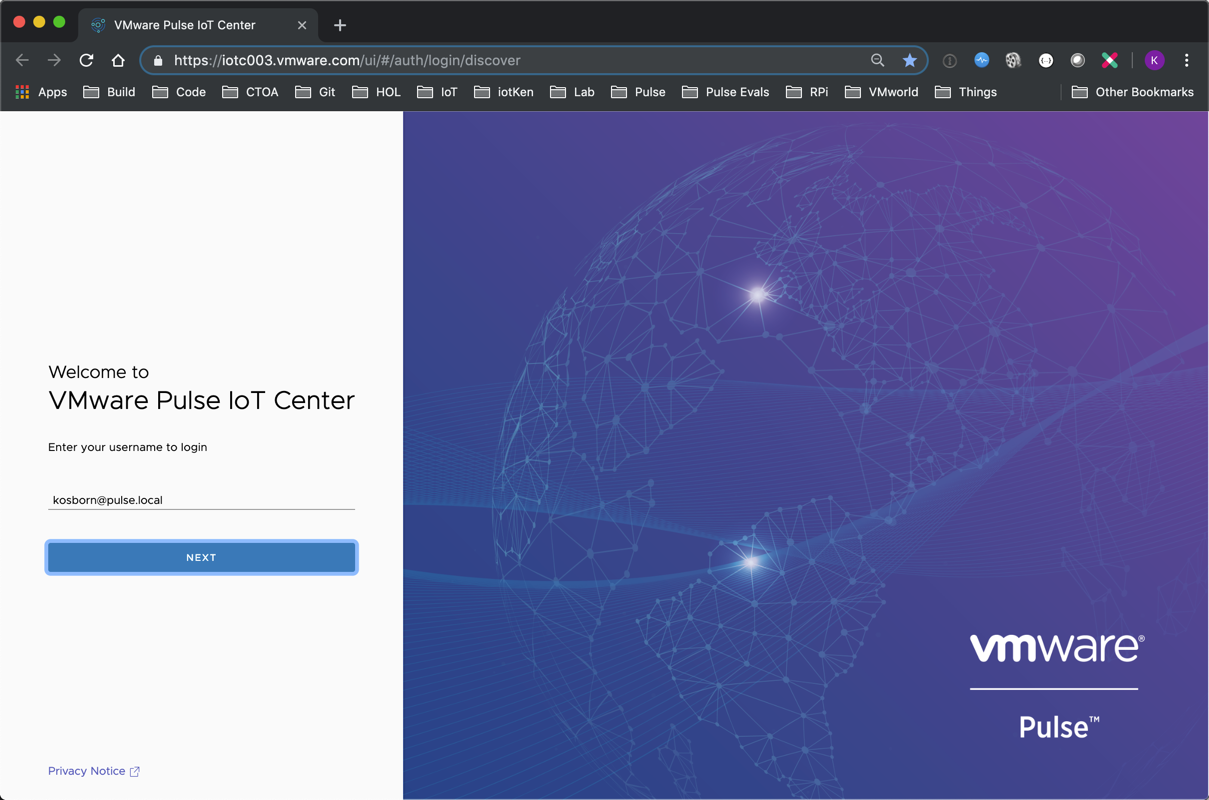
1 Login to Pulse Console if you are not already (link)
2 Username: [First Name Initial][Last Name]@pulse.local
Password: VMware1!
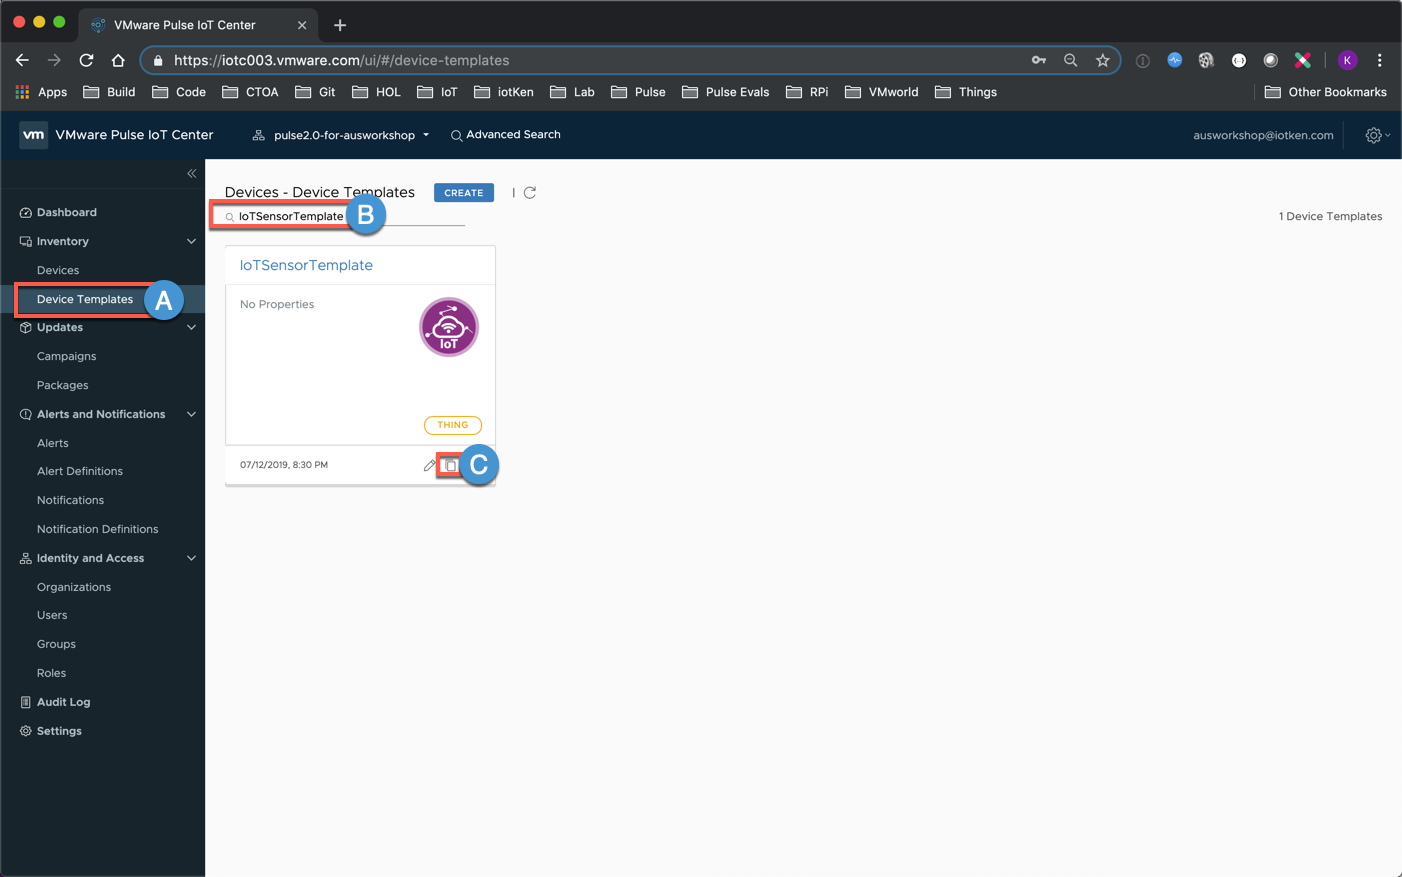
2A Select Device Templates
2B Enter ‘IoTSensorTemplate’ in Search field
2C Select Copy Icon for the ’SensorTemplate’ Thing
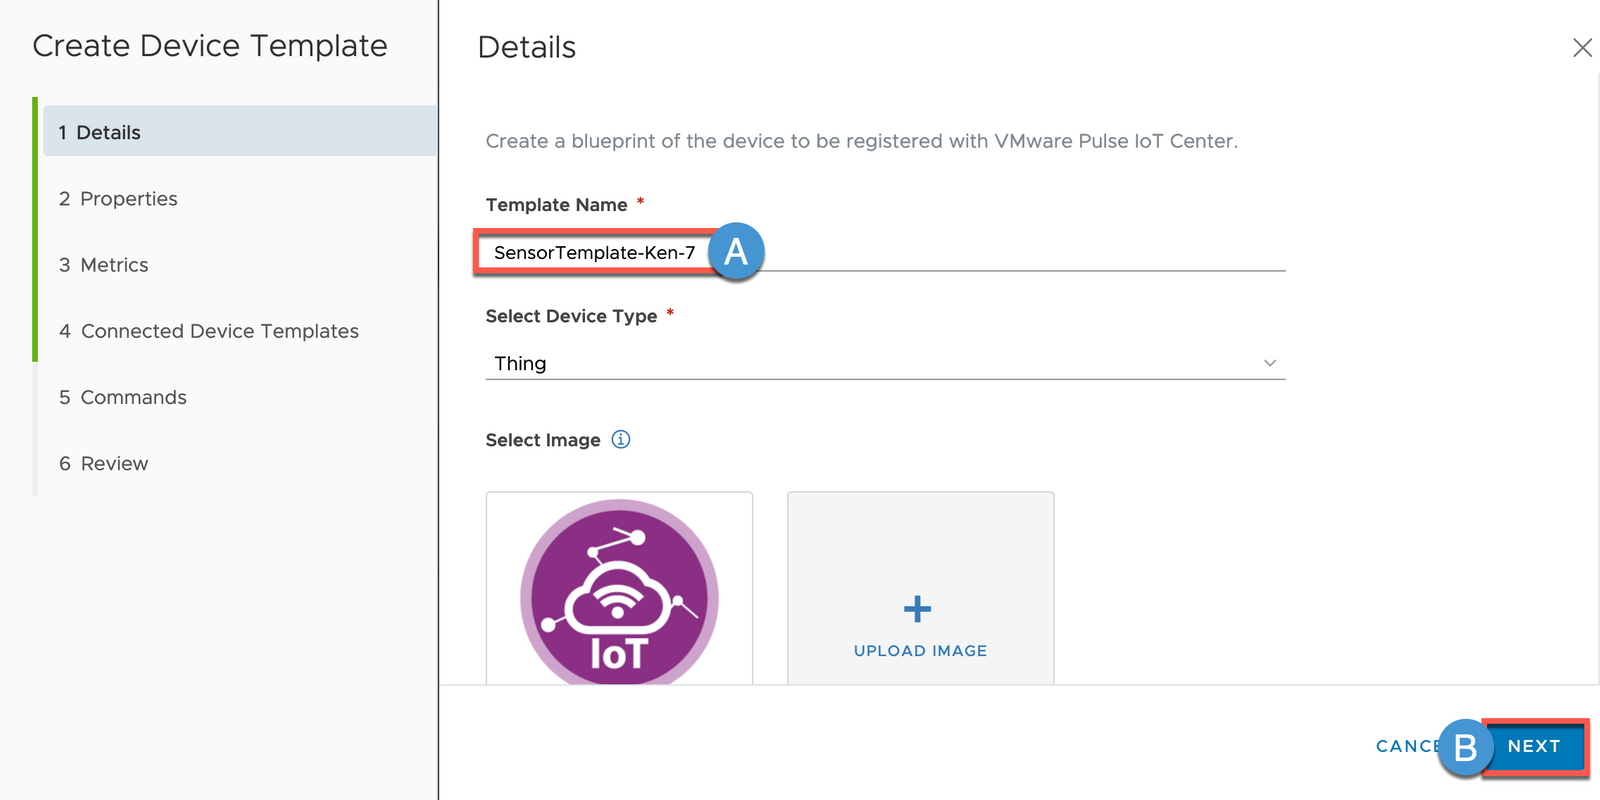
3A Enter Template Name (make sure you remove ‘IoT’ from the front of the name): ‘SensorTemplate-[YourFirstName]-[FavoriteSingleDigitNumber]’
3B Click NEXT
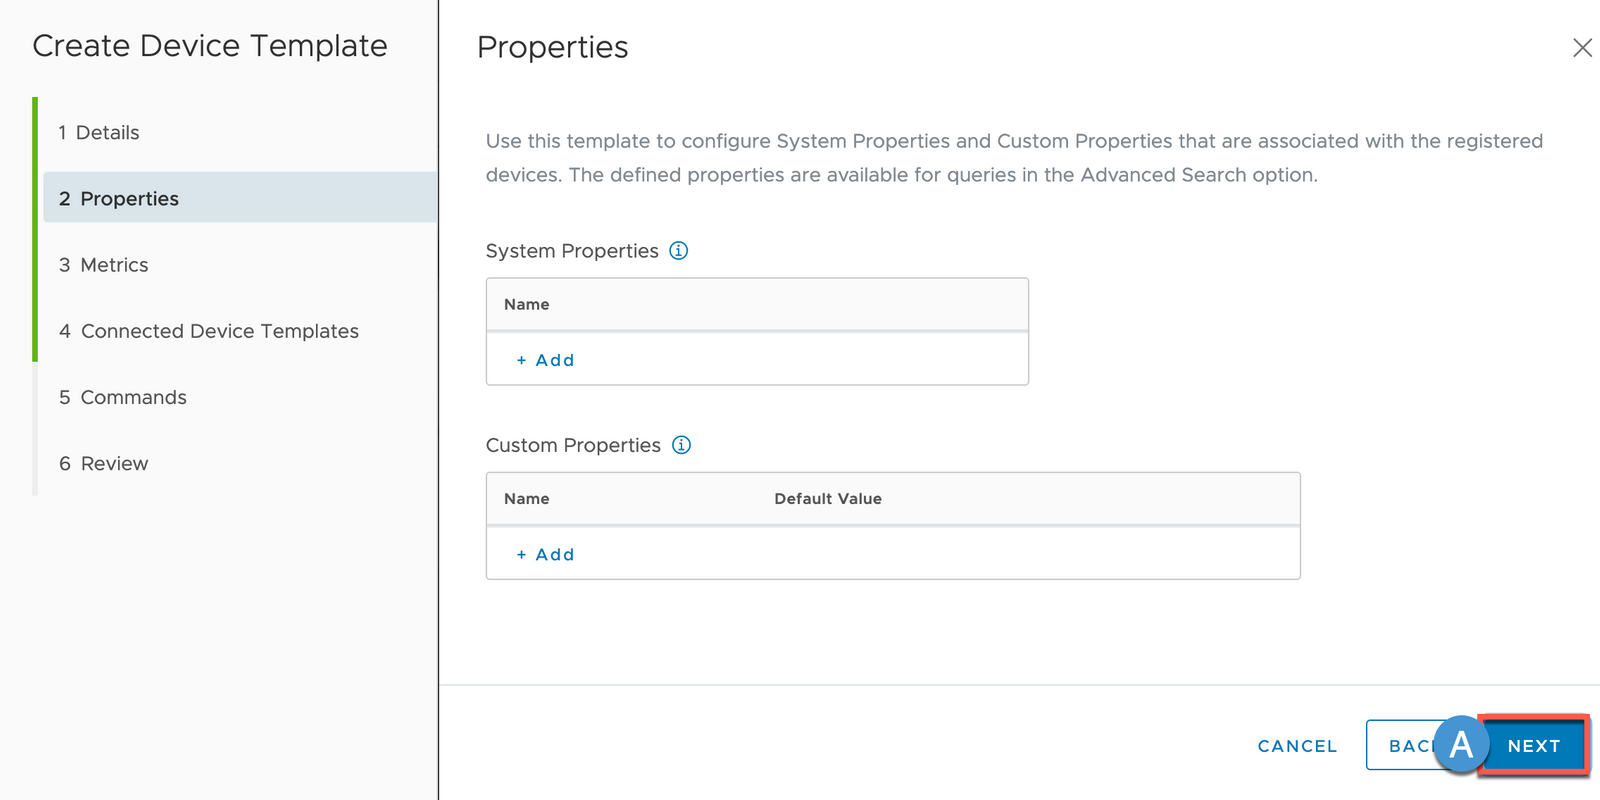
4A Properties - Click NEXT
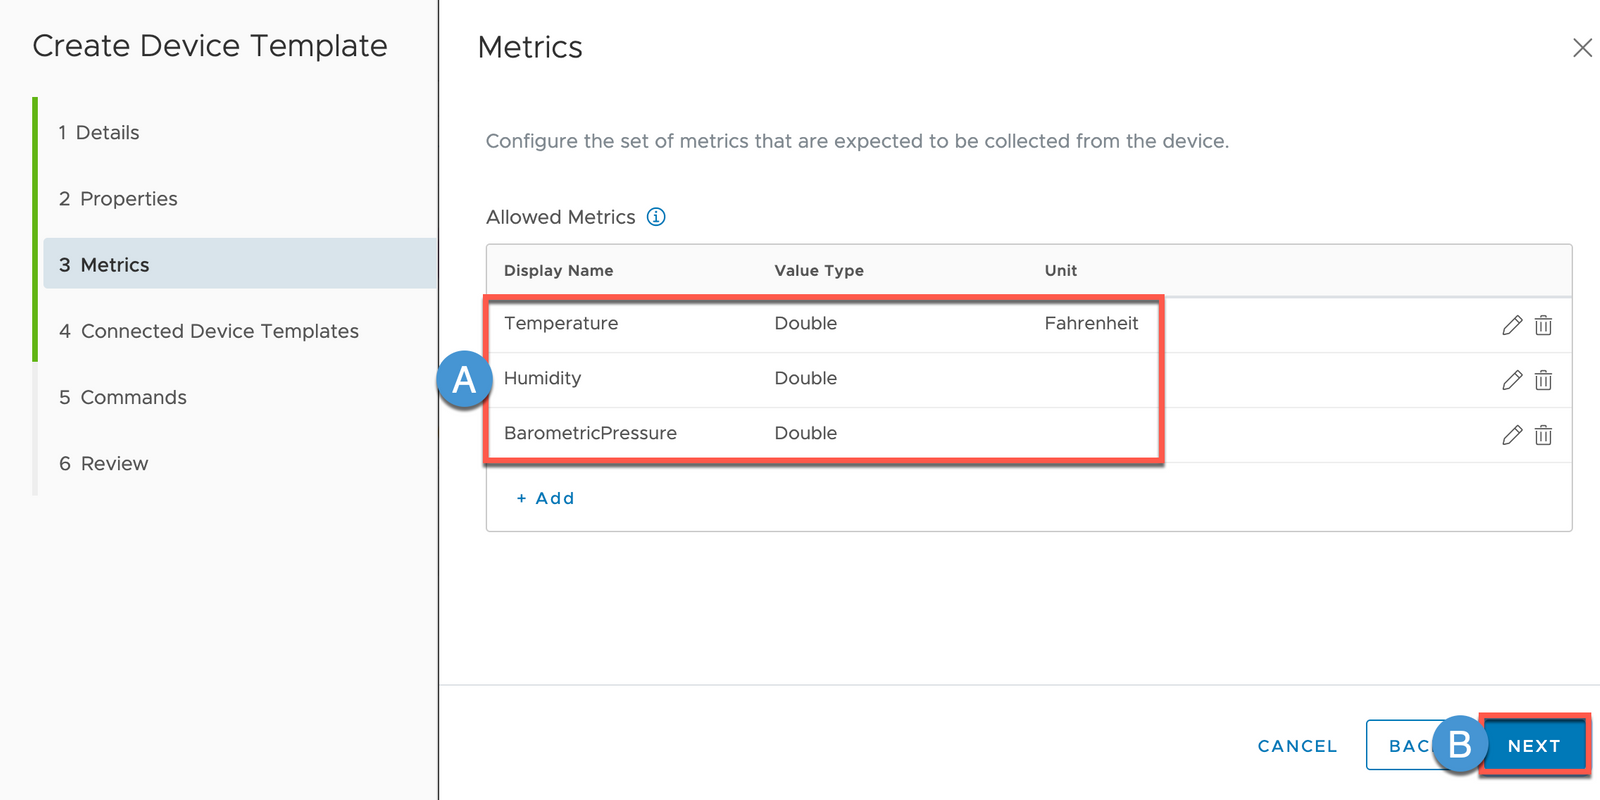
5A Metrics - Note that the Template is configured to receive Temperature, Humidity and BarometricPressure Metrics
5B Click NEXT
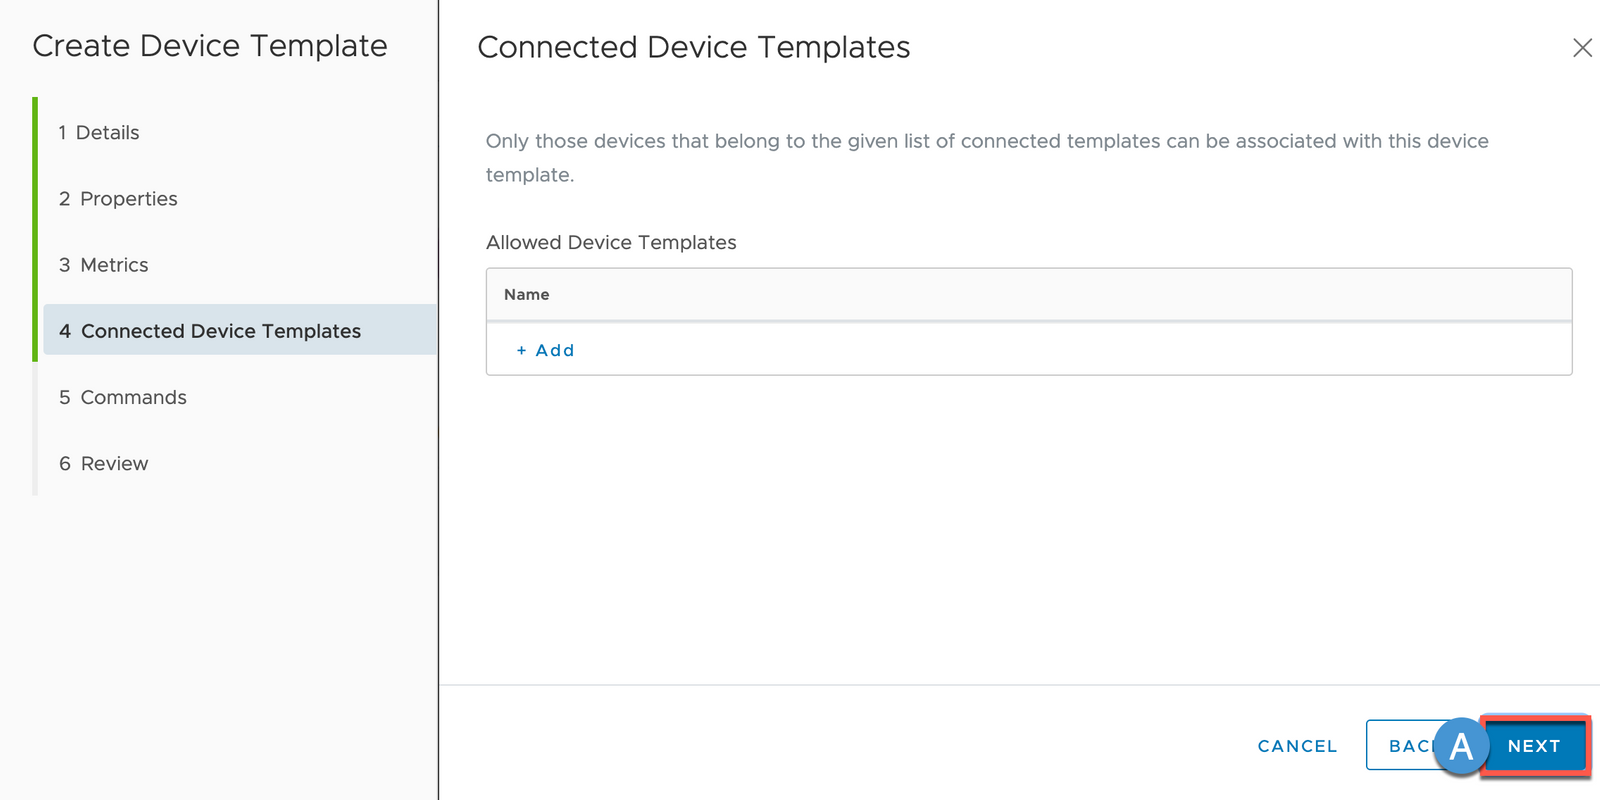
6A Connected Device Templates - Click NEXT
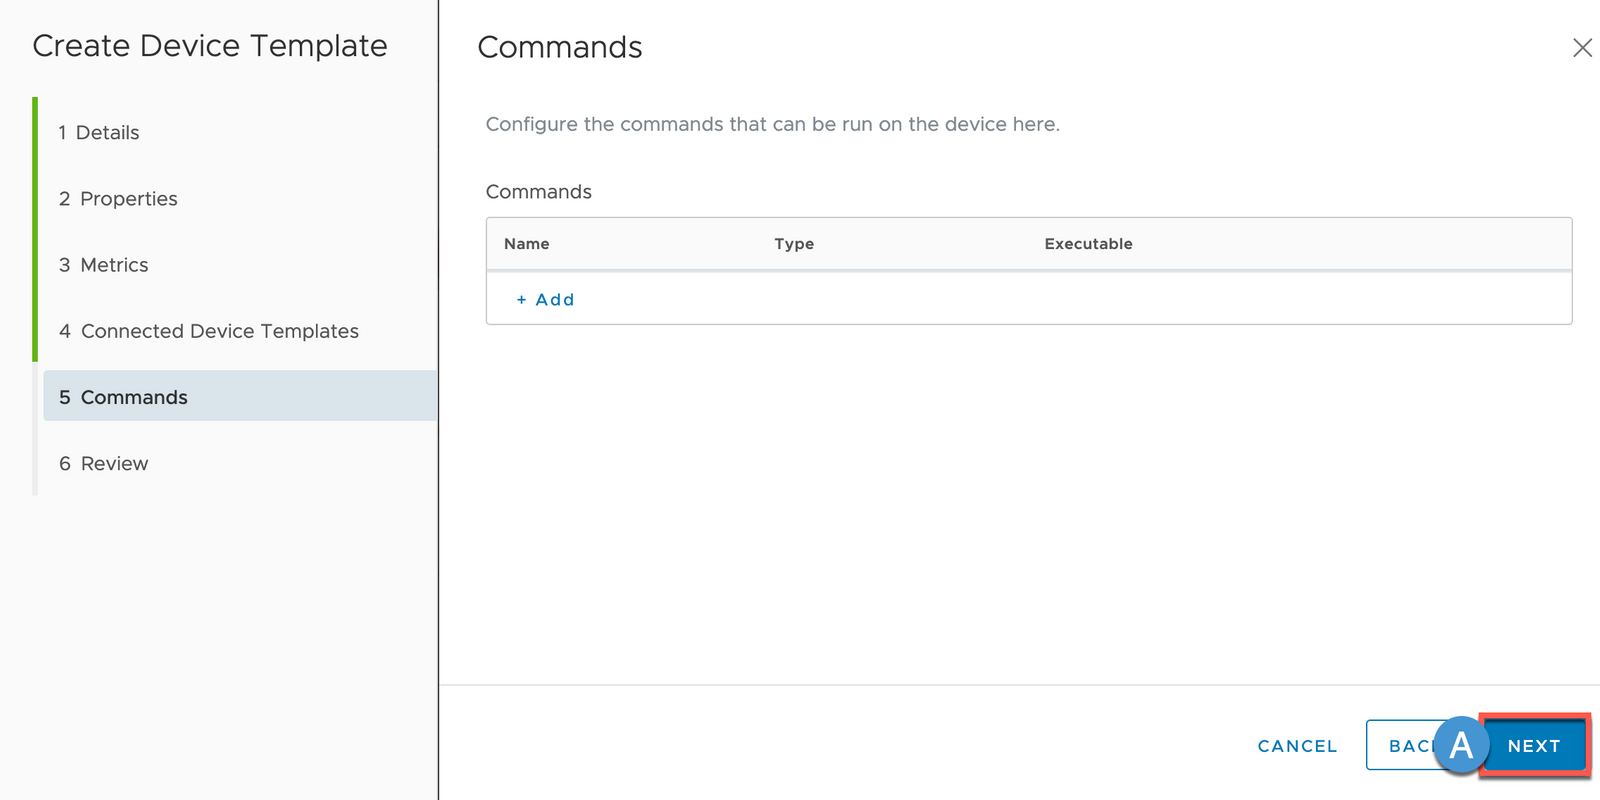
7 Commands - Click NEXT
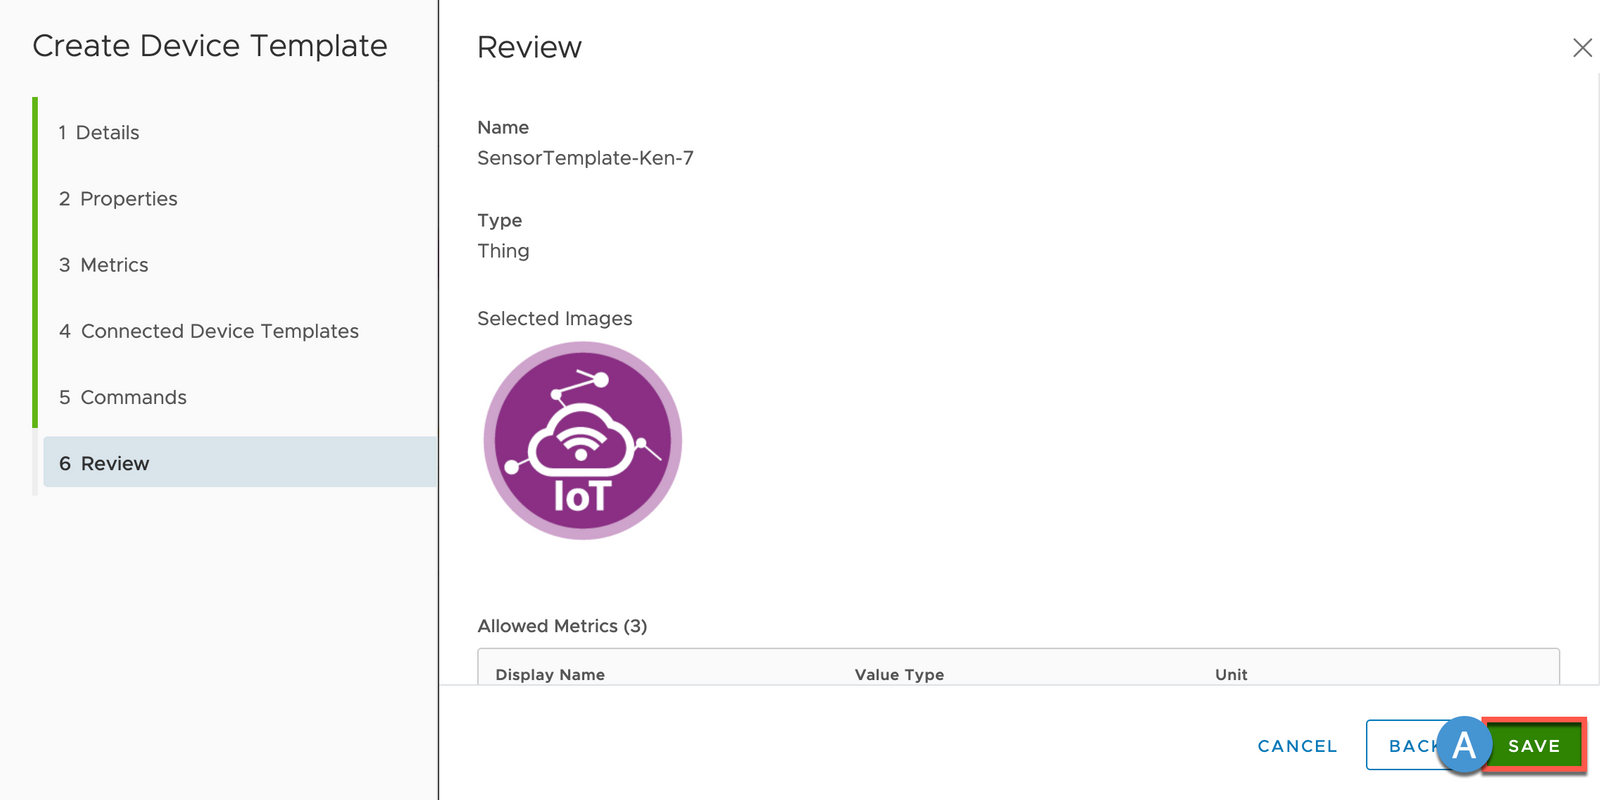
8 Review - Click SAVE
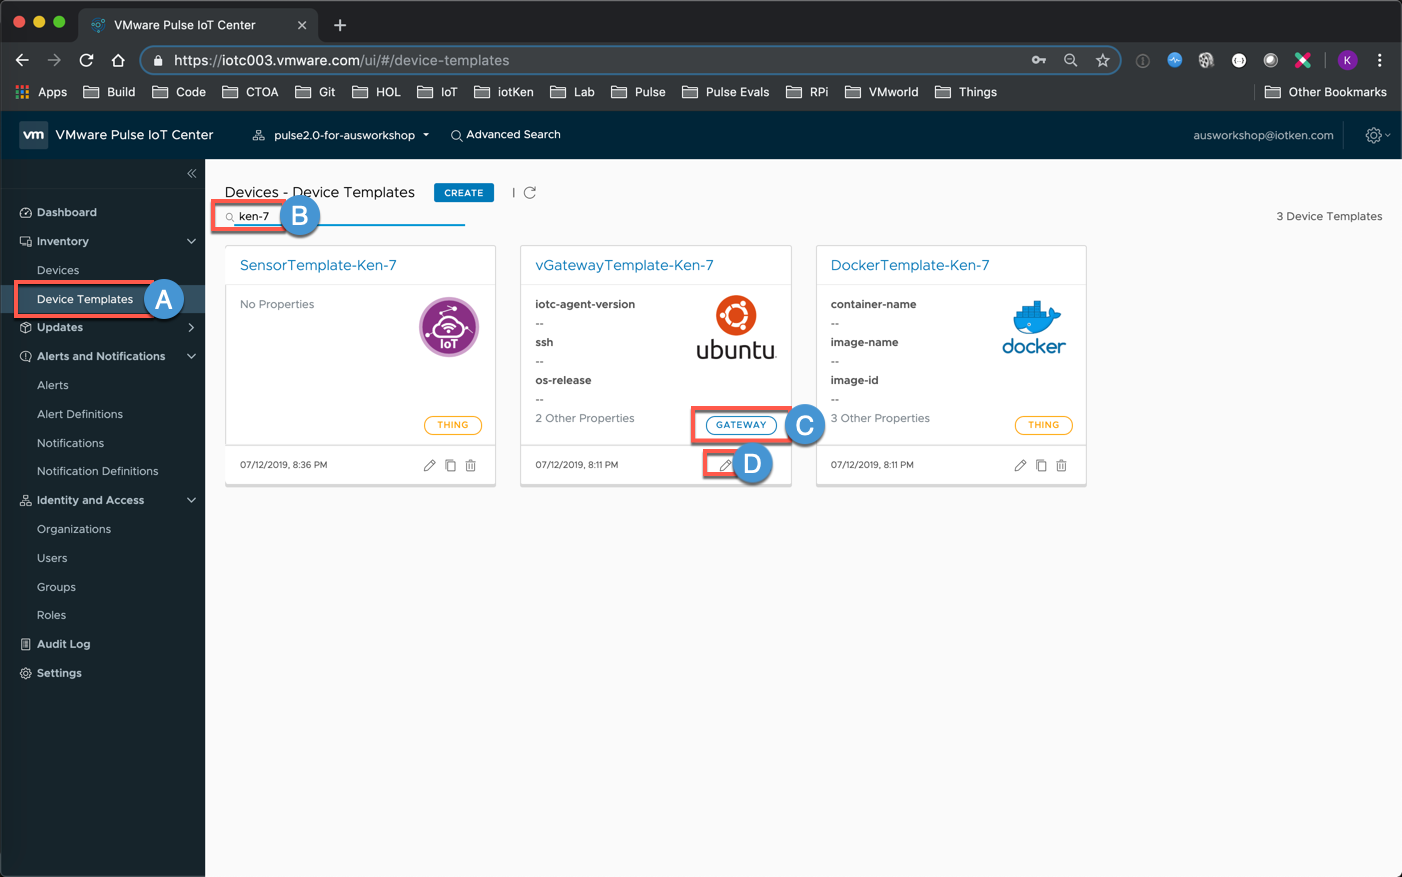
8A In a moment, we are going to onboard a Thing (Virtual IoT Sensor) and associate it with our Virtual Gateway; however, before we do that we need to modify our Gateway Template to Whitelist (allow) the SensorTemplate that we just created. Select Device Templates
8B Search for your Gateway Template by entering your name-number in the Search field.
8C Note that Thing or Gateway (Template types) are indicated visually.
8D Make sure that you are editing your Gateway Template and clicking the Pencil (Edit) Icon
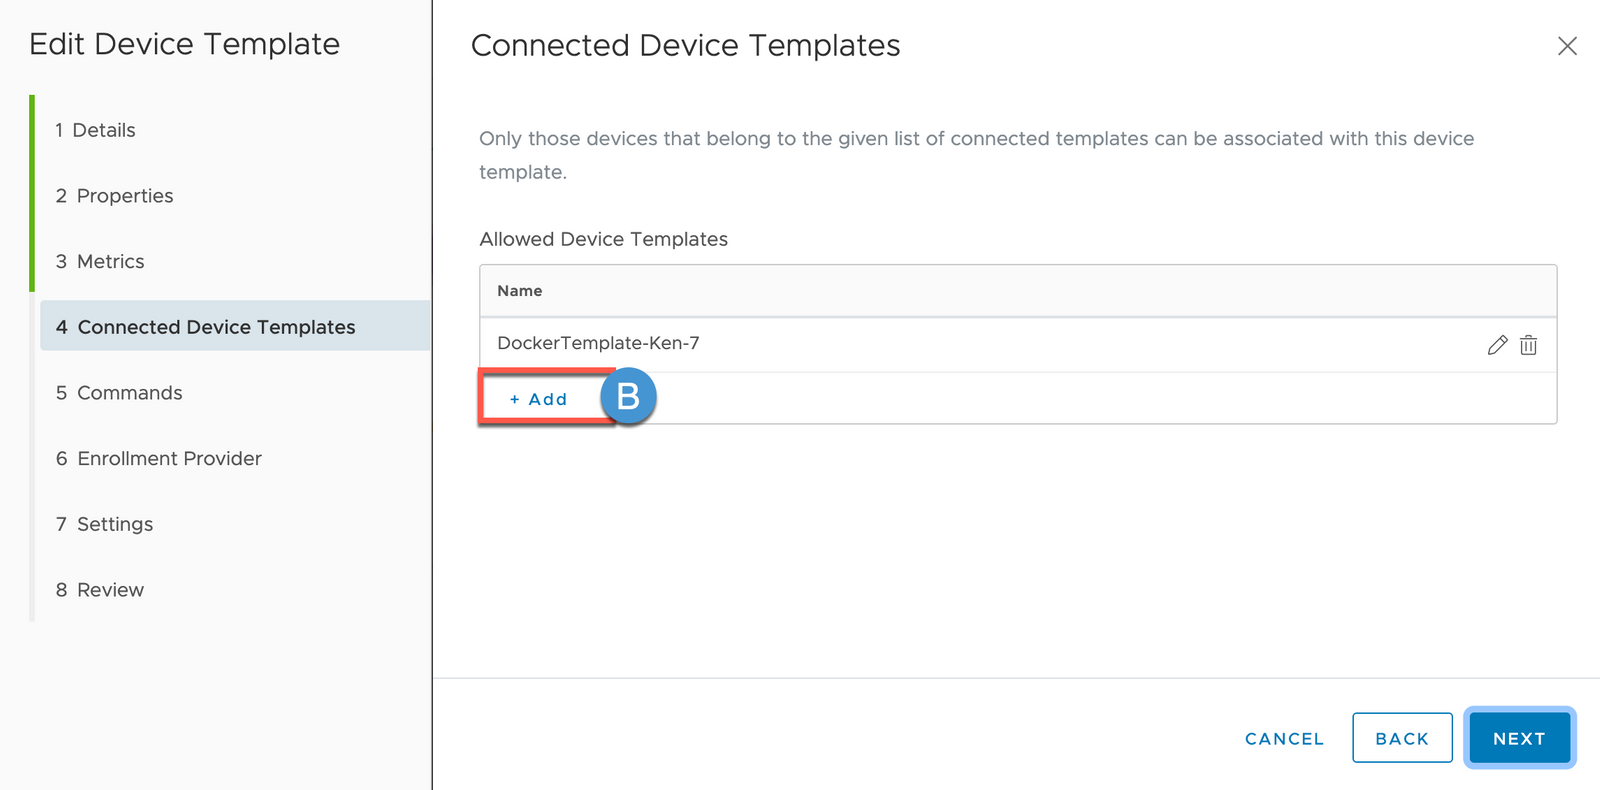
9A Click NEXT until you get to the Connected Device Templates page
9B Click +Add
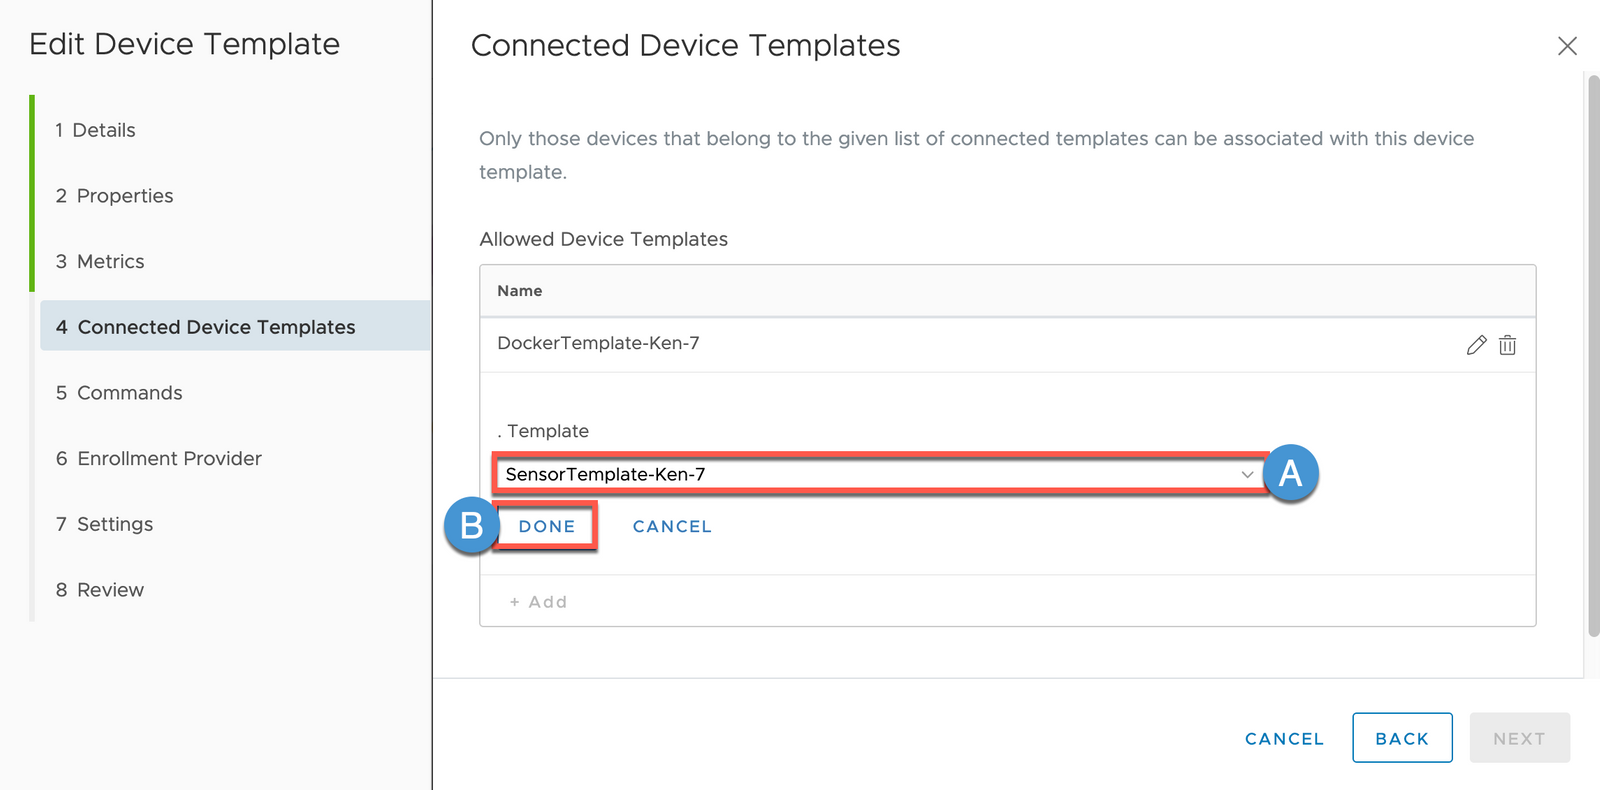
10A Click the drop-down and select the ‘SensorTemplate-[FirstName]-[Number]’ that you created previously
10B Click DONE
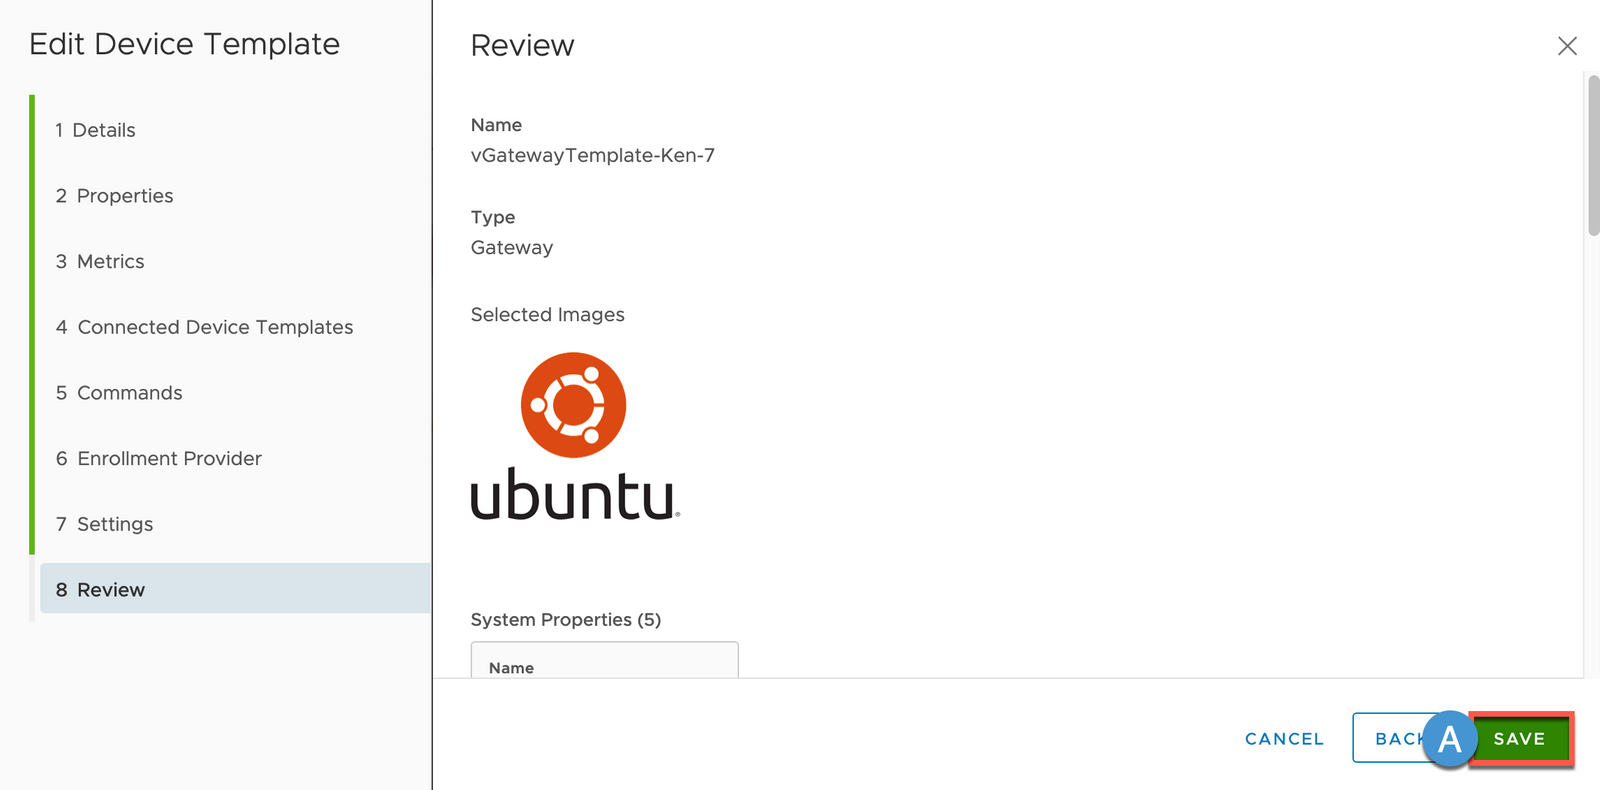
11A Click NEXT until you get the Review page then click SAVE
Onboard Thing (Virtual IoT Sensor)
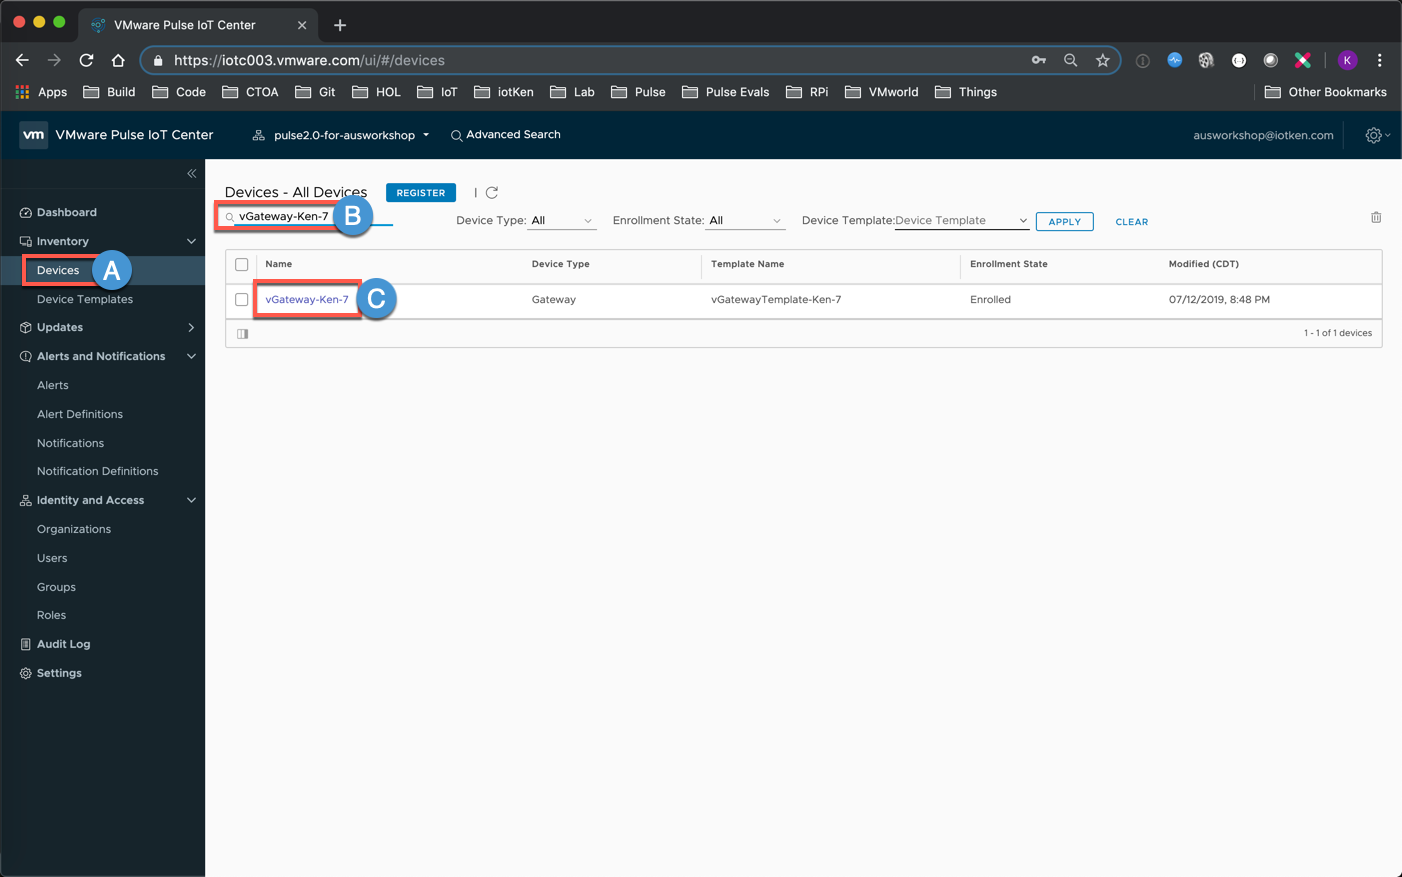
1A We will need your Virtual Gateway’s Pulse ID as part of enrolling your Virtual IoT (Environment Monitoring) Sensor. Select Devices
1B Search for your Gateway Device by entering vGateway-[Your Name]-[Number] in the Search field
1C Click your device name
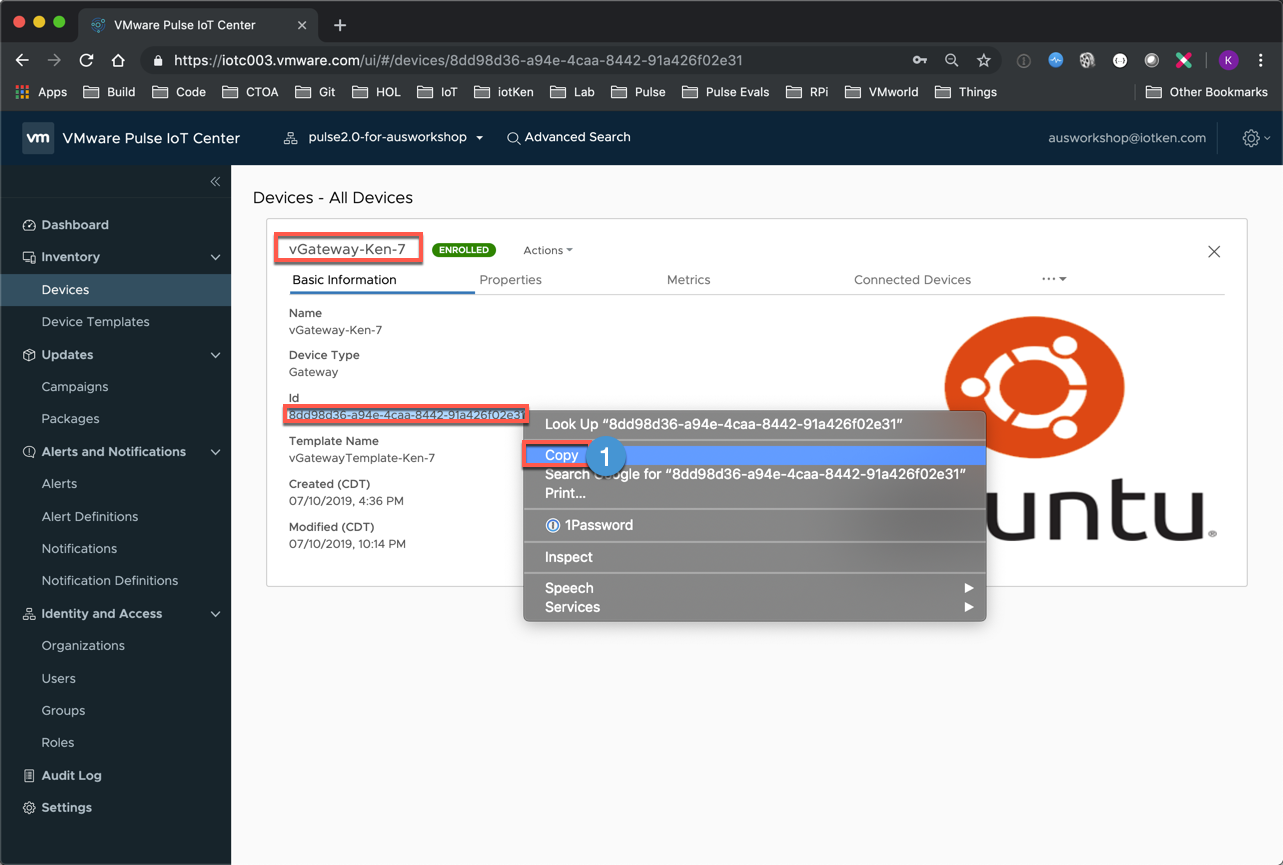
2 Copy your Device’s Id to your Clipboard
3 Return to your Gateway SSH session and change into your Pulse Agent /bin folder (if you are already not there)
cd /opt/vmware/iotc-agent/bin

4 Let’s examine the parameters that are available via the Pulse DefaultClient once again
./DefaultClient help | more
5A We will be using the ‘enroll-device’ option, passing in the necessary parameters (template name, device name and parent-id)
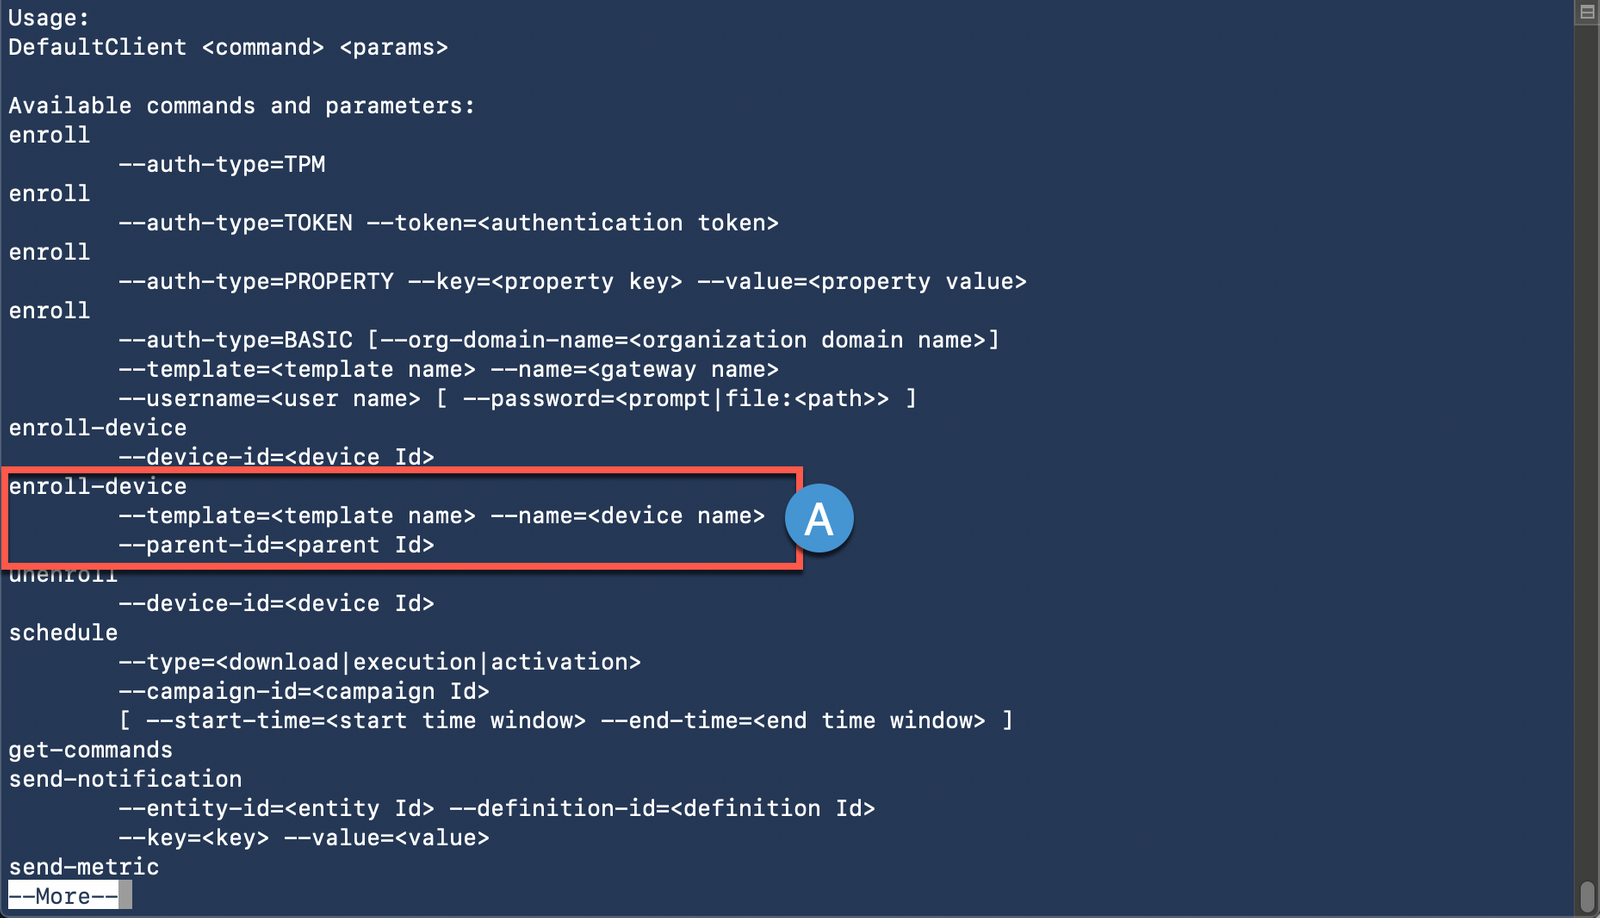
(Press Q or CTRL-C to exit)
6 Type the following to onboard your Virtual IoT Sensor and associate it with your Parent Gateway. Modify the [Firstmame]-[Number] values to match what you are using. Note that we are passing in the Template Name for the SensorTemplate-[FirstName]-[Number] that you just created:
./DefaultClient enroll-device --template=SensorTemplate-[FirstName]-[Number] --name=IoTSensor-vGateway-[FirstName]-[Number] --parent-id=[Paste in your Clipboard contents]

7 ’Enroll connected device successful.’ indicates that the command was successful. (If you receive an ‘Enroll response failed for this client’ error message, make sure that you whitelisted the correct Thing template during the previous steps above and that you also copied the correct Device ID to your clipboard).
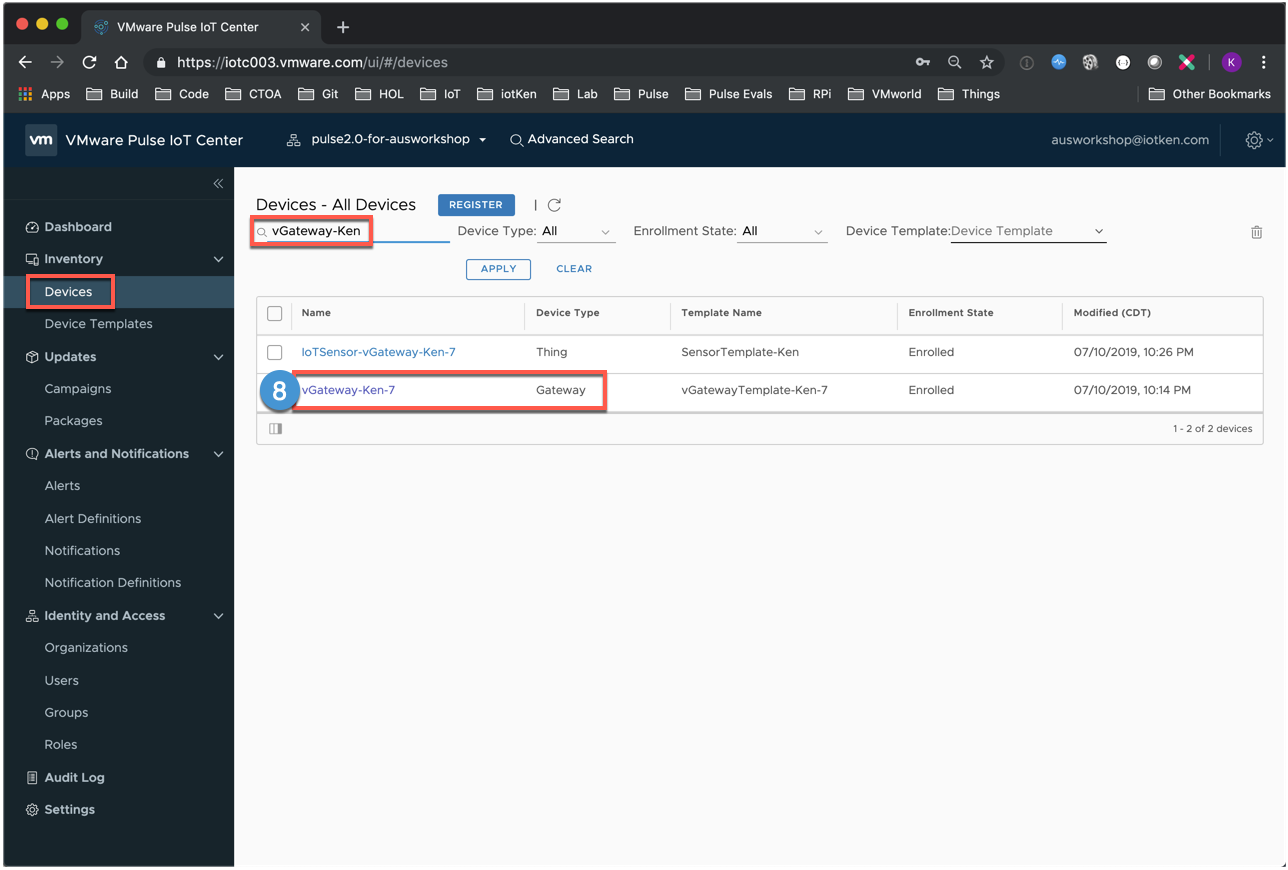
8 Return to the Pulse Console, set a Search Filter for your Virtual Gateway then click your vGateway-[FirstName]-[Number] device name
9A Click Connected Devices
9B Note that you now have an IoT Sensor associated with your Gateway. Click the IoTSensor-vGateway-[FirstName]-[Number]
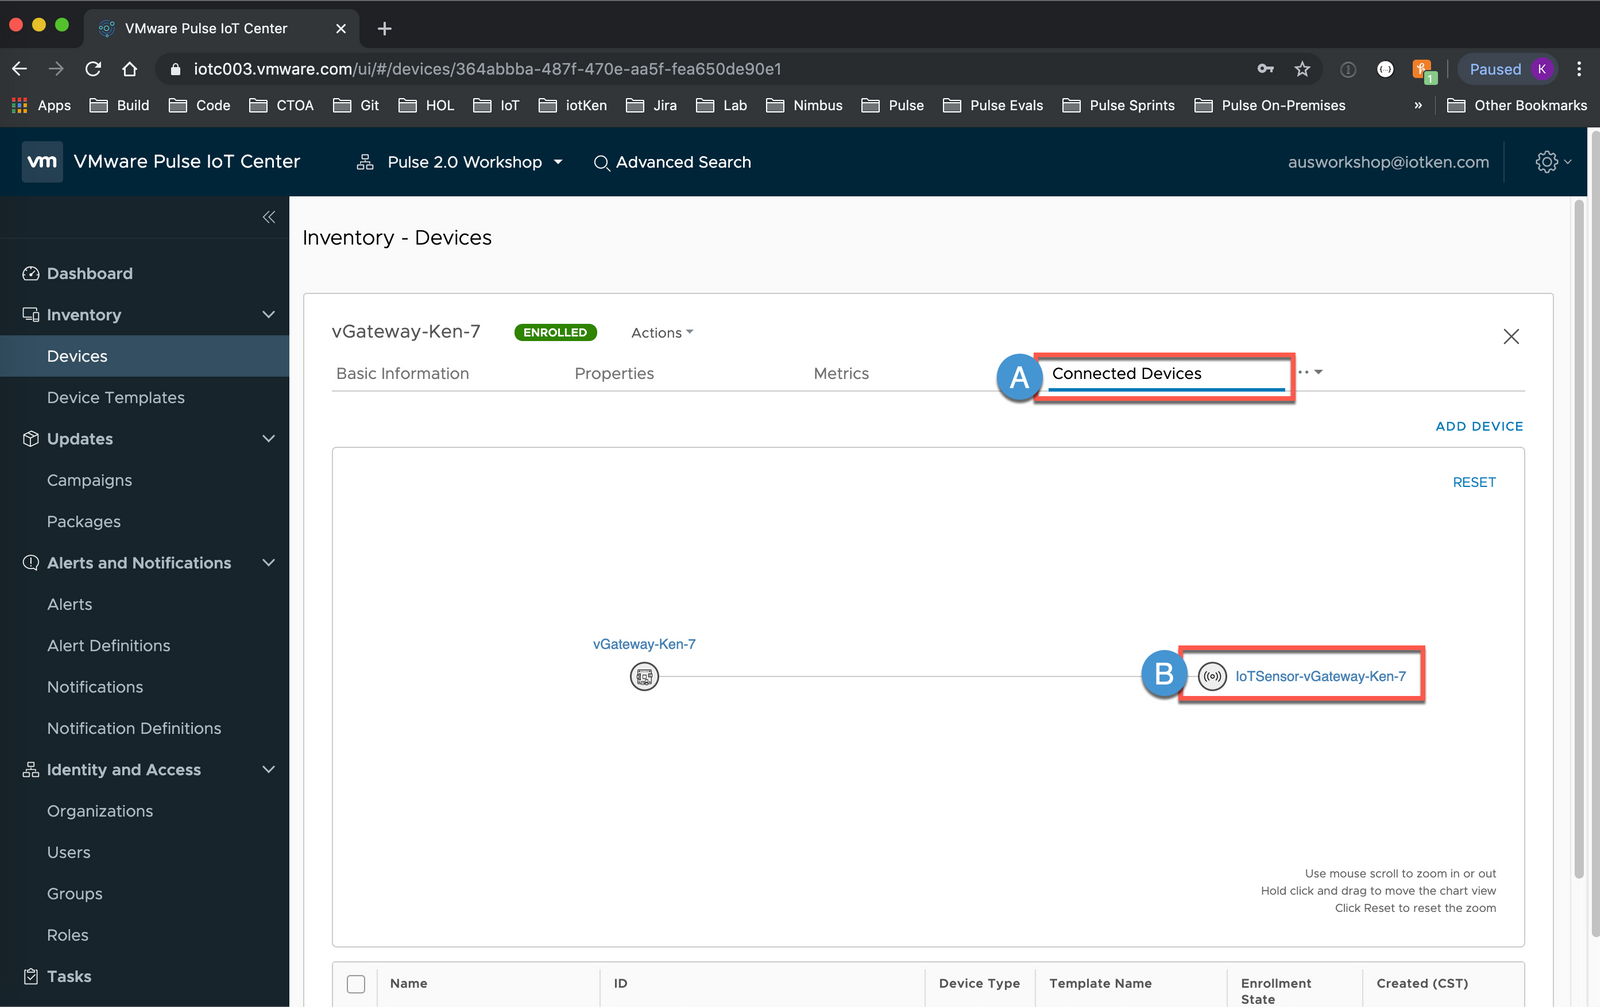
10A Note that the Sensor is ENROLLED then Click IoTSensor-vGateway-[FirstName]-[Number]
10B Click IoTSensor-vGateway-[Name]-[Number]
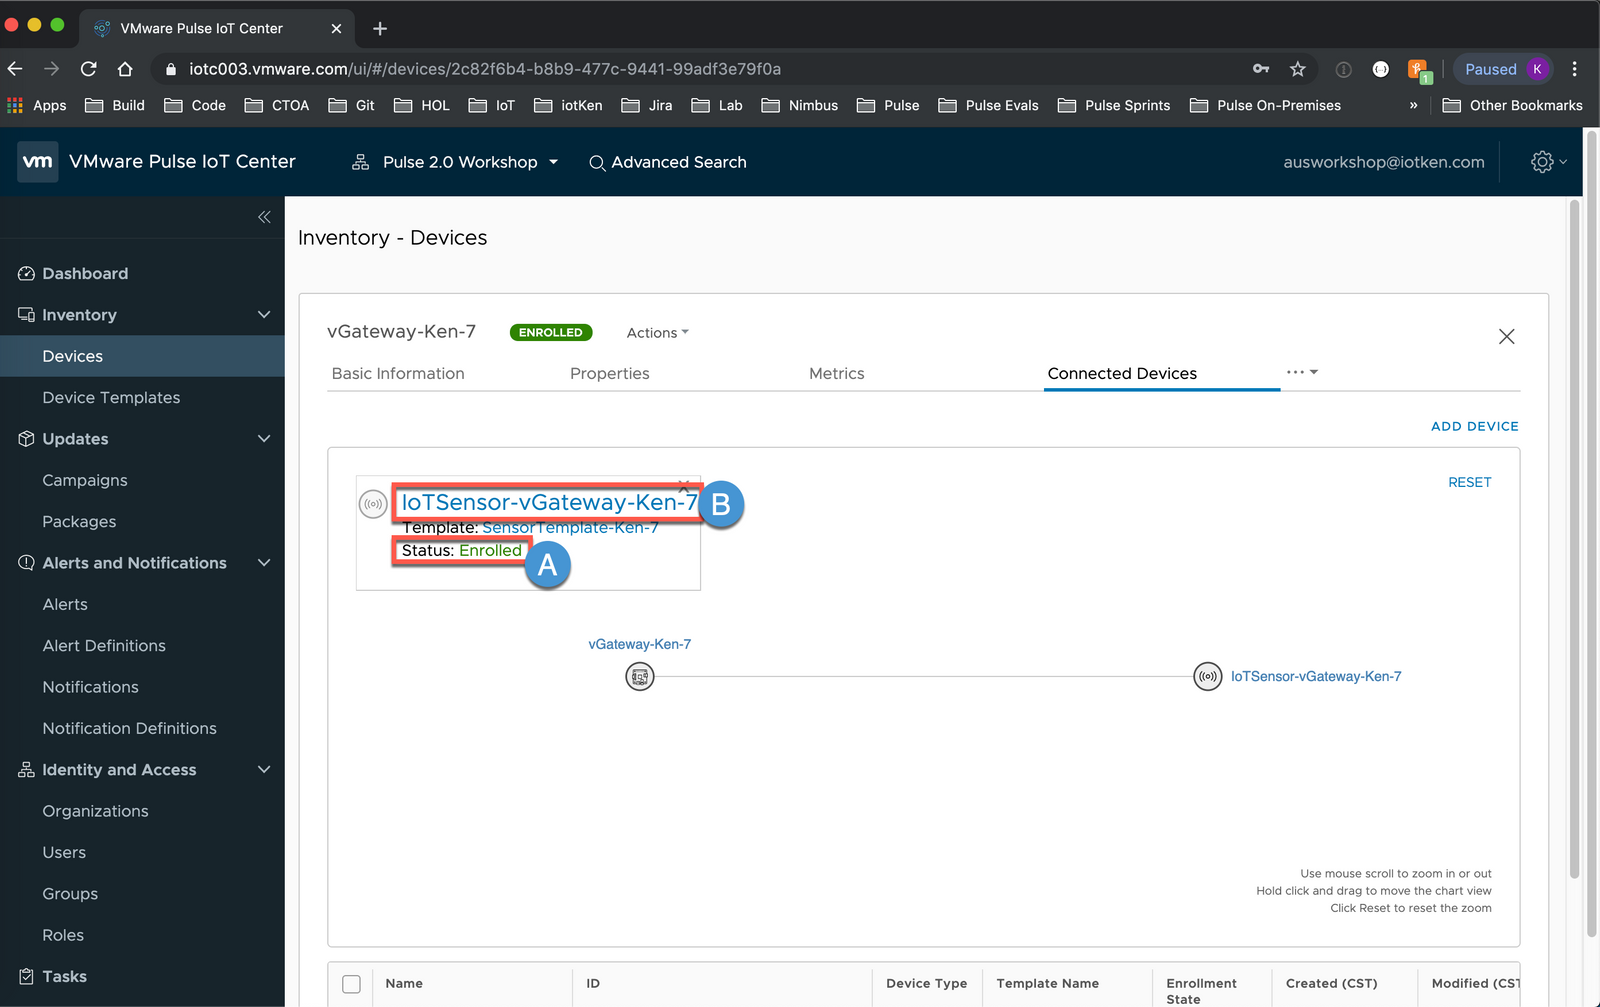
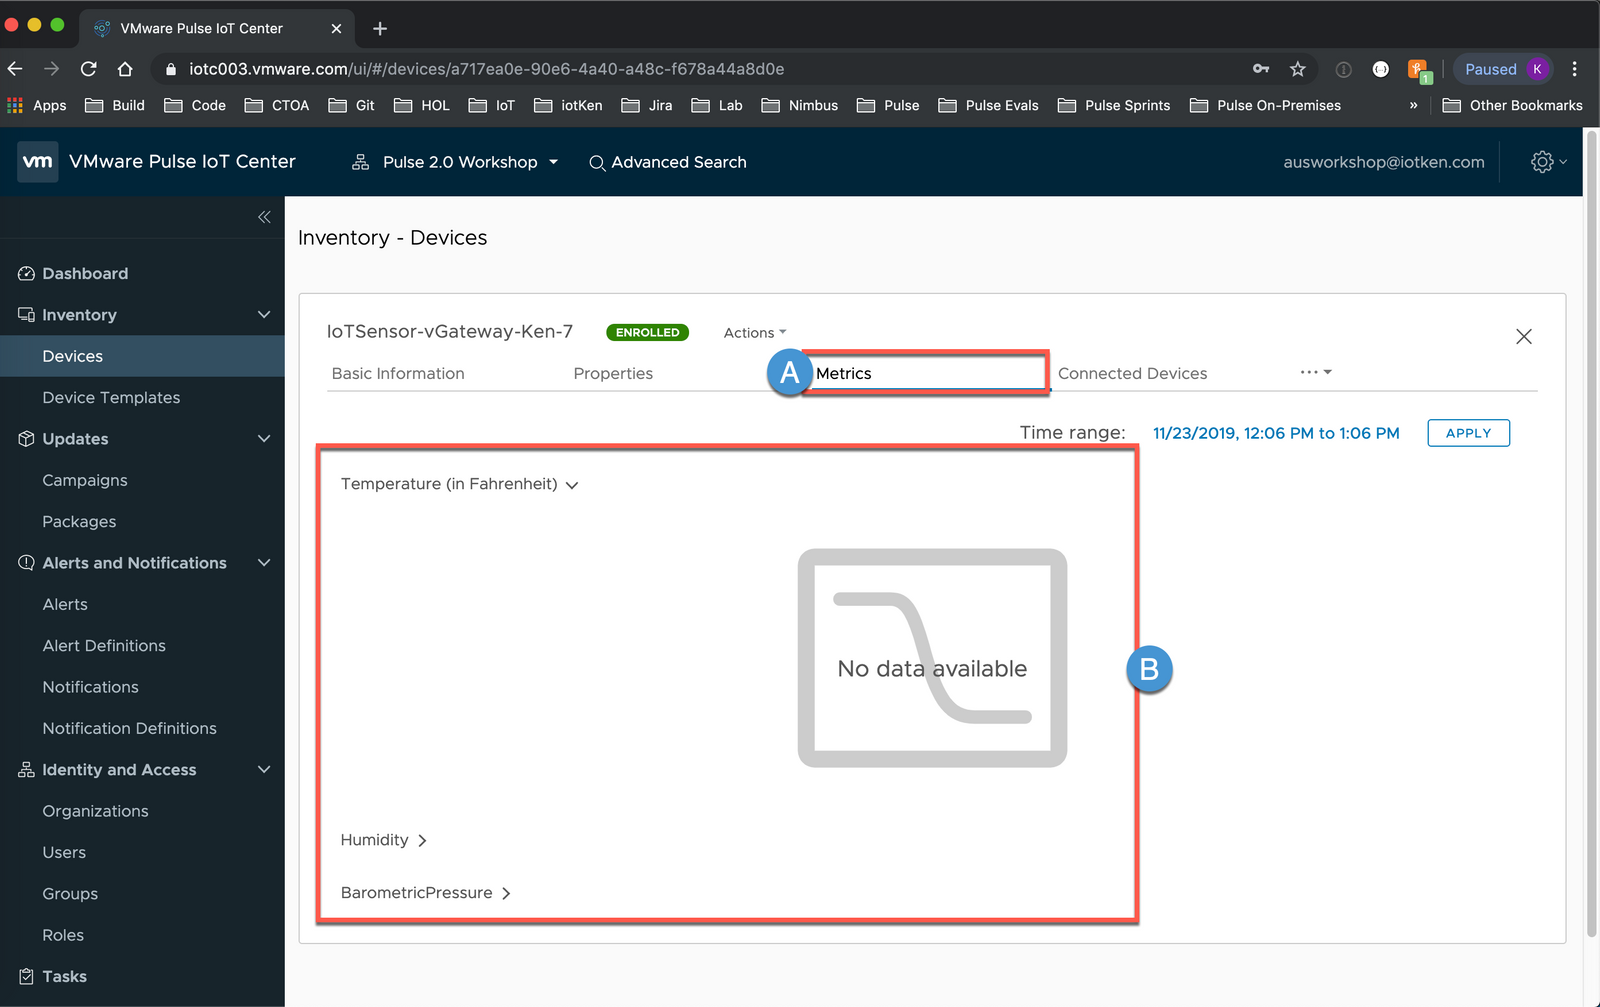
11A Click Metrics
11B Note that our Environment monitoring Metric categories are present; however, there is no data being collected yet. We will address that next.
Utilize Script to Send Metrics
Now that we have wired everything up from a Connected Things perspective, let’s send the Temperature/Humidity/Pressure data to Pulse. We will do so manually first (by running a script) and then we’ll configure a Linux service to run the script for us automatically.
1 Return to your SSH session and change into your Workshop directory
cd /home/[username]/workshop

2 Run the following script to start sending data to Pulse
./vIoT-Sensor.sh
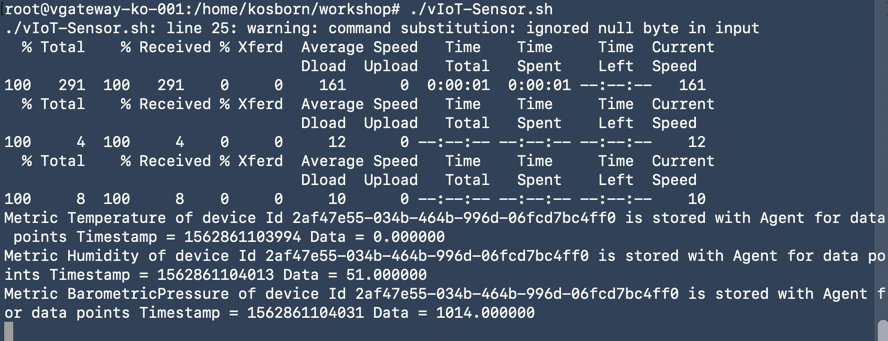
3 While this script is running, let’s examine what it is doing. Here is a listing of the Script. In the next few steps, we’ll review each section.
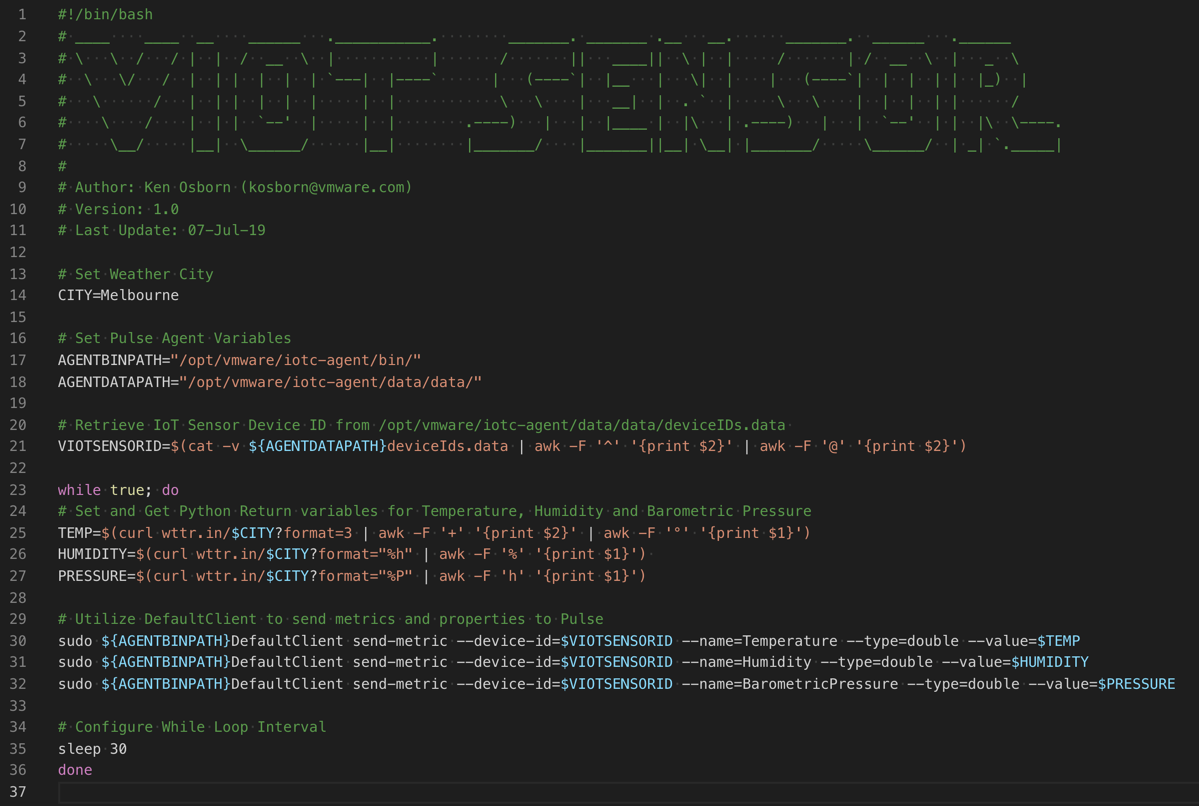
4 To simulate an IoT Sensor, we are using a console based, online weather utility named ‘wttr.in'. In this section of the script, we are setting a Variable equal to the City that wttr.in will pull Temperature/Humidity/BarometricPressure information for:
# Set Weather City
CITY=Melbourne
5 Next, we are simply setting Path variables to the location of the Pulse Agent bin and data folders on your Gateway:
# Set Pulse Agent Variables
AGENTBINPATH="/opt/vmware/iotc-agent/bin/"
AGENTDATAPATH="/opt/vmware/iotc-agent/data/data/"
6 In this section, we are retrieving your IoT Sensor ID from a file in the Pulse agent data directory (deviceIds.data) (this is the same ID that you can see in the Pulse Console when looking at the Basic Information display):
# Retrieve IoT Sensor Device ID from /opt/vmware/iotc-agent/data/data/deviceIDs.data
VIOTSENSORID=$(cat -v ${AGENTDATAPATH}deviceIds.data | awk -F '^' '{print $2}' | awk -F '@' '{print $2}')
7 Here we start a while loop and utilize wttr.in (via curl) to retrieve current Temperature, Humidity and Barometric Pressure information for the City variable that was declared above. These values are stored in the indicated Variables (TEMP, HUMIDITY and PRESSURE):
while true; do
# Set and Get Python Return variables for Temperature, Humidity and Barometric Pressure
8 We now take the information that has been collected and utilize the Pulse Agent ‘DefaultClient' to send this information to Pulse. Note the parameters that are required as part of the ’send-metric’ command and how we populate those parameters based on the previous variable (data) that was collected above. The --name parameters use the exact same text that were created in your IoT Sensor Template (’Temperature’, ‘Humidity’, ‘BarometricPressure’):
# Utilize DefaultClient to send metrics and properties to Pulse
sudo ${AGENTBINPATH}DefaultClient send-metric --device-id=$VIOTSENSORID --name=Temperature --type=double --value=$TEMP
sudo ${AGENTBINPATH}DefaultClient send-metric --device-id=$VIOTSENSORID --name=Humidity --type=double --value=$HUMIDITY
sudo ${AGENTBINPATH}DefaultClient send-metric --device-id=$VIOTSENSORID --name=BarometricPressure --type=double --value=$PRESSURE
9 Finally, we end the While loop with a sleep command. Since the while condition is always true, this loop repeats itself every 30 seconds, retrieving the Temp, Humidity and Barometric Pressure then sending that data to Pulse
# Configure While Loop Interval
sleep 30
done
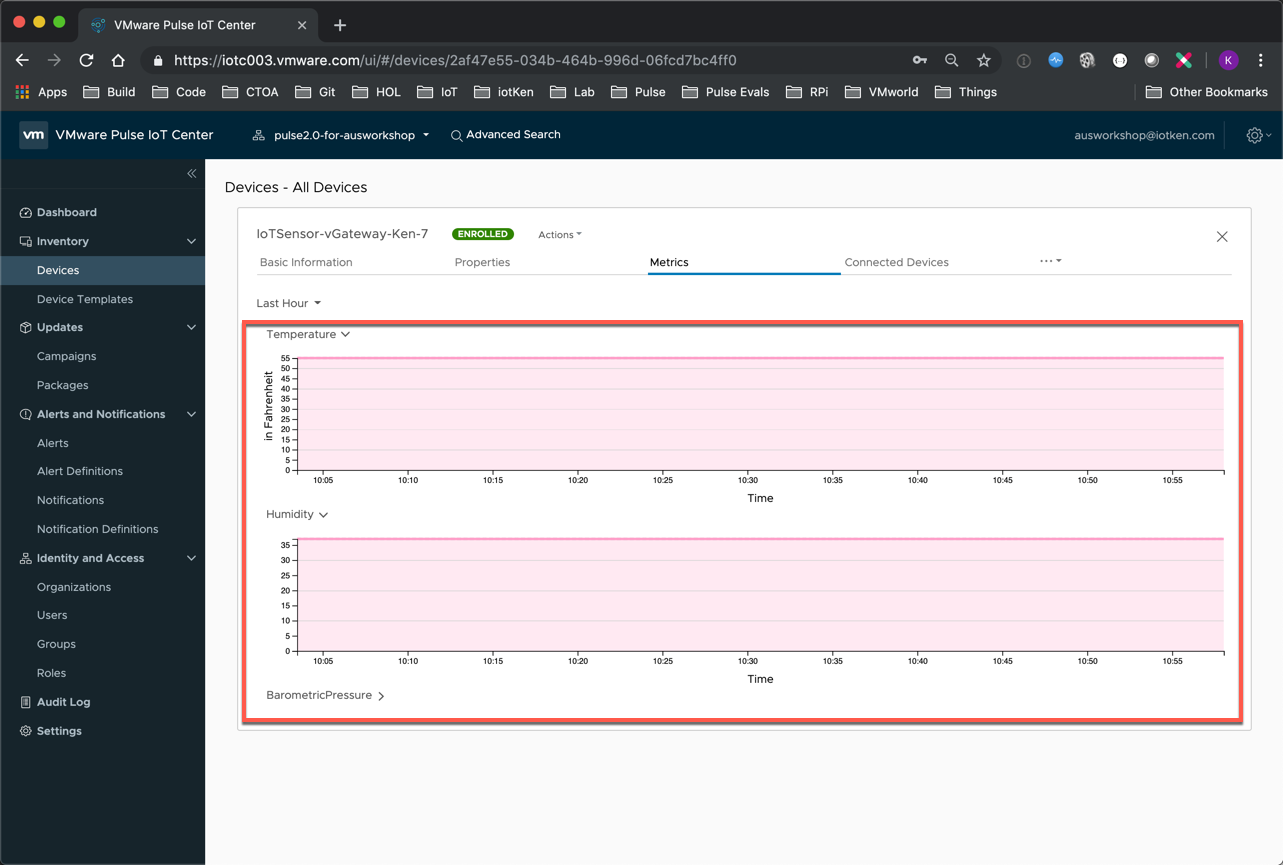
10 Return to the Pulse Console (Chrome Browser) and search for the IoTSensor-vGateway-[FirstName]-[Number] that you created. Click the IOTSensor and select Metrics. Note that Data is being populated via the Script you ran (unless you skimmed through the above script description section, too fast). 🙂 All Kidding aside, metric collection occurs at a Default 5 Minute interval and it might require a few cycles for the data to start appearing. Please feel free to continue to Part II and then circle back later.
Please click HERE to go to our final 'Onboard Things, Part II' Lesson
comments powered by Disqus