Overview
1 Create Notification Definition
2 Create Alert Definition
3 Review and Acknowledge Alert
Create Notification Definition
In this lesson, you will create a Notification Definition that utilizes your Email Address as the Destination. Pulse also supports Rest API calls to adjacent systems (e.g. Service NOW).
1 Login to Pulse Console if you are not already (link)
2 Username: [First Name Initial][Last Name]@pulse.local
Password: VMware1!
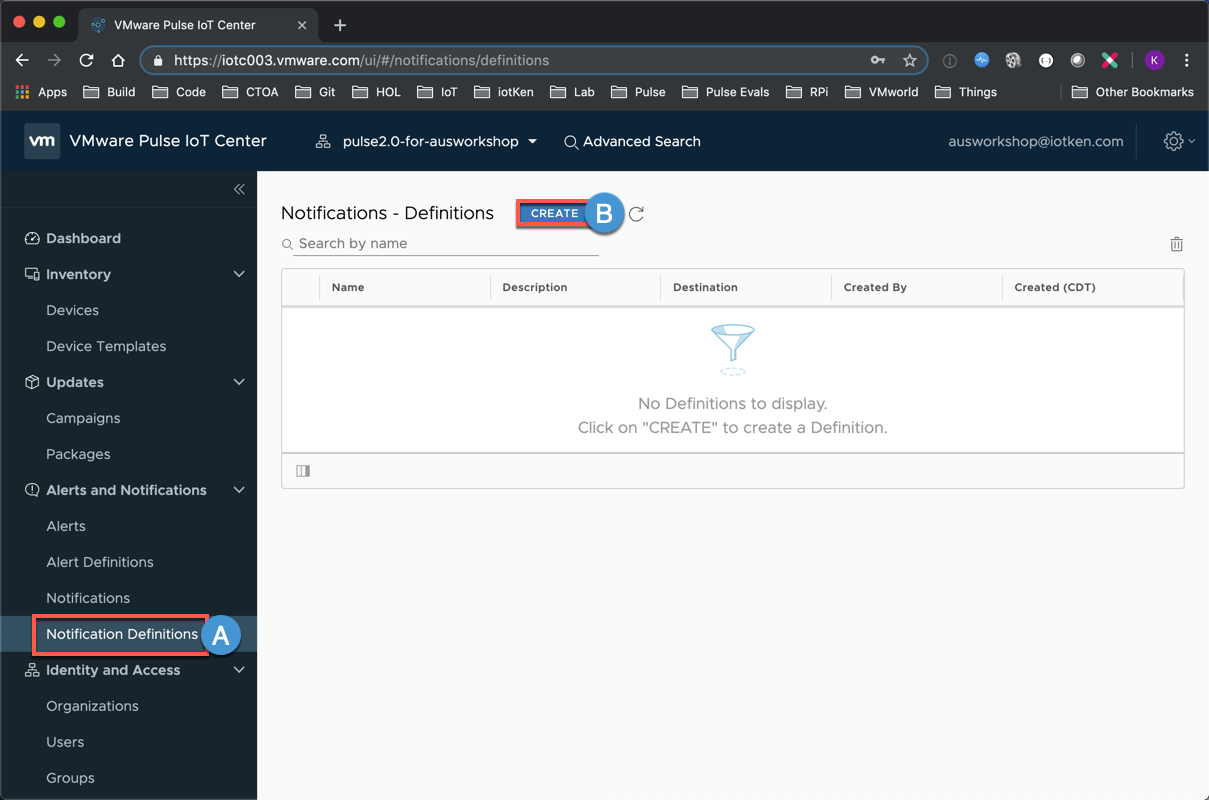
3A Select Notification Definitions
3B Click CREATE
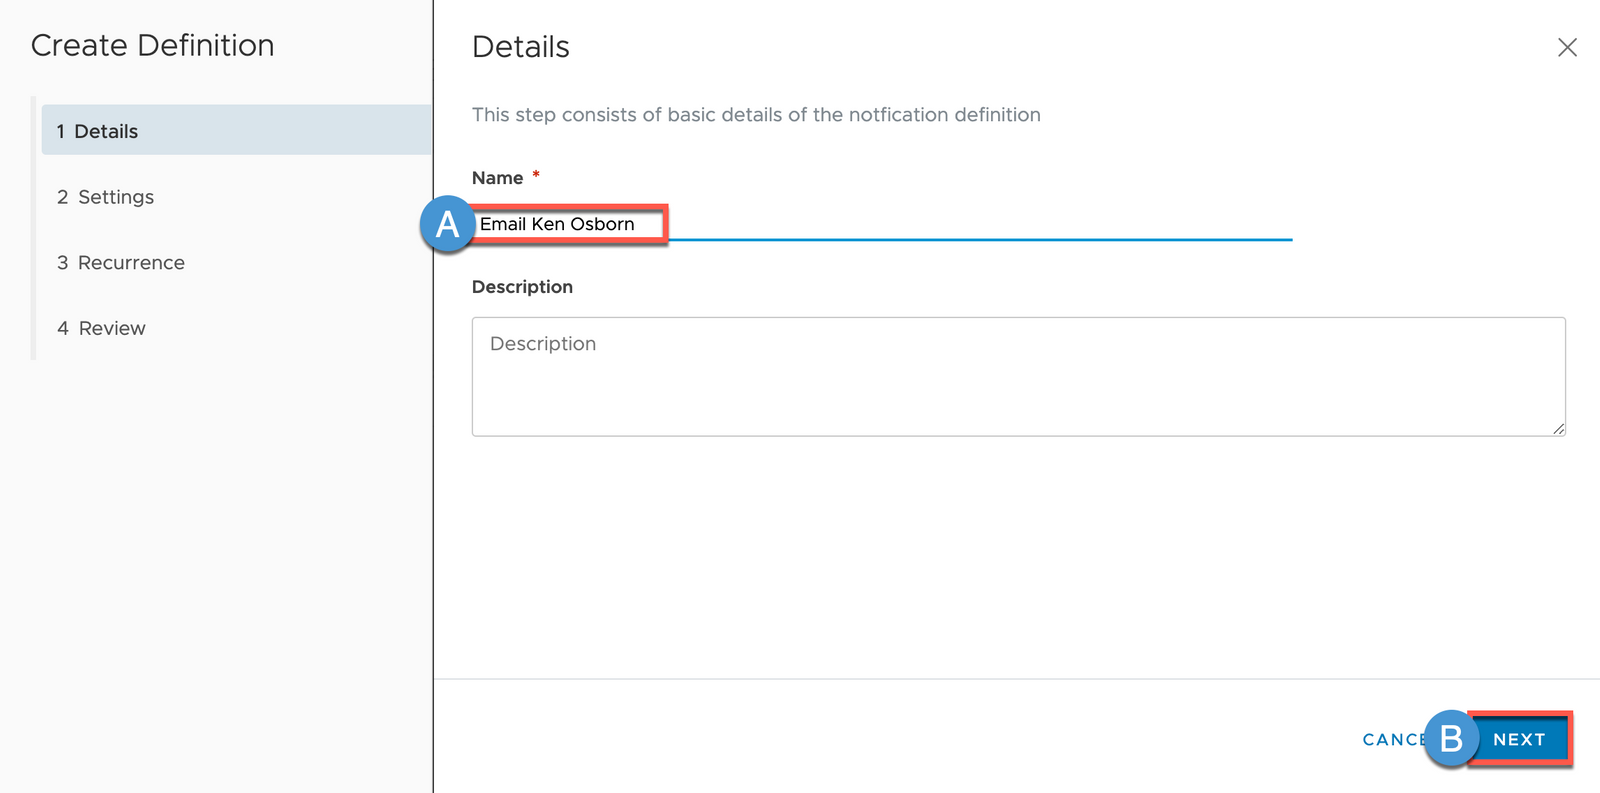
4A Enter Name: Email [Your Full Name]
4B Click NEXT
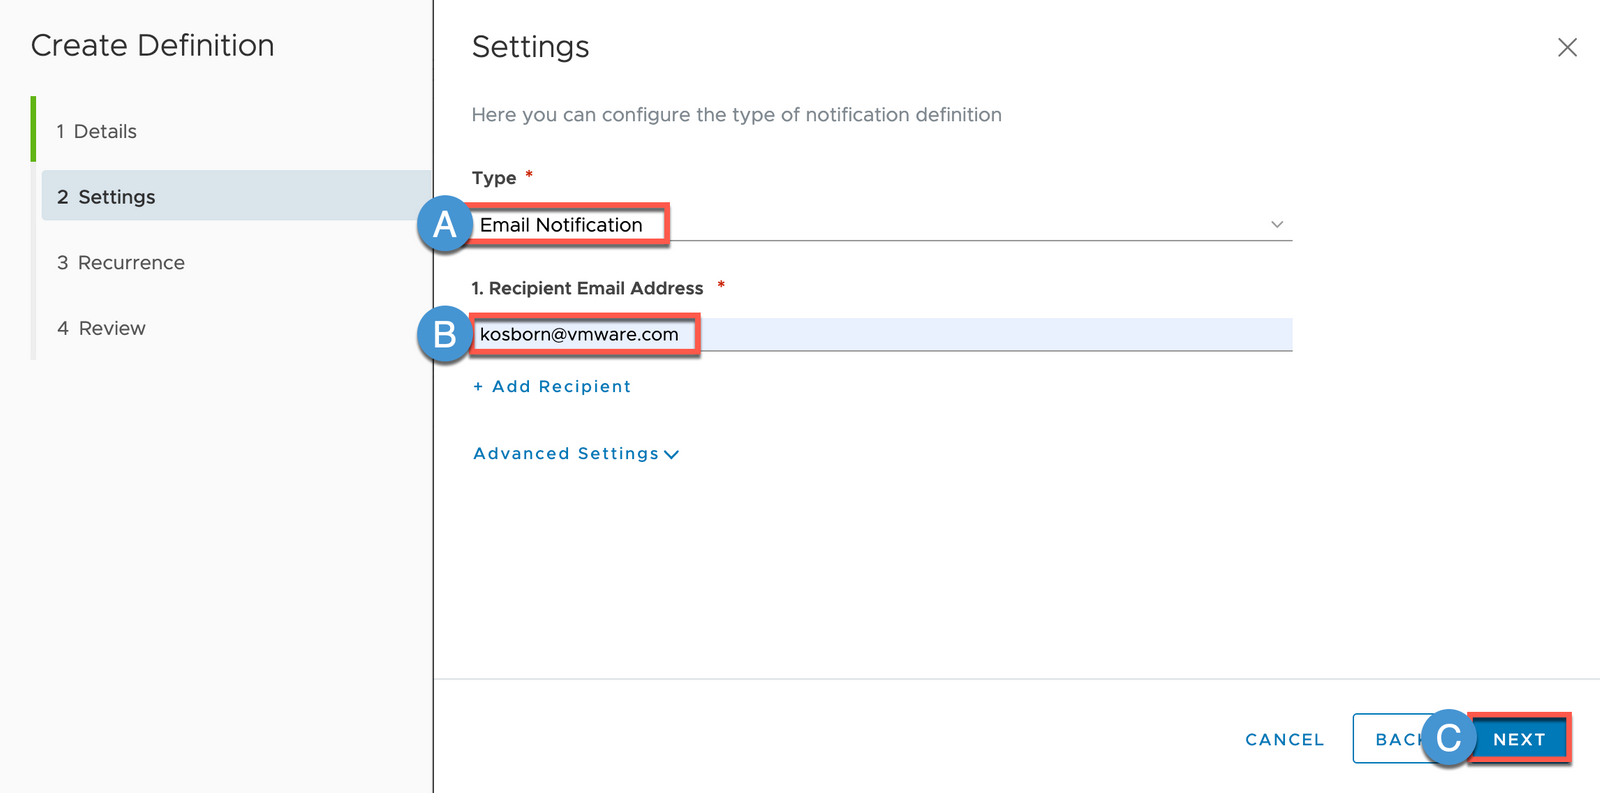
5A Select Type: Email Notification
5B Recipient Email Address: [Your Email Address]
5C Click NEXT
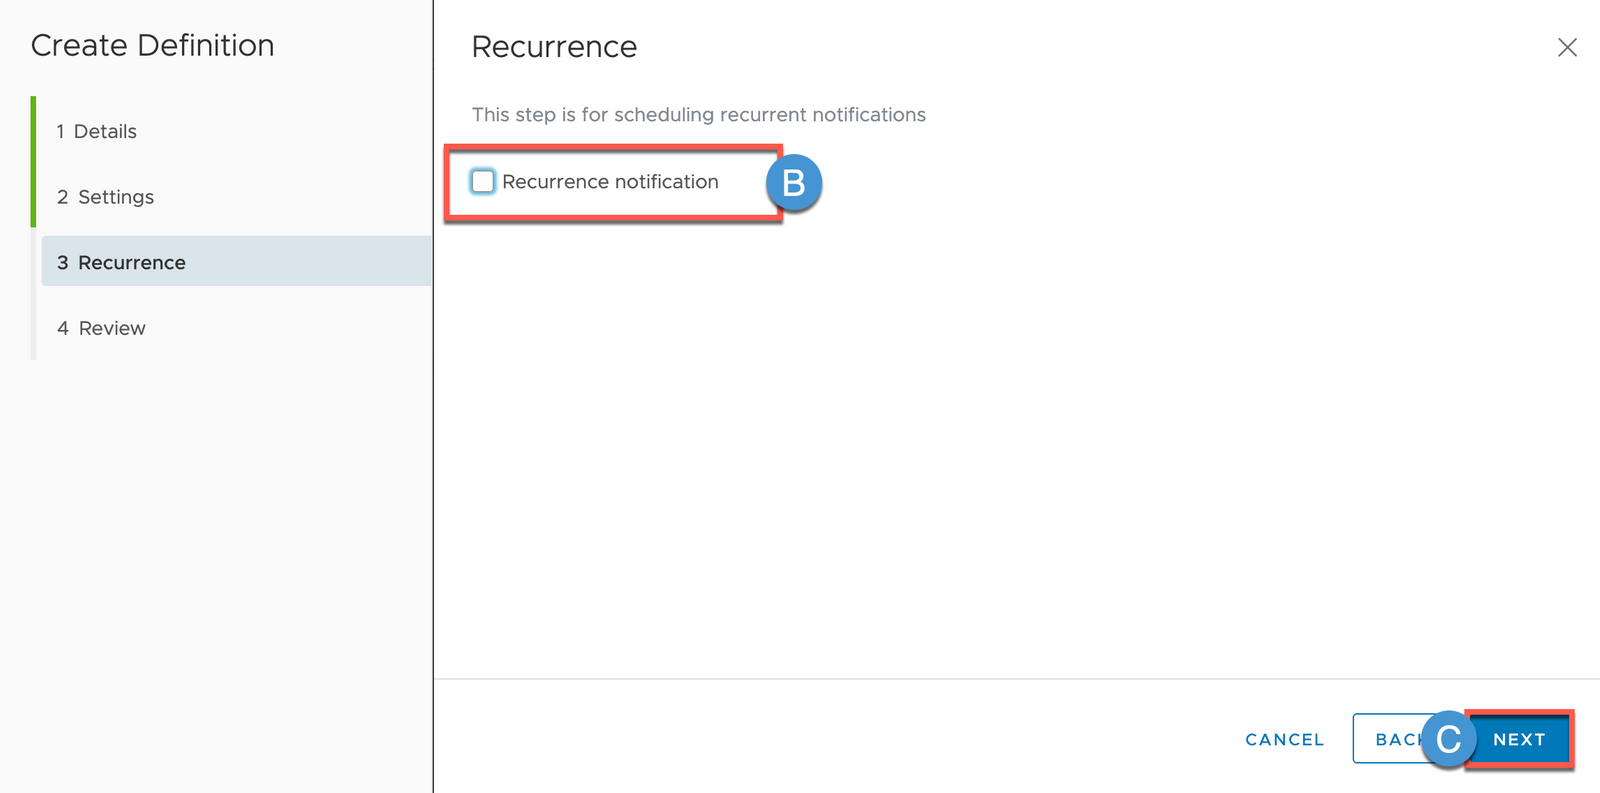
6A (not shown) Temporarily check Recurrence notification and note that you have the ability to have your notifications reoccur on a configurable interval
6B Leave Recurrence notification unchecked
6C Click NEXT
7A Review and Click SAVE

Create Alert Definition
Now we will create a Pulse Alert utilizing your Virtual IoT Sensor’s Template Metrics
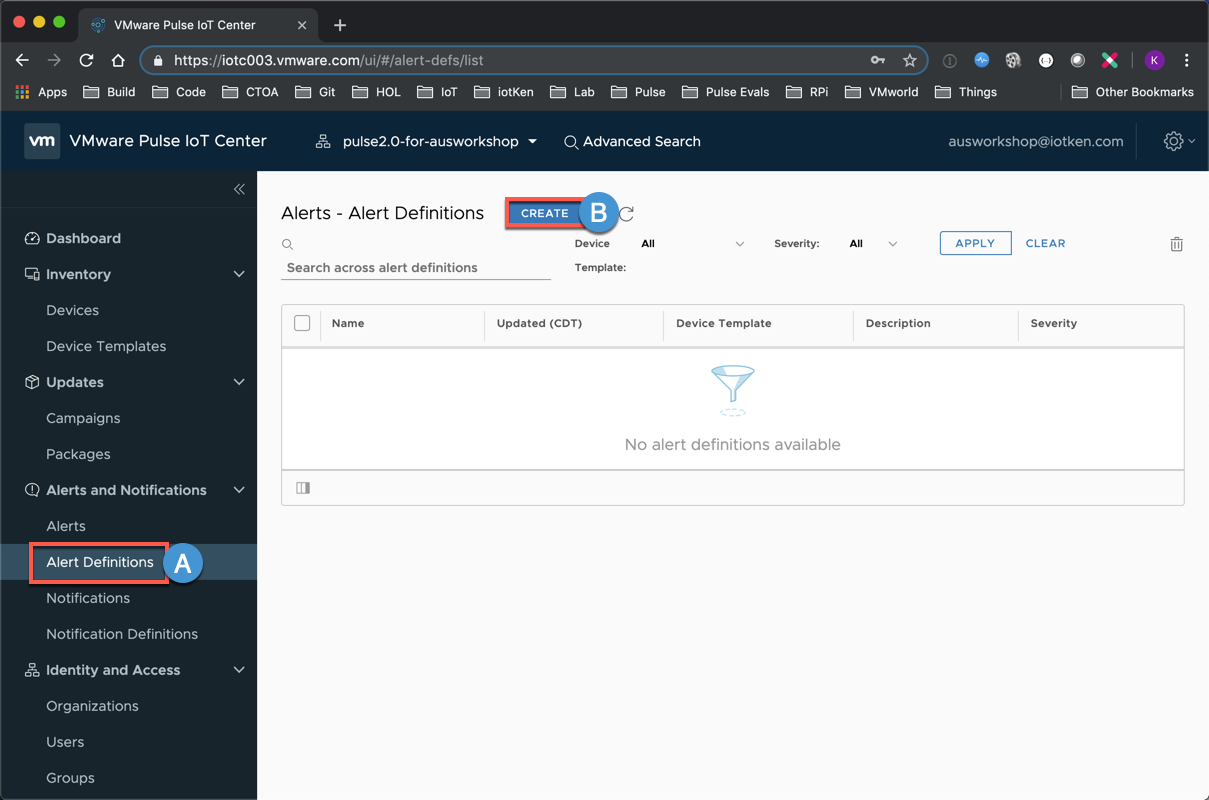
1A Select Alert Definitions
1B Click CREATE
2A Enter Name: [Your FirstName’s] Temperature Alert
2B Scroll Down

3A Select Severity: 2-WARNING
3B Click NEXT

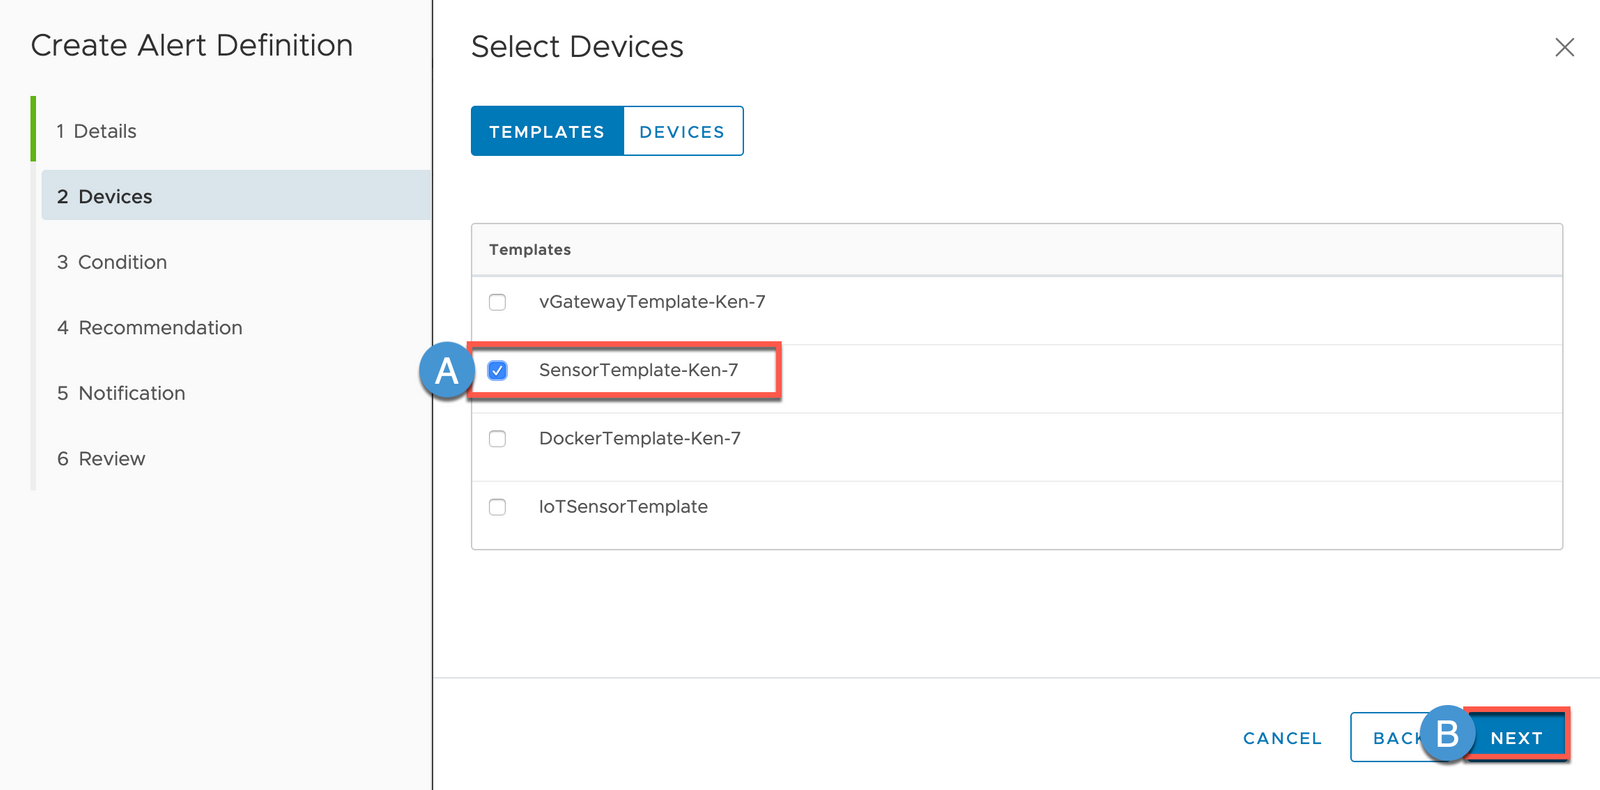
4A Enable Check box for your SensorTemplate-[Name]-[Number] (you may need to scroll down in this list)
4B Click NEXT
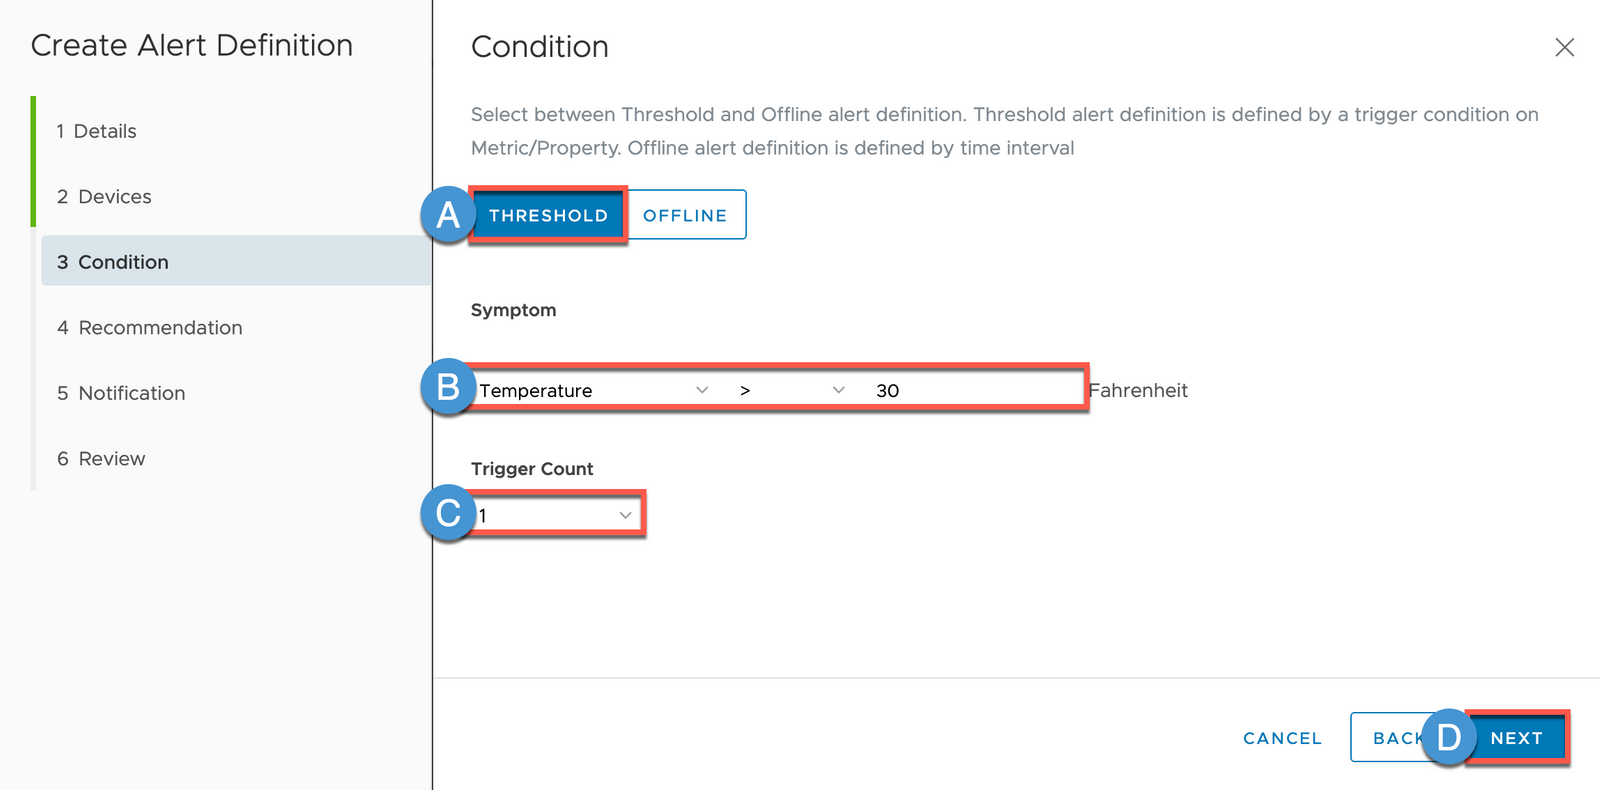
4A Select THRESHOLD
4B Symptom: Temperature > 30 (Note that Pulse is presenting Metrics which were configured as part of the SensorTemplate)
4C Trigger Count: 1 (aka ‘first occurrence’)
4D Click NEXT
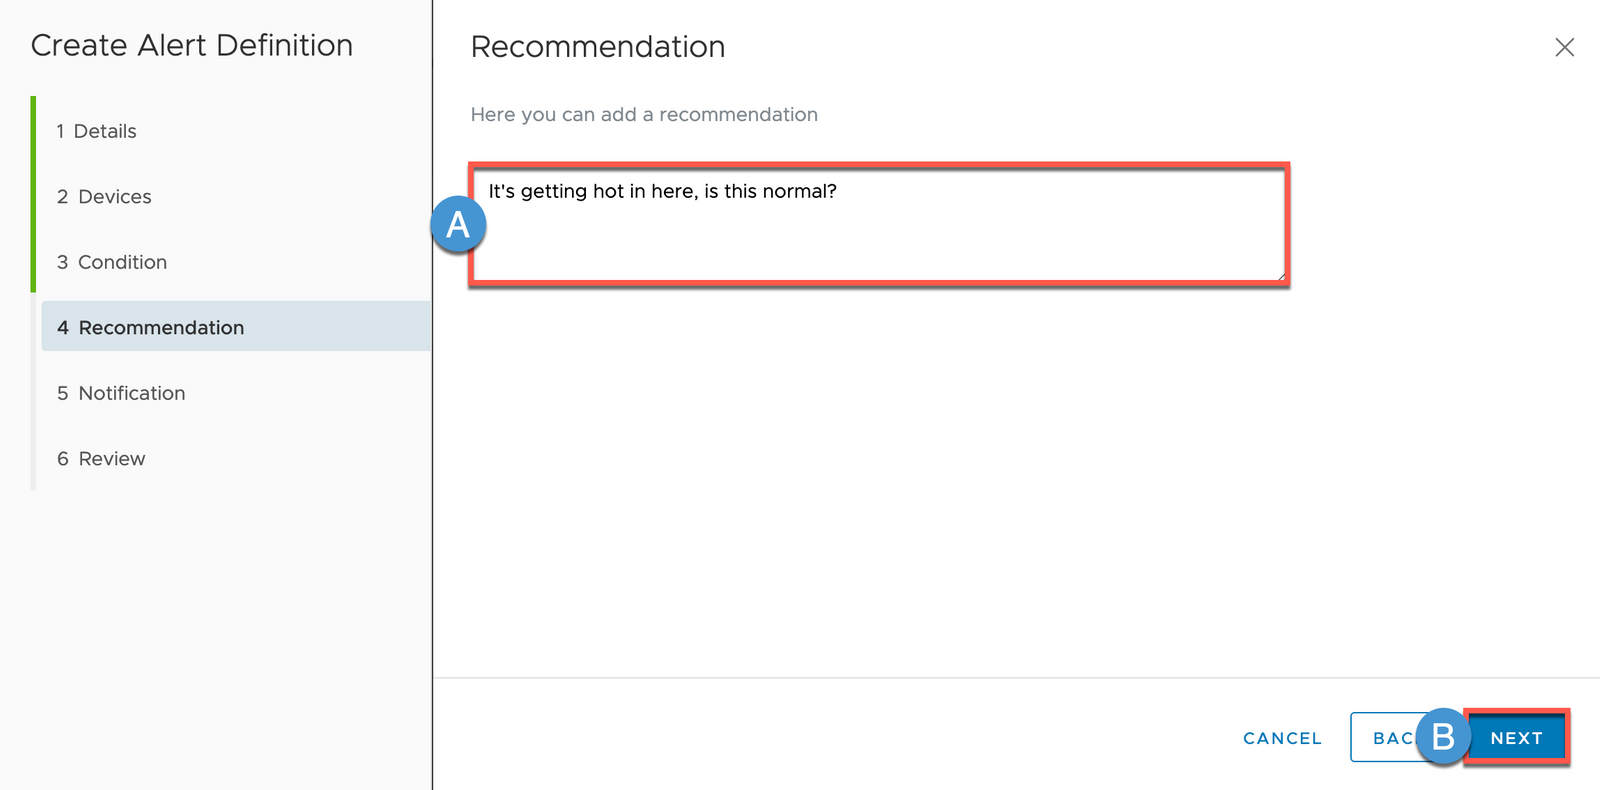
5A Enter a Recommendation
5B Click NEXT
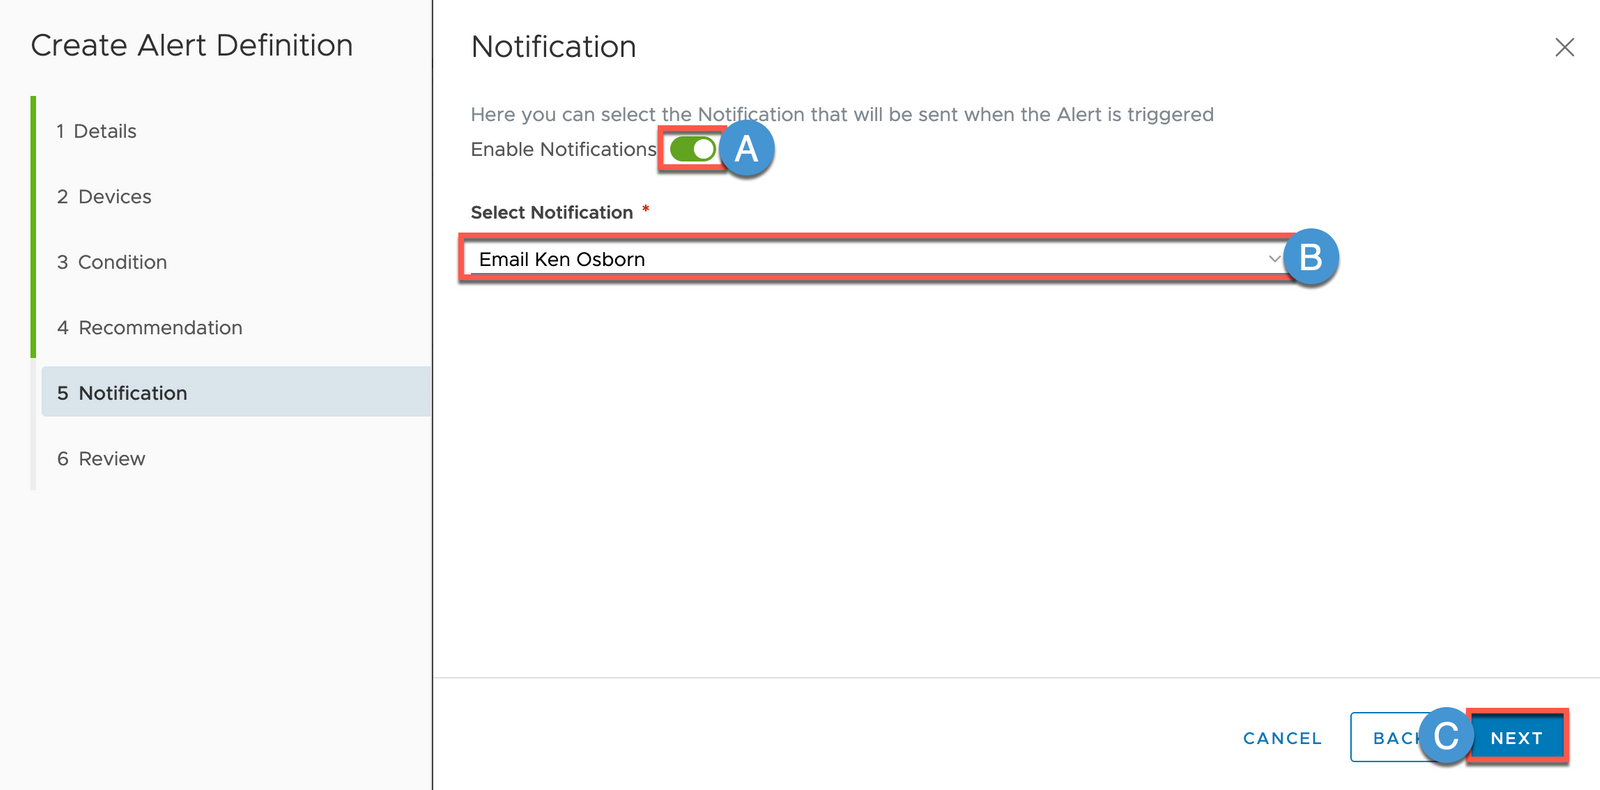
6A Enable Notifications (Slider)
6B Select Notification: (‘Email [Your Full Name]')
6C Click NEXT
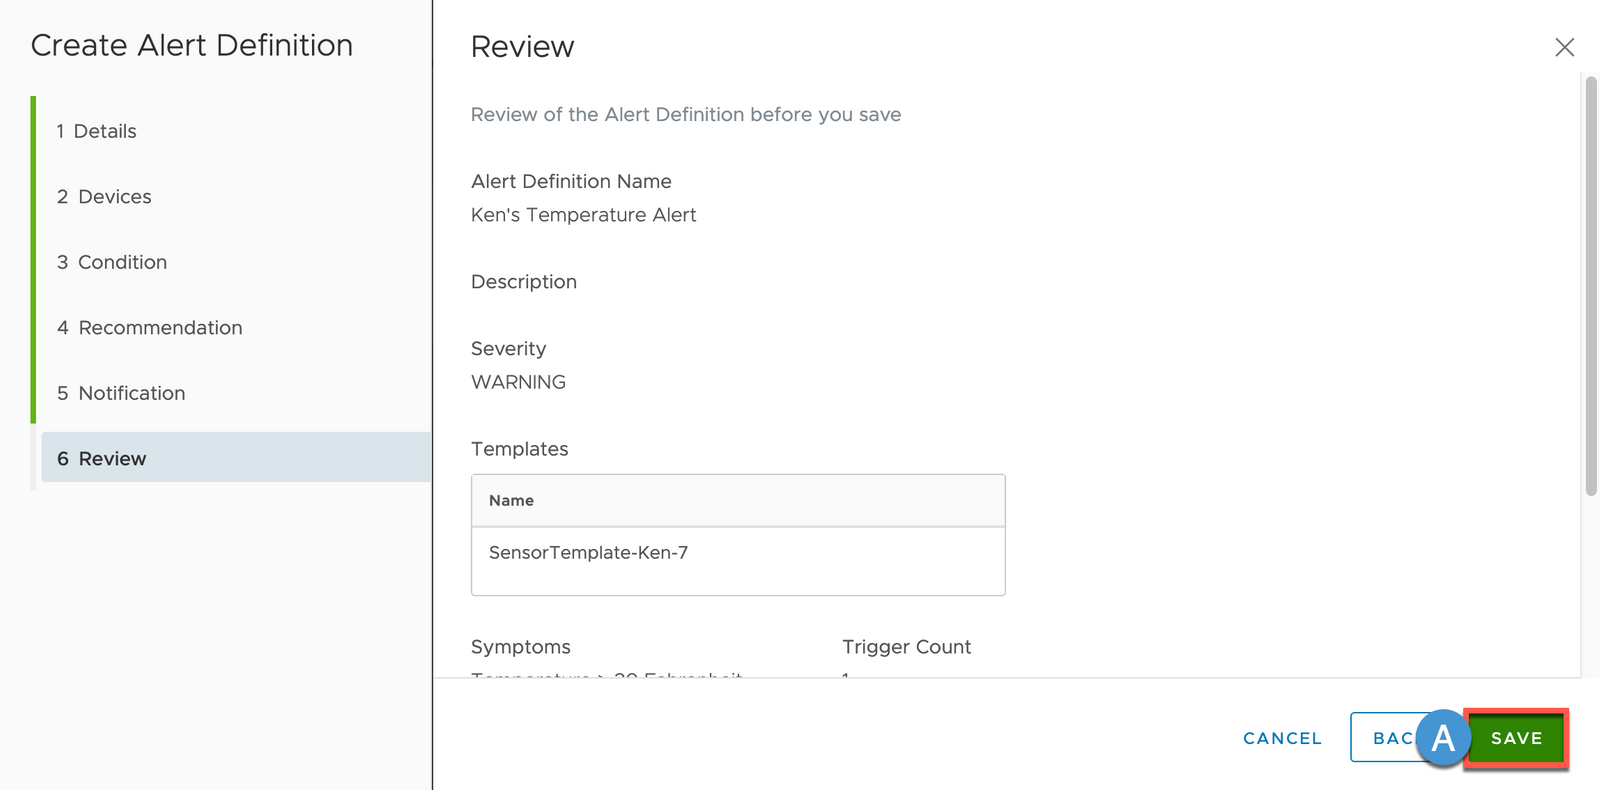
7A Review and Click SAVE
Review and Acknowledge Alert
As long as your Virtual IoT Sensor is still online and collecting Data, you should receive an Email Alert as well as a visual Alert in the Pulse Console (this can take awhile (~5 minutes) in our Lab Environment - thank you for your patience)
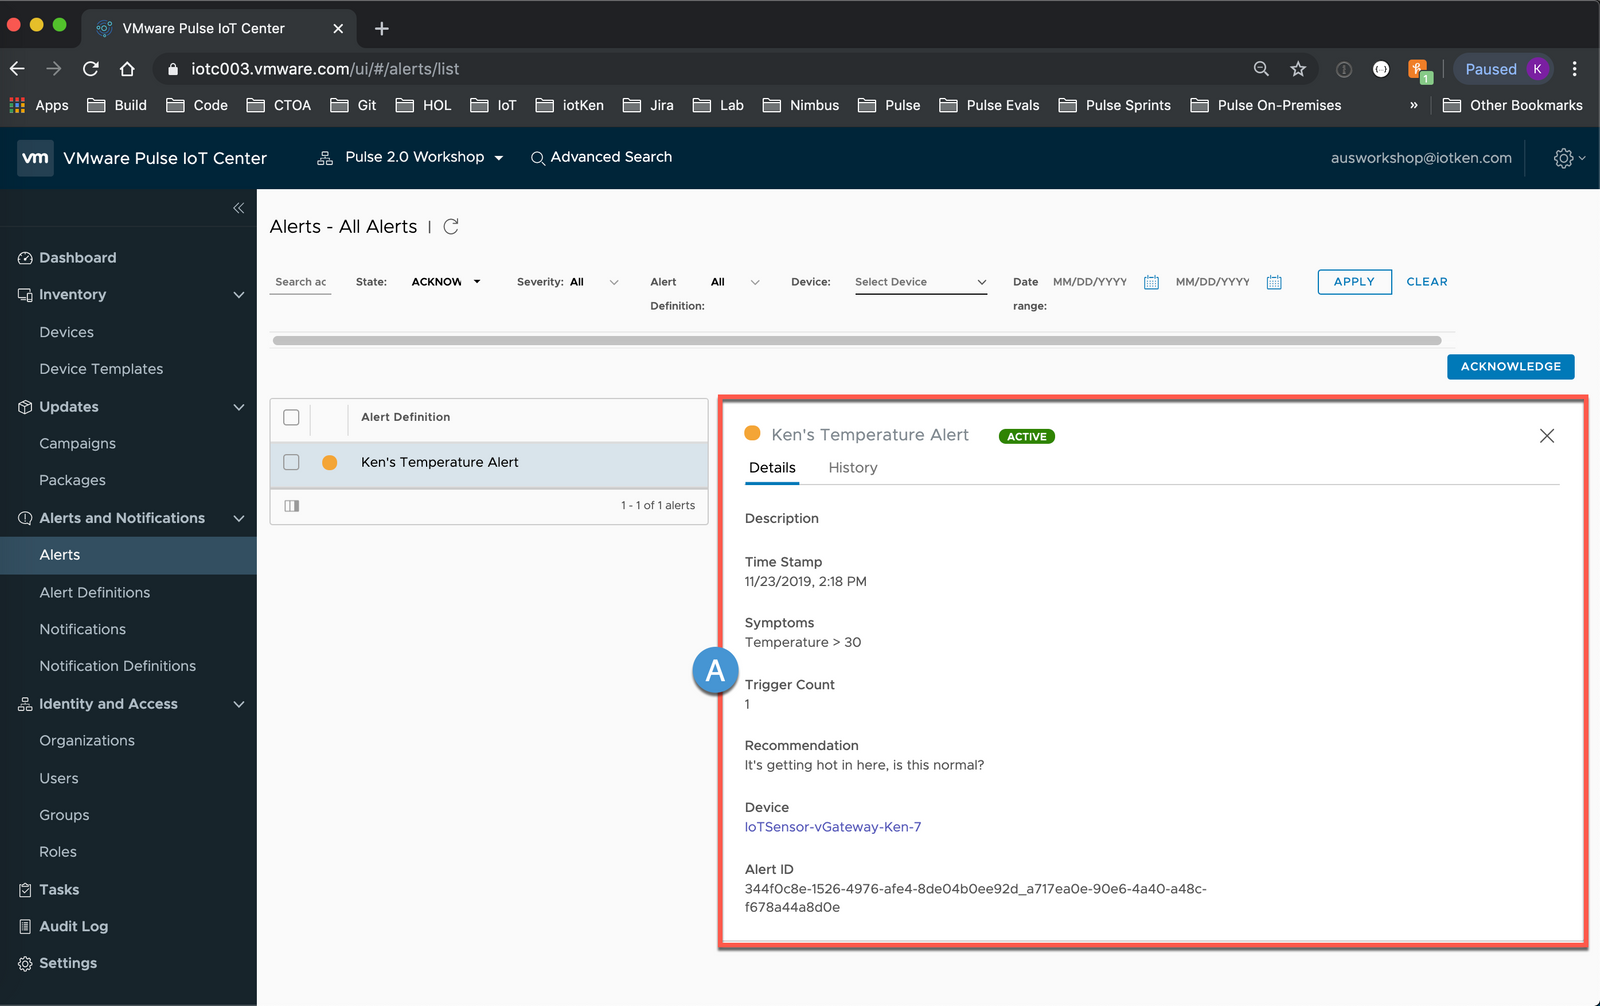
1A Select Alerts
1B Click [Your Full Name]’s Temperature Alert
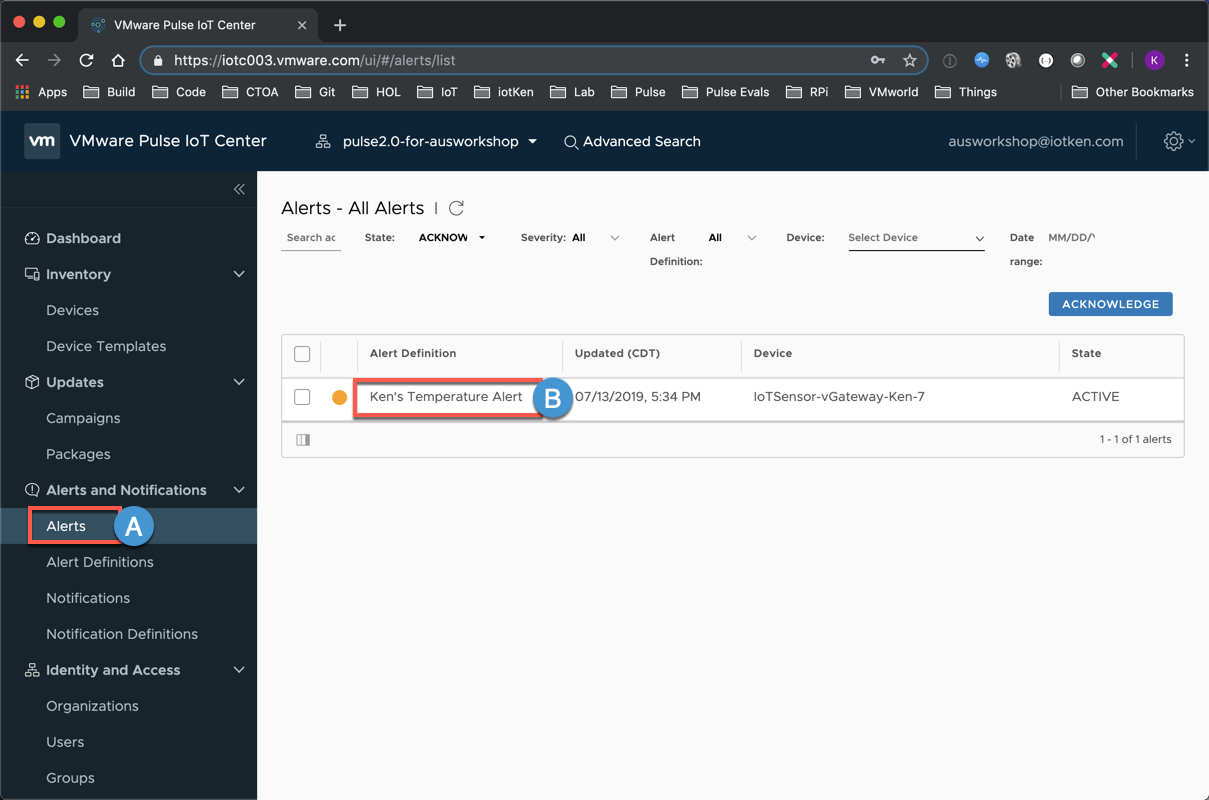
2 Note the details that are provided in your Alert, including a hyperlink to the impacted Device (IoTSensor-vGateway-[FirstName]-[Number])
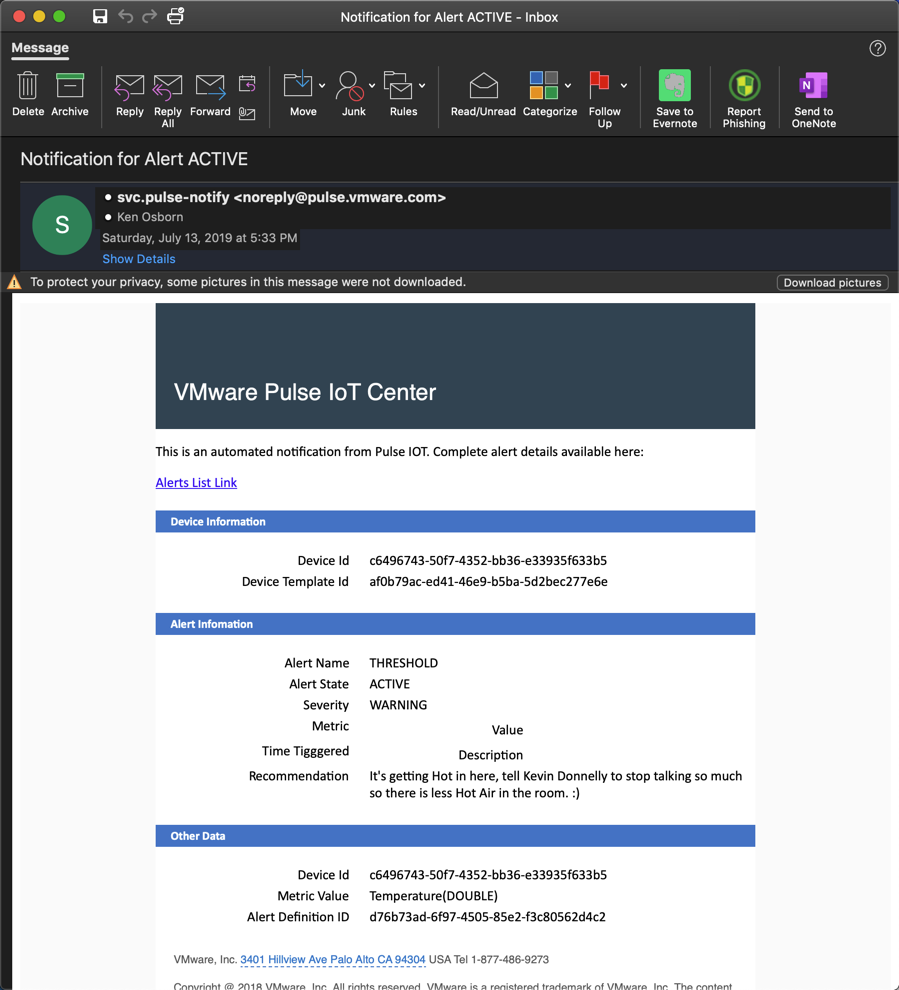
3 (Optional) Check your email for an alert from ’svc.pulse-notify’
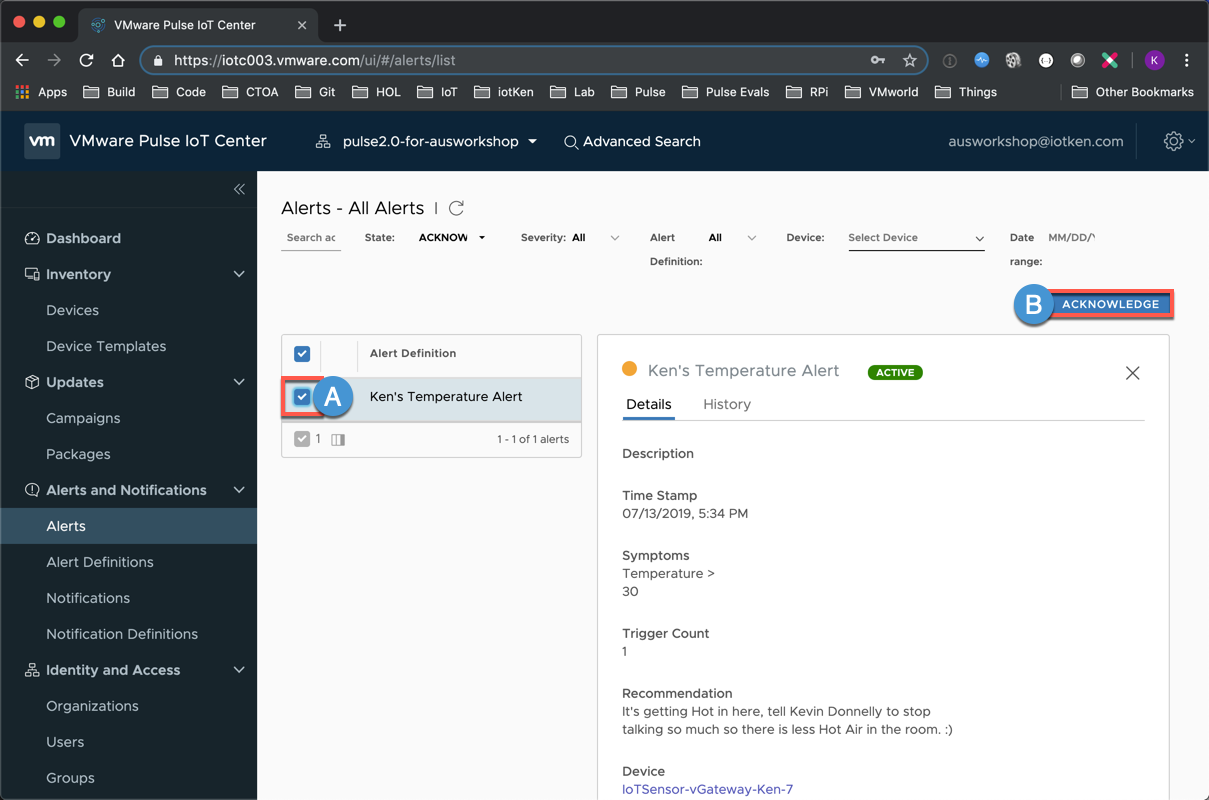
4A Enable the Checkbox next to your Alert
4B Click ACKNOWLEDGE
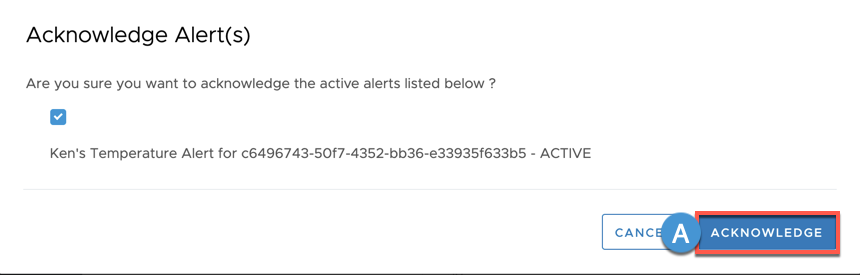
5A Click ACKNOWLEDGE
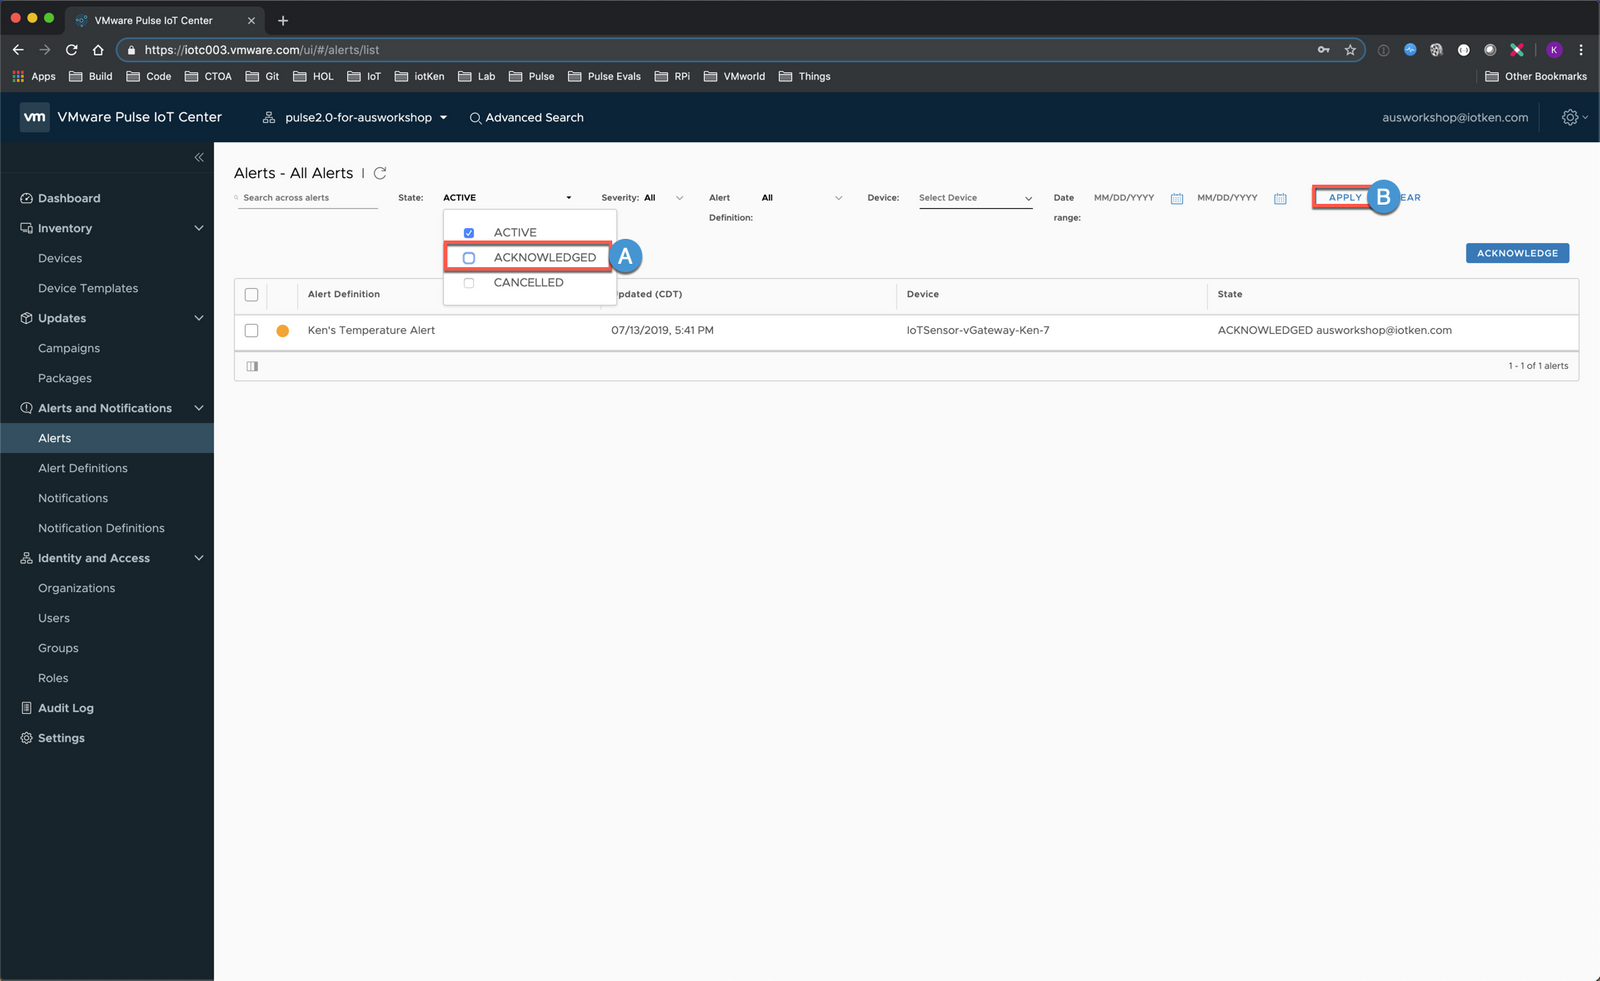
6A You can filter out the Acknowledges Messages by Selecting the State Column and unchecking the ACKNOWLEDGE box
6B Click APPLY
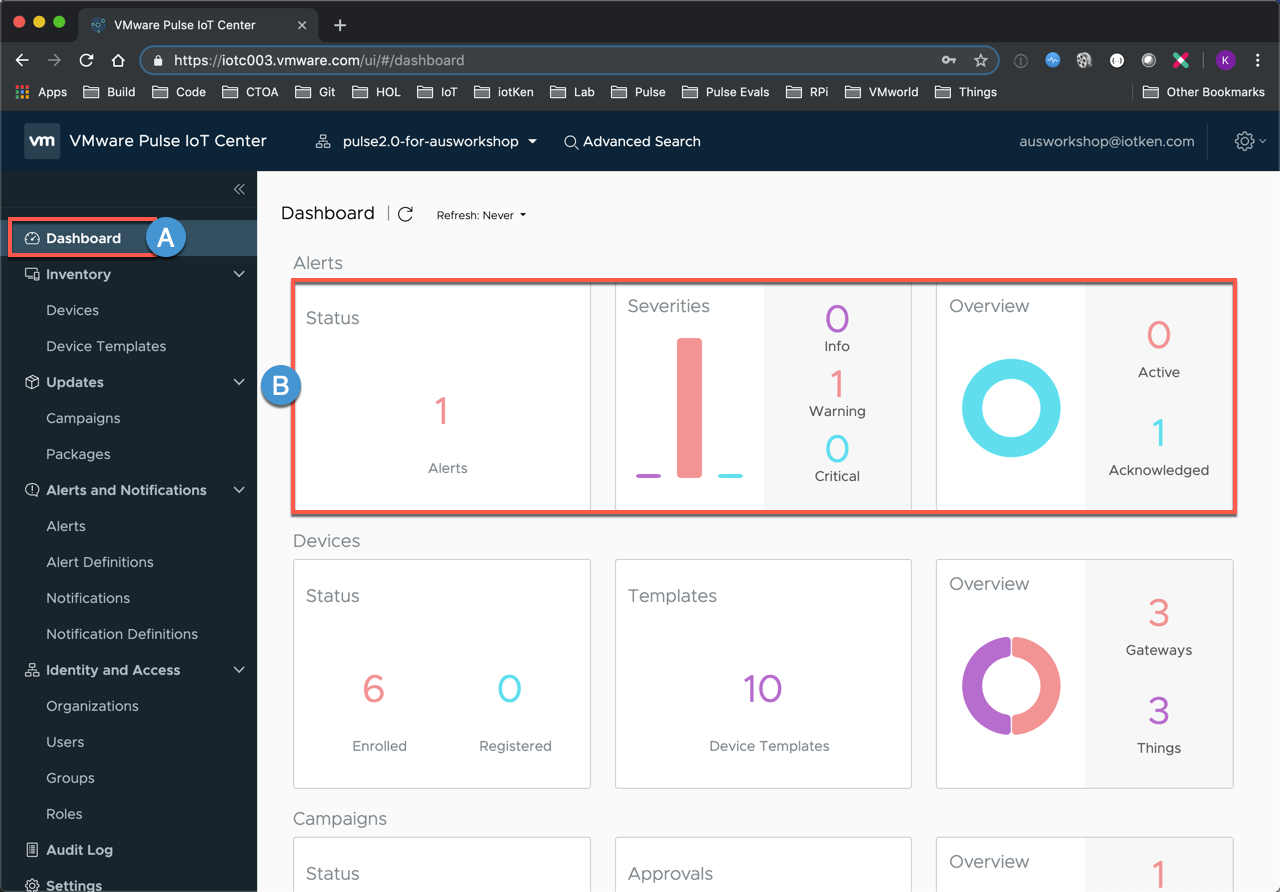
7A Click Dashboard
7B Note that high level Alert information (Status / Severities / Overview) is visible
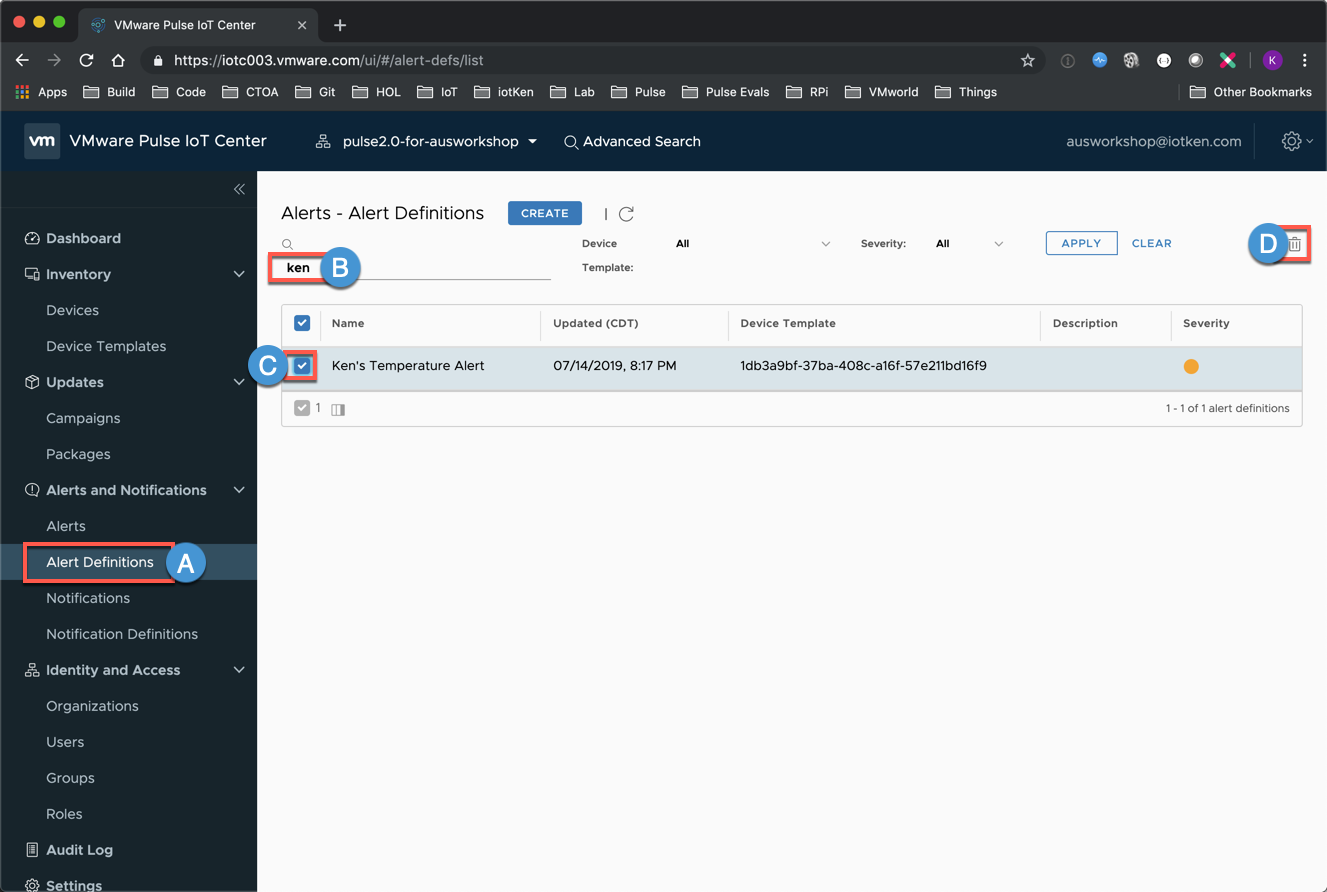
8A Let’s delete the Alert Definition so we are not spamming your Email Inbox (Select Alert Definitions)
8B Set a Search filter for [YourName]
8C Enable the Checkbox next to your Alert Definition
8D Click the Trashcan (Delete) Icon
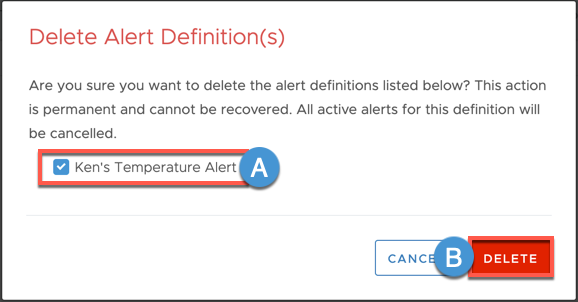
9A Verify that [YourName’s] Temperature Alert is Checked
9B Click DELETE
<Thank you - this concludes our ’Monitor' Lesson>
comments powered by Disqus