Overview
1 Create Device Thing Template(s) via Pulse UI
2 Onboard Thing via Gateway
3 Configure Gateway to send Thing Metrics to Pulse
4 Configure SenseHAT Linux Service
Steps
Login to Pulse Console
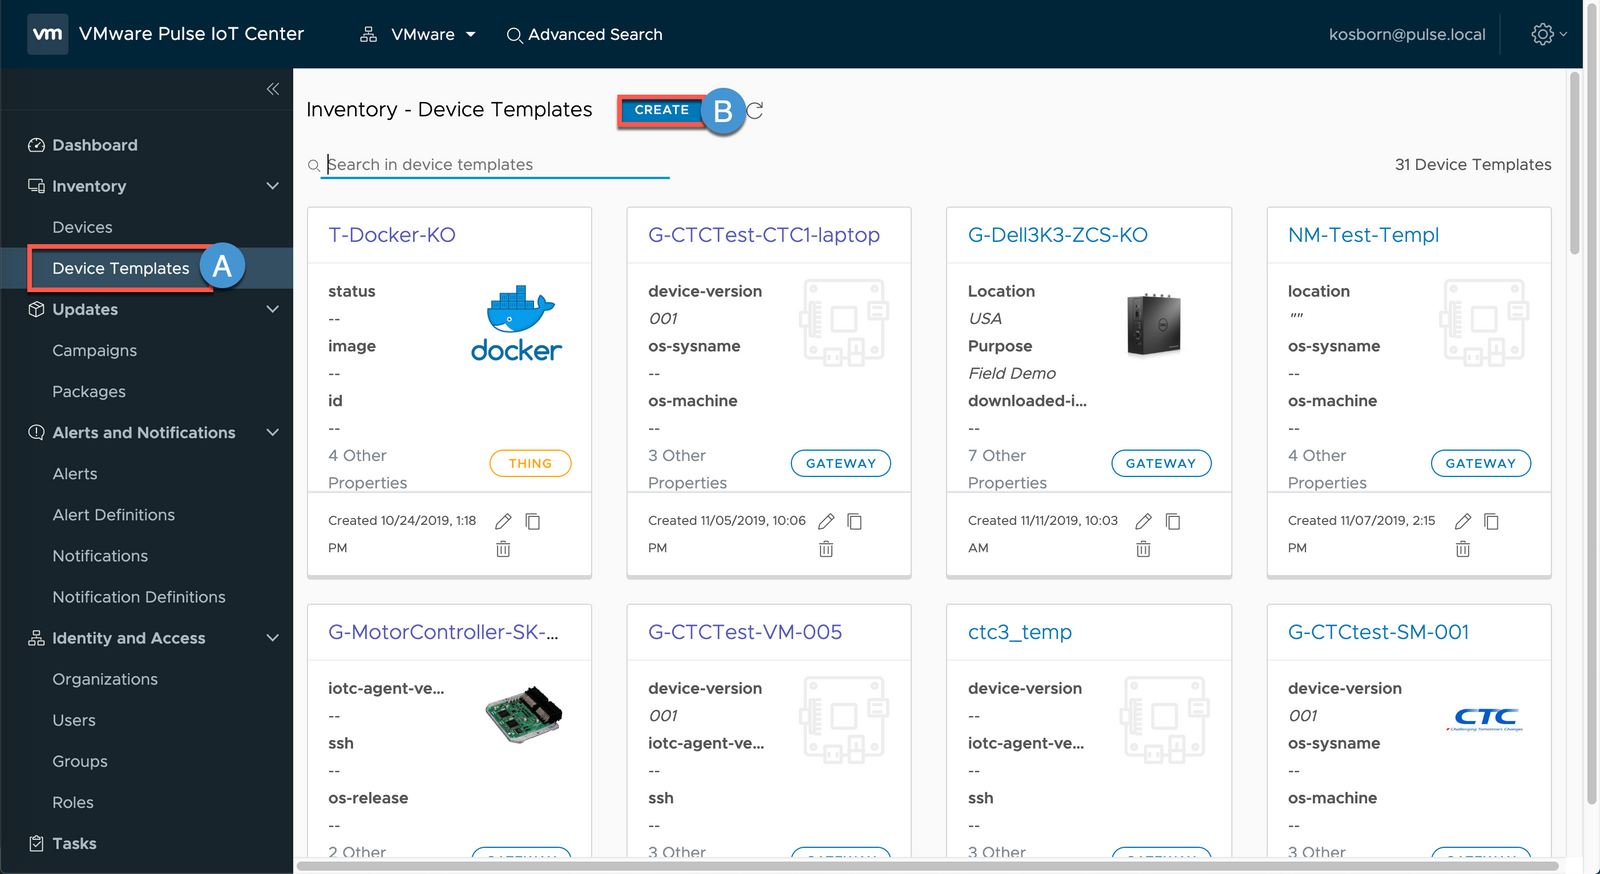
1A Select Inventory\Device Templates
1B Click Create
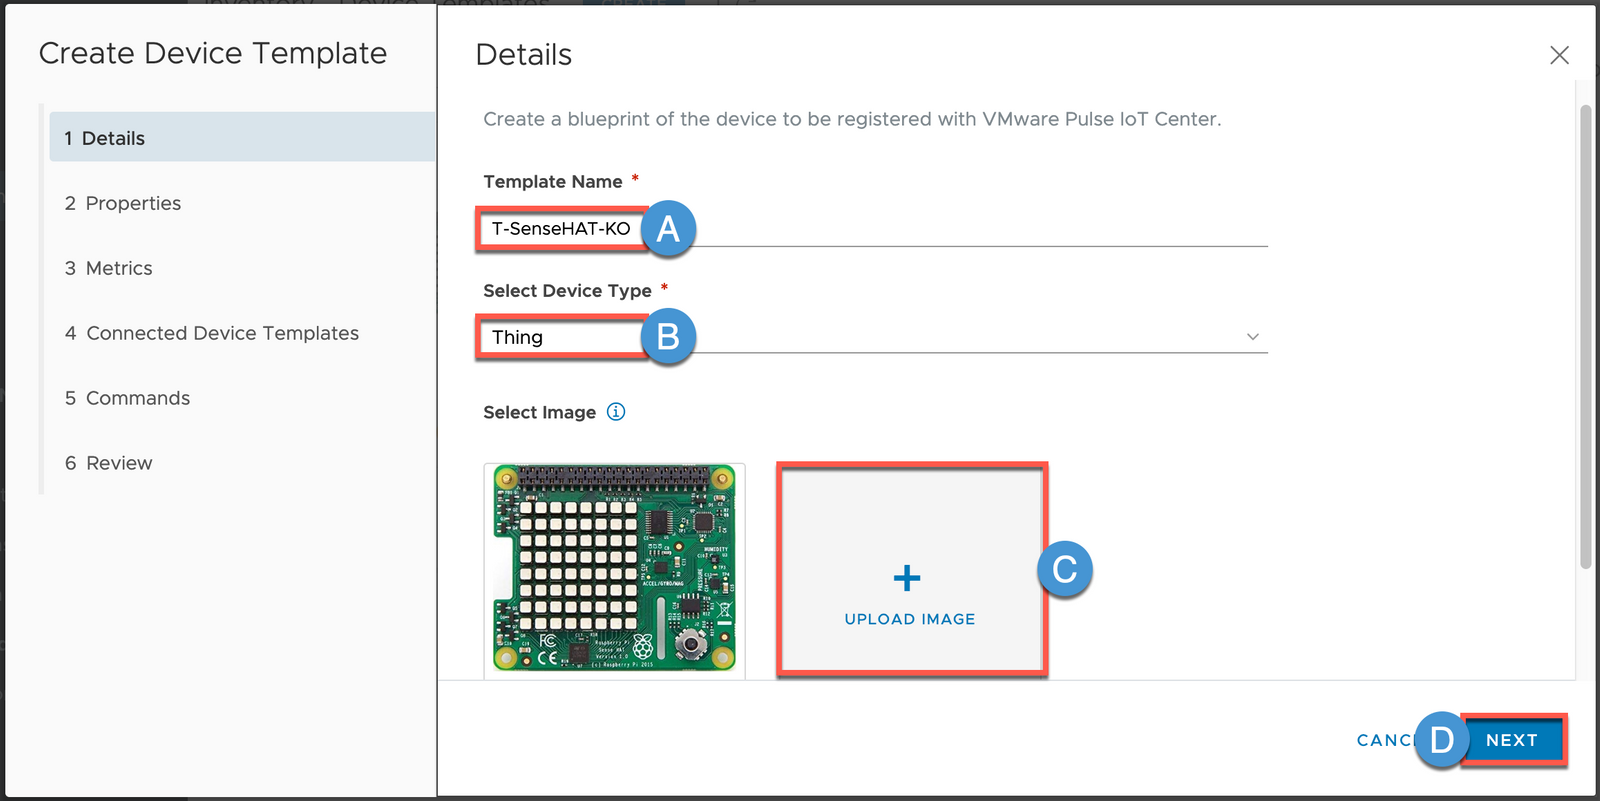
2A Enter Template Name
2B Select Thing for Device Type
2C (Optional) Upload Image
2D Click NEXT
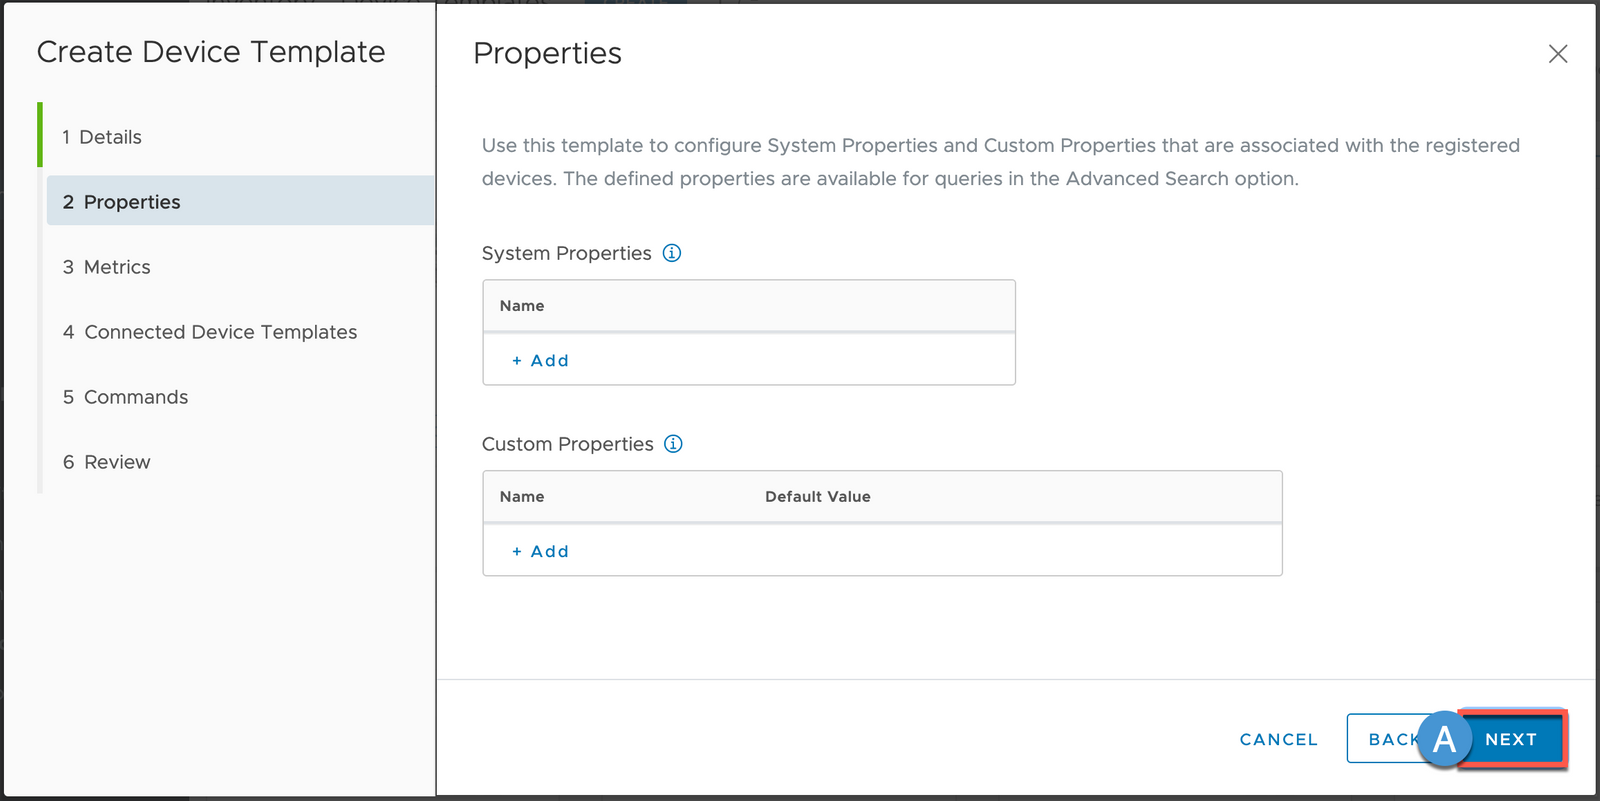
3A (Properties) Click NEXT
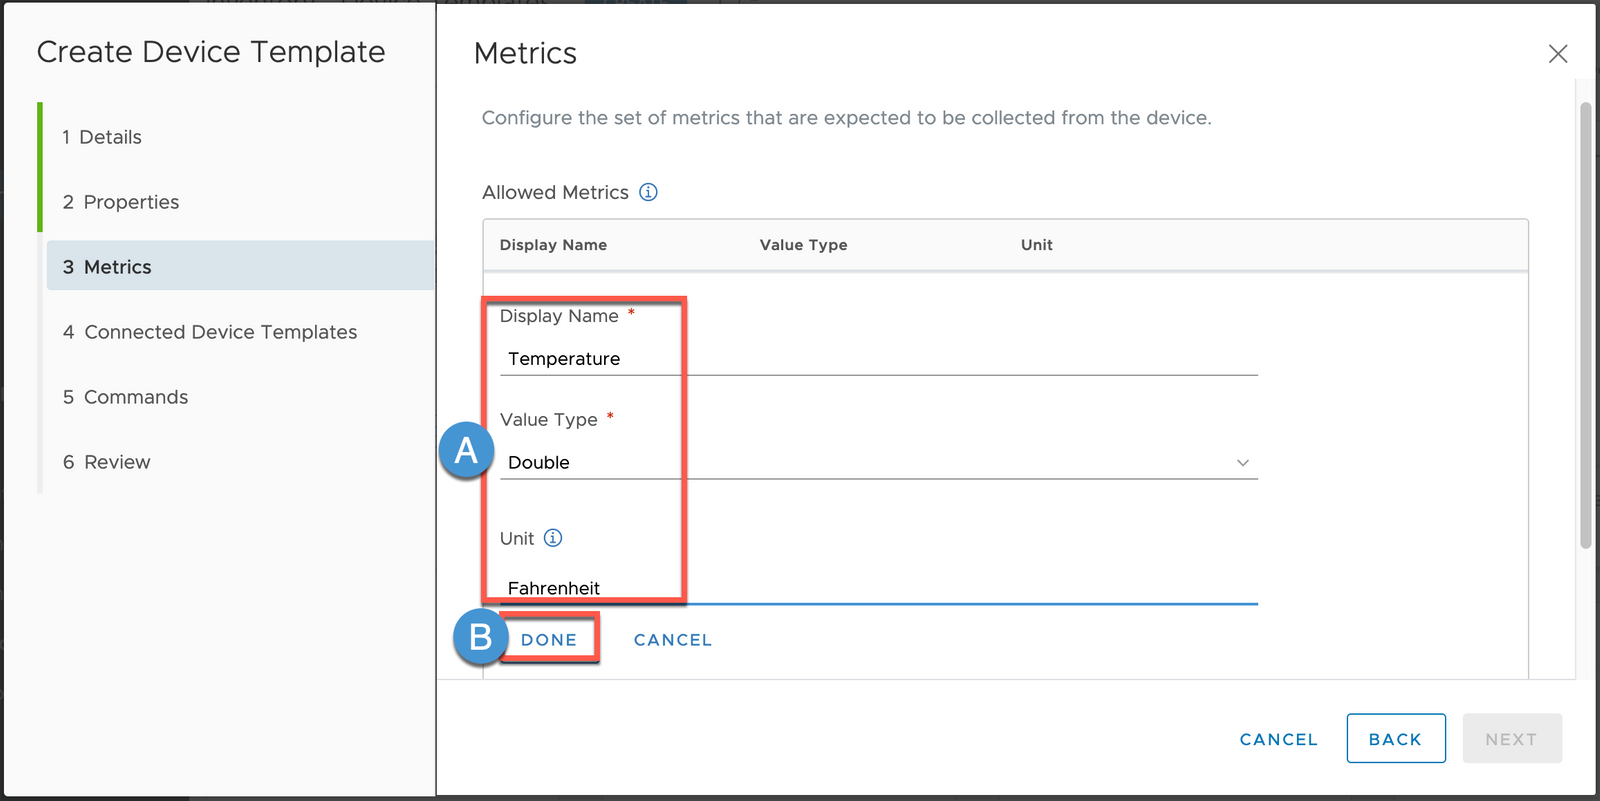
6A Click + Add and build out the following:
Display Name: Temperature
Value Type: Double
Name: SSH Enable
Unit: Fahrenheit
6B Click DONE
7A Click + Add and build out the following:
Display Name: Humidity
Value Type: Double
Name: SSH Enable
7B Click DONE
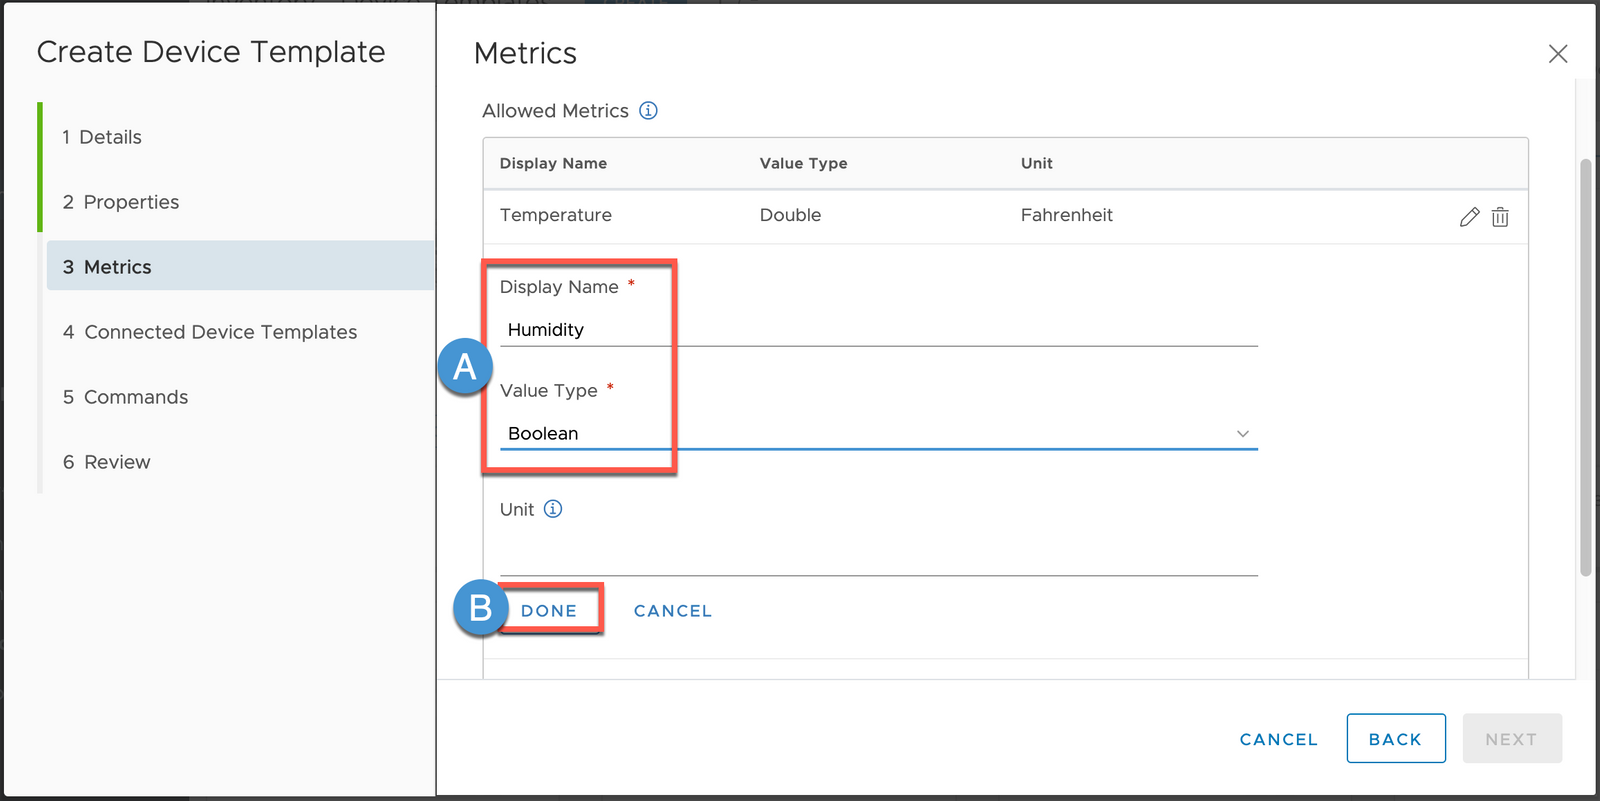
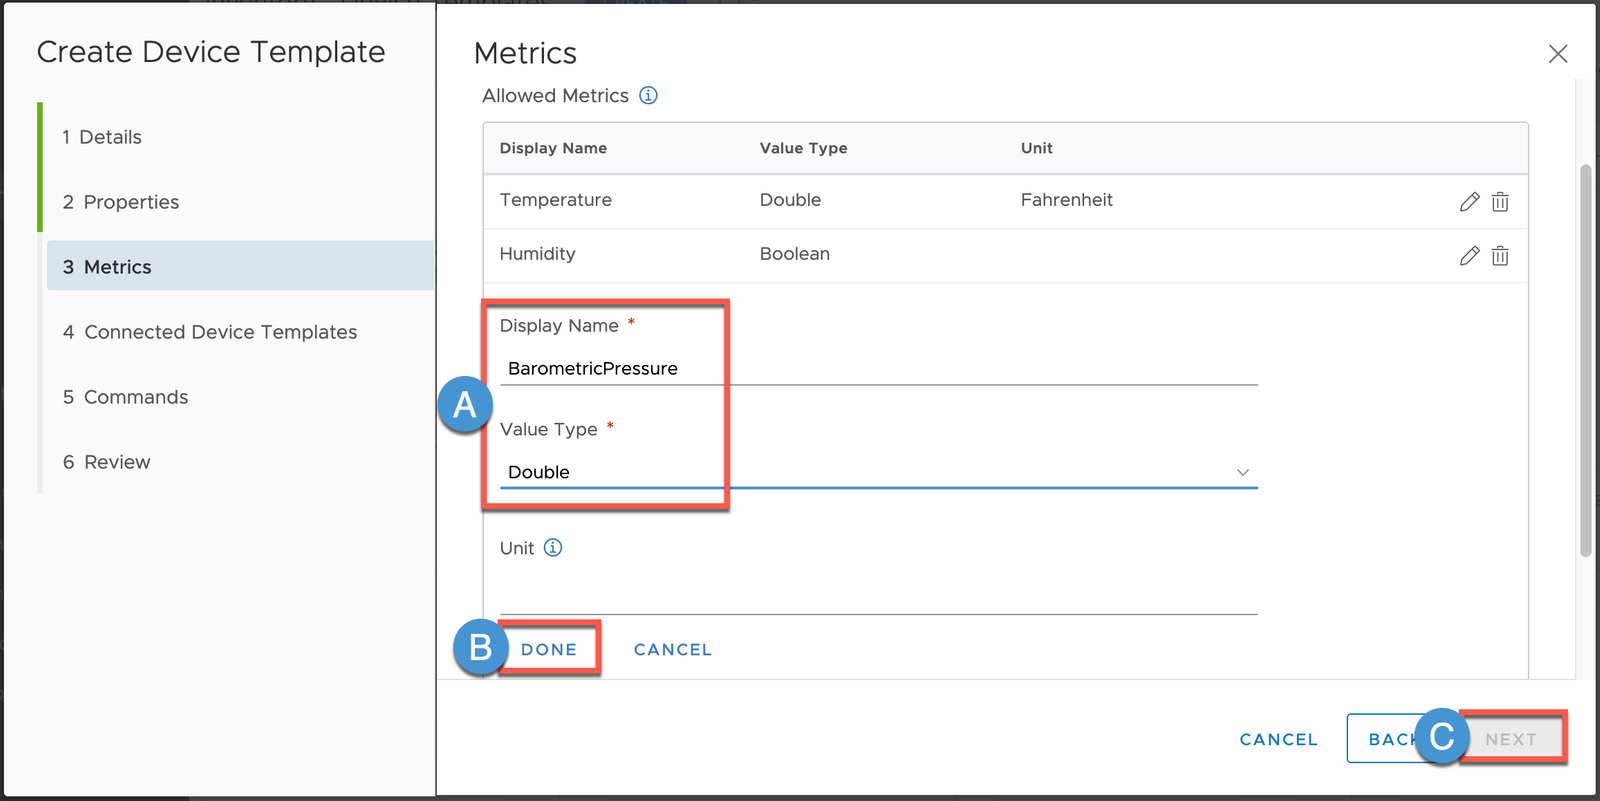
8A Click + Add and build out the following:
Display Name: Humidity
Value Type: Double
Name: SSH Enable
8B Click DONE
8C Click NEXT
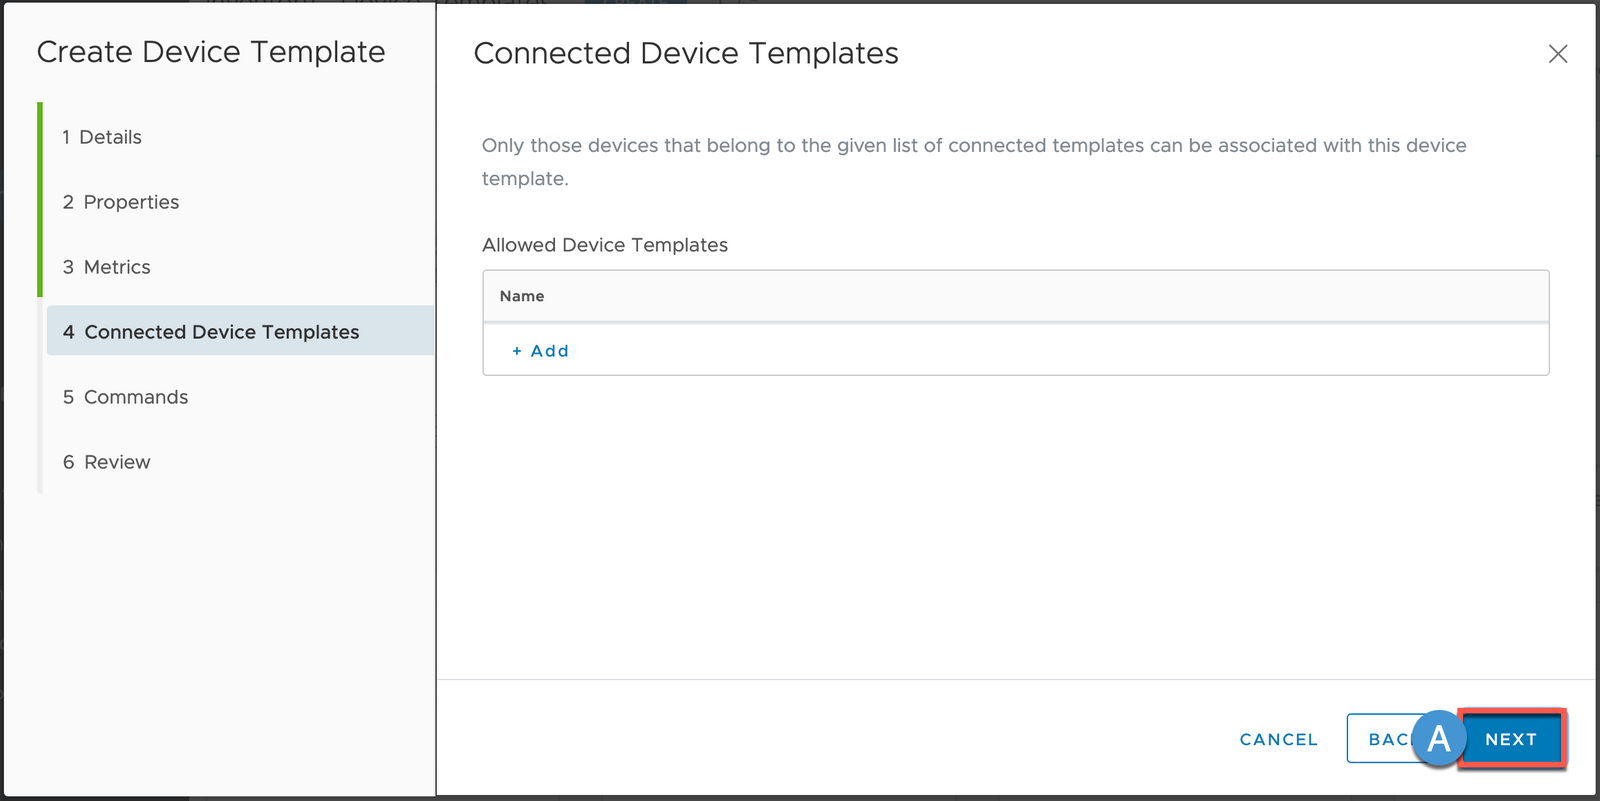
9A (Connected Device Templates) Click NEXT
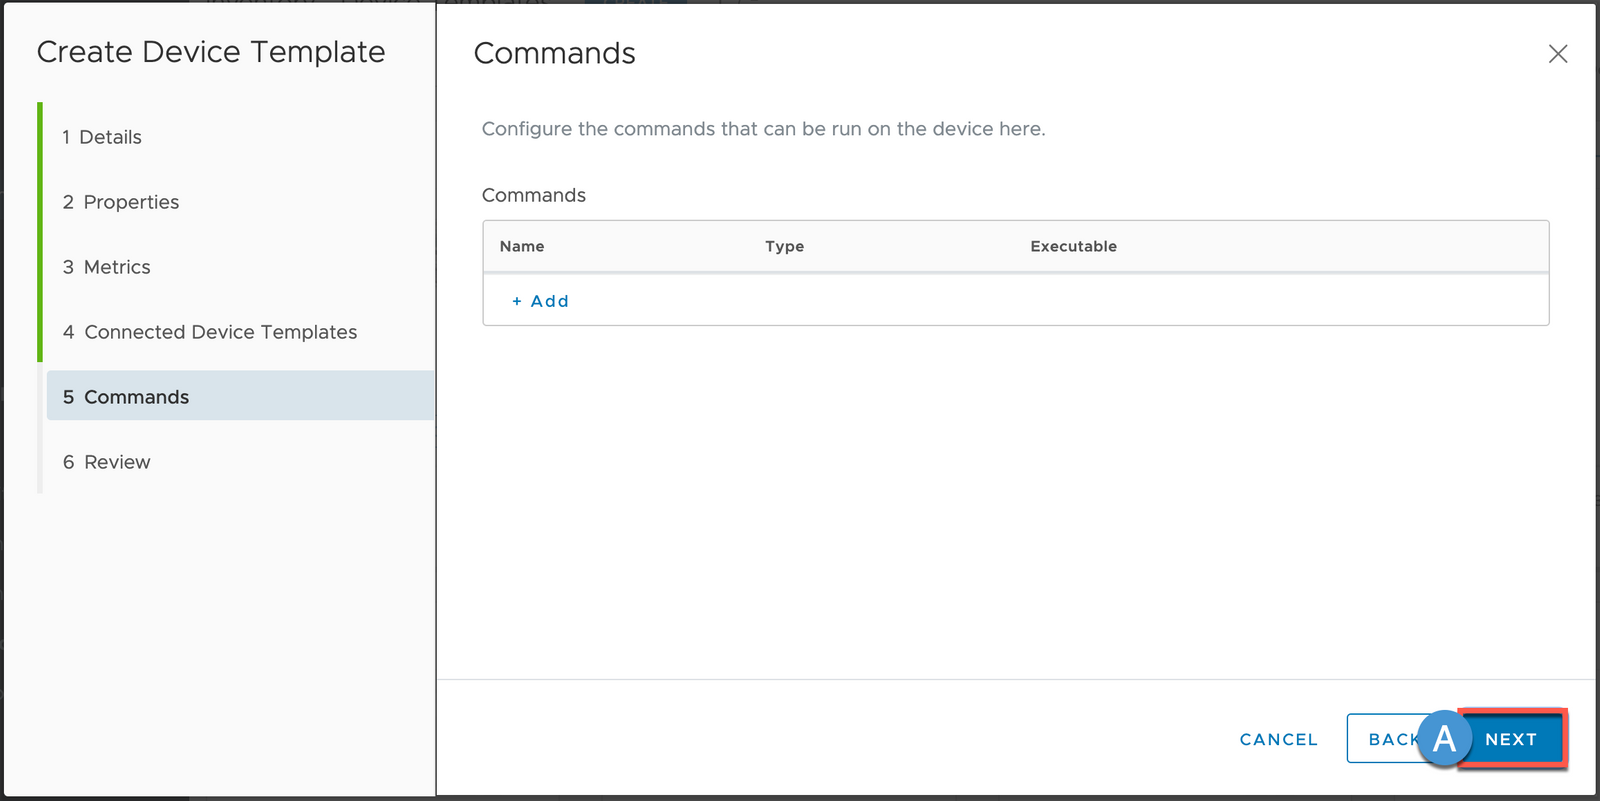
10A (Commands) Click NEXT
11A Review and click SAVE
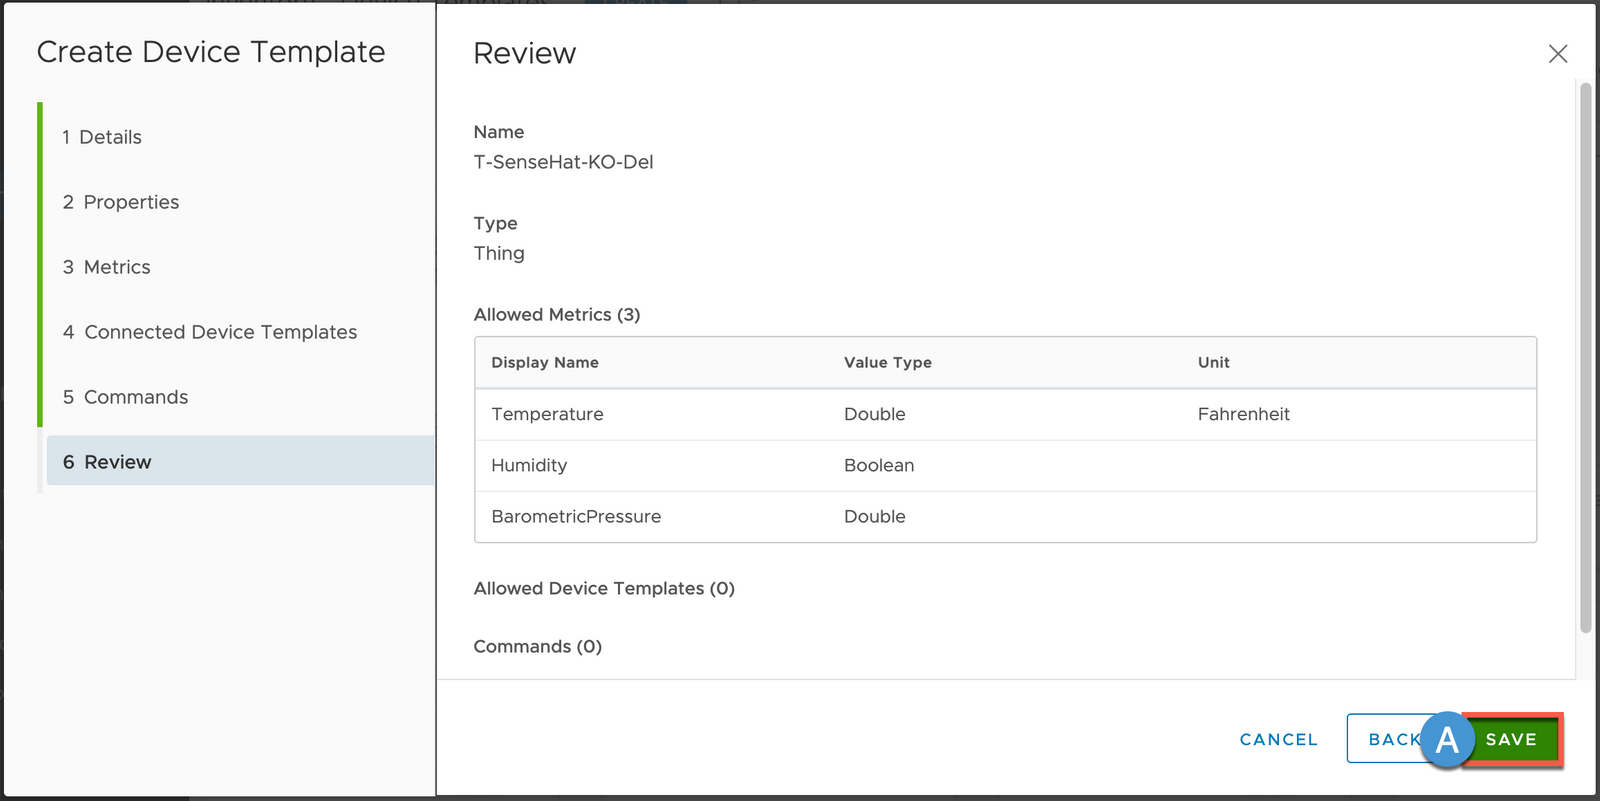
Now that we have created your Thing Template, we need to modify our Gateway Template to Whitelist (Allow) this Device as a Connected Thing
12A Select Device Templates
12B (Optional) Set a Search Filter for your Gateway Template
12C Click the Pencil Icon to edit your Gateway Template
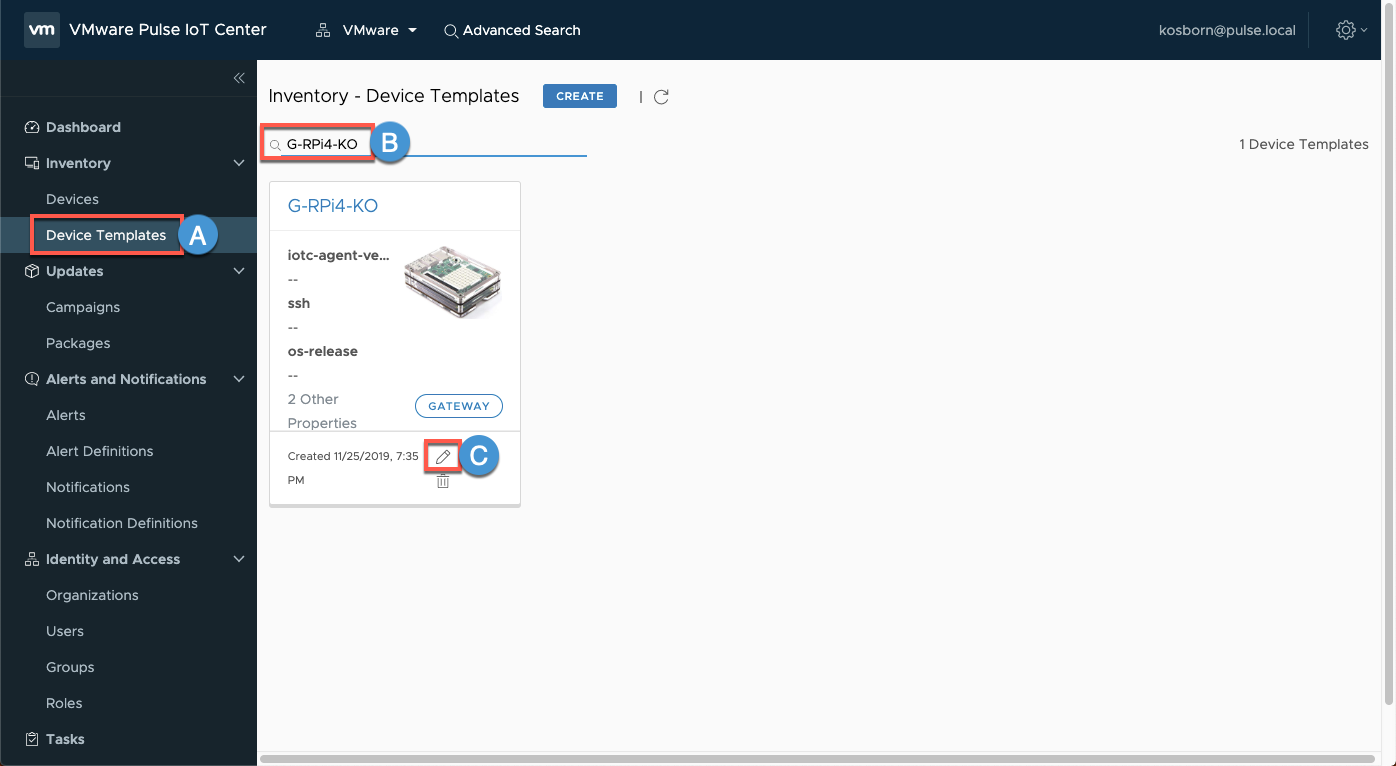
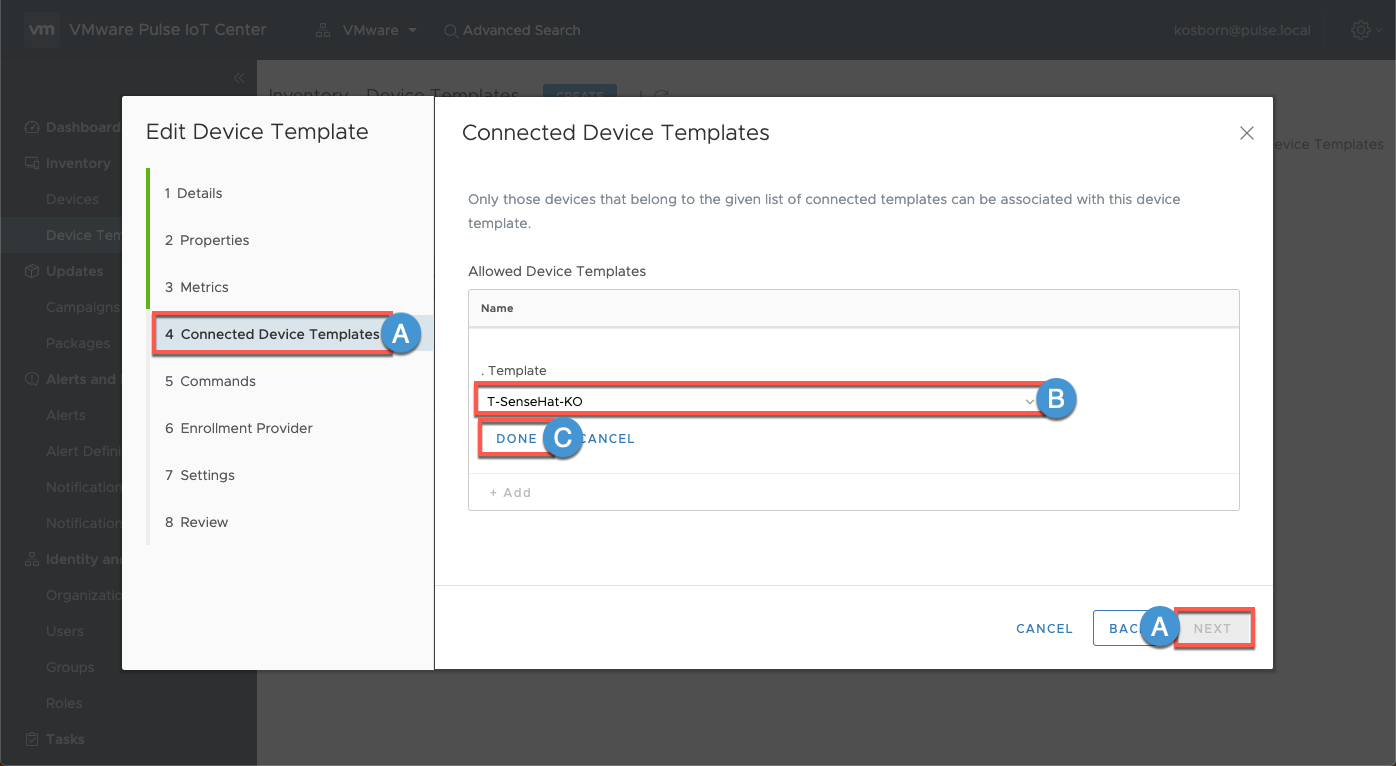
13A Click NEXT until you are on the 4 Connected Device Templates Step
13B Click + Add and select your newly created Thing Template from the drop-down menu
13C Click Done
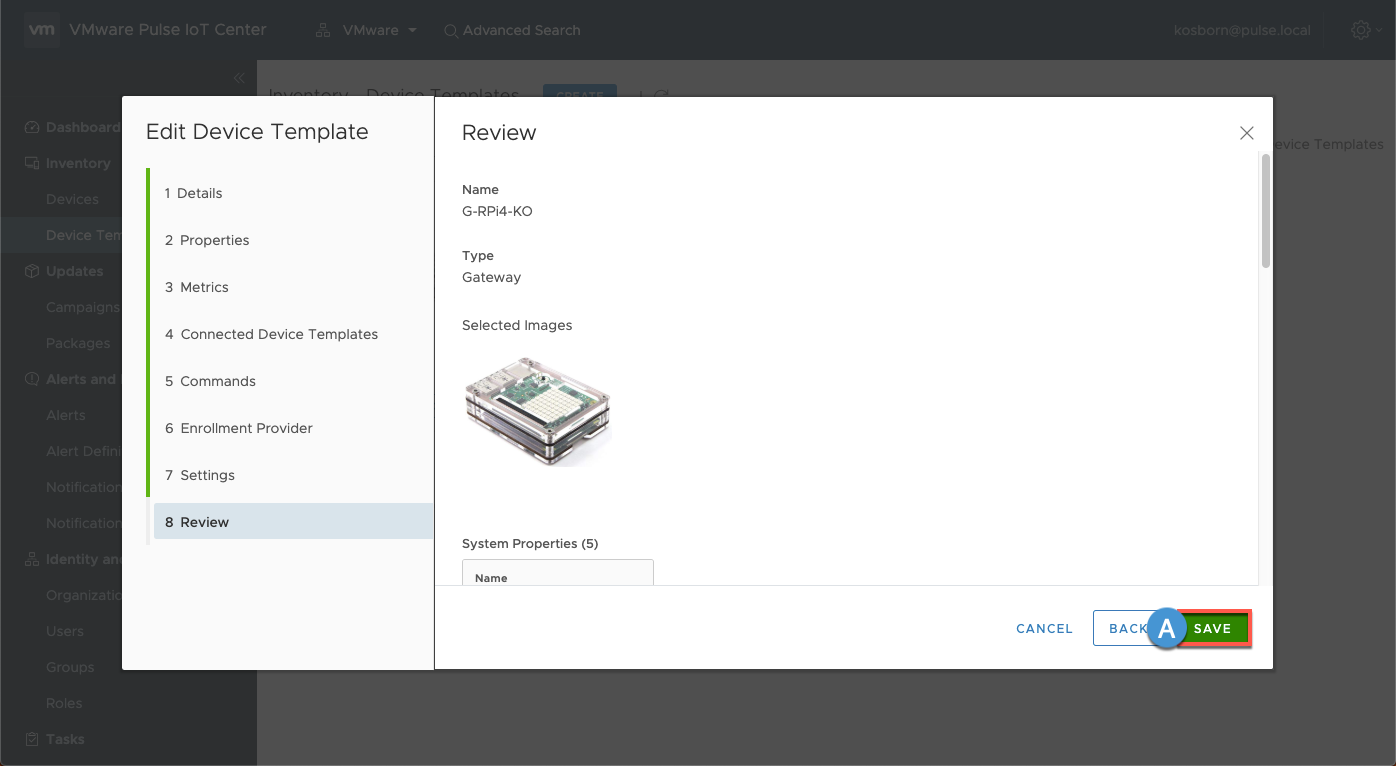
13D Click NEXT until you are on the 8 Review Step
14A Review and Click SAVE
Onboard Thing via Gateway
1 SSH to your Raspberry Pi
ssh username@[IP address]

2 Elevate Permissions
sudo su

2 Change into the Pulse Agent bin directory
cd /opt/vmware/iotc-agent/bin

5A Run the DefaultClient with the help parameter to examine the enroll-device options
./DefaultClient enroll-device help

5B Note that in order to enroll the SenseHAT device as a Connected Thing to our Raspberry Pi Gateway, we have to pass in a few required parameters (template name, device name and parent Id)
The Template Name = the name that you chose when you created your Thing Template earlier.
The Device Name = whatever you decide. We recommend including the Gateway name in the Thing name so that you can see the relationship when viewing Devices in the Pulse Console.
The Parent ID is the Unique Identifier that Pulse created for your Raspberry Pi Gateway when you onboarded it previously. We can retrieve this value from the Pulse UI in your Web Browser or we can retrieve this value via DefaultClient in your SSH Session. Let’s do the latter.
6A Type (or copy/paste) the following command to set a Bash Variable equal to the value of your Gateway Parent ID
PARENTID=$(./DefaultClient get-devices | sed -n 2p | awk '{print $1}')

6B Echo out the newly created Bash variable to view the Parent ID
echo $PARENTID

7 Type the following command to onboard your SenseHAT as a Connected Thing (modify your Template and Name parameters to match your values)
./DefaultClient enroll-device --template=T-SenseHat-KO --name=SenseHAT-RPi4-KO-001 --parent-id=$PARENTID

7B Note that we receive confirmation that the device was connected successfully and that Pulse has also generated a Unique ID for our SenseHAT device.
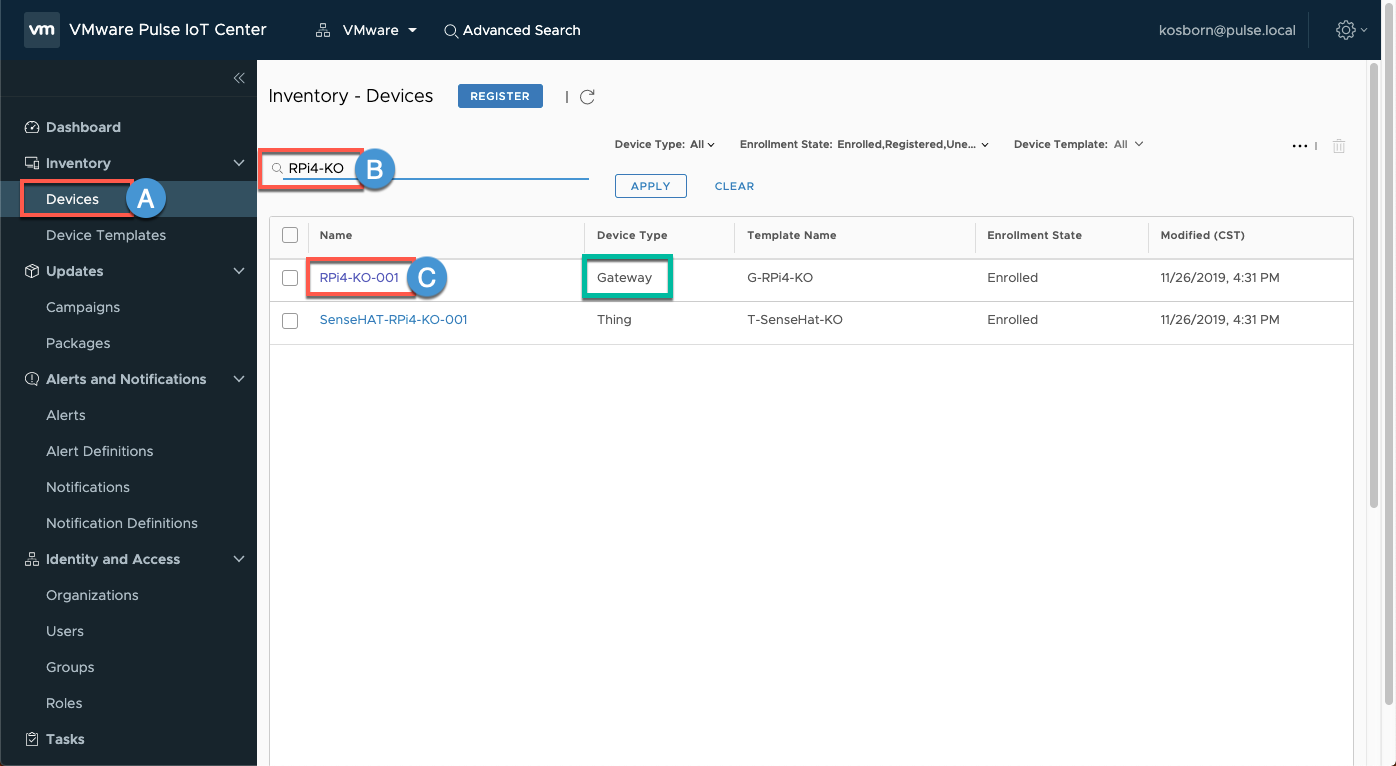
7A Return to the Pulse Console and select Devices
7B (Optional) Set a Search Filter using all or a portion of your Gateway Name
7C Click your Gateway
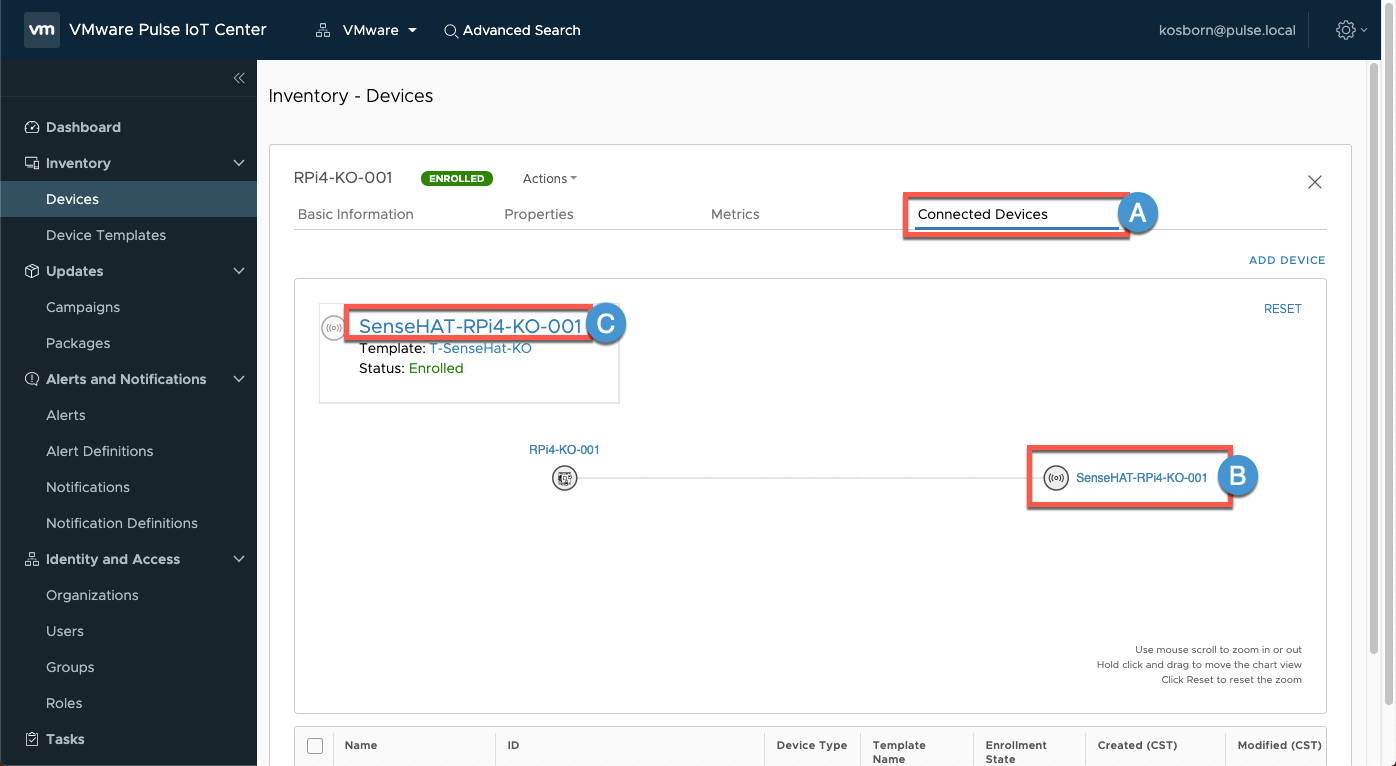
8A Click Connected Devices and note that your SenseHat is now visually illustrated as a Connected Thing to your Gateway
8B Click (Your SenseHat Name)
8C Note that your SenseHat is in an Enrolled state
8D Click (Your SenseHat Name)
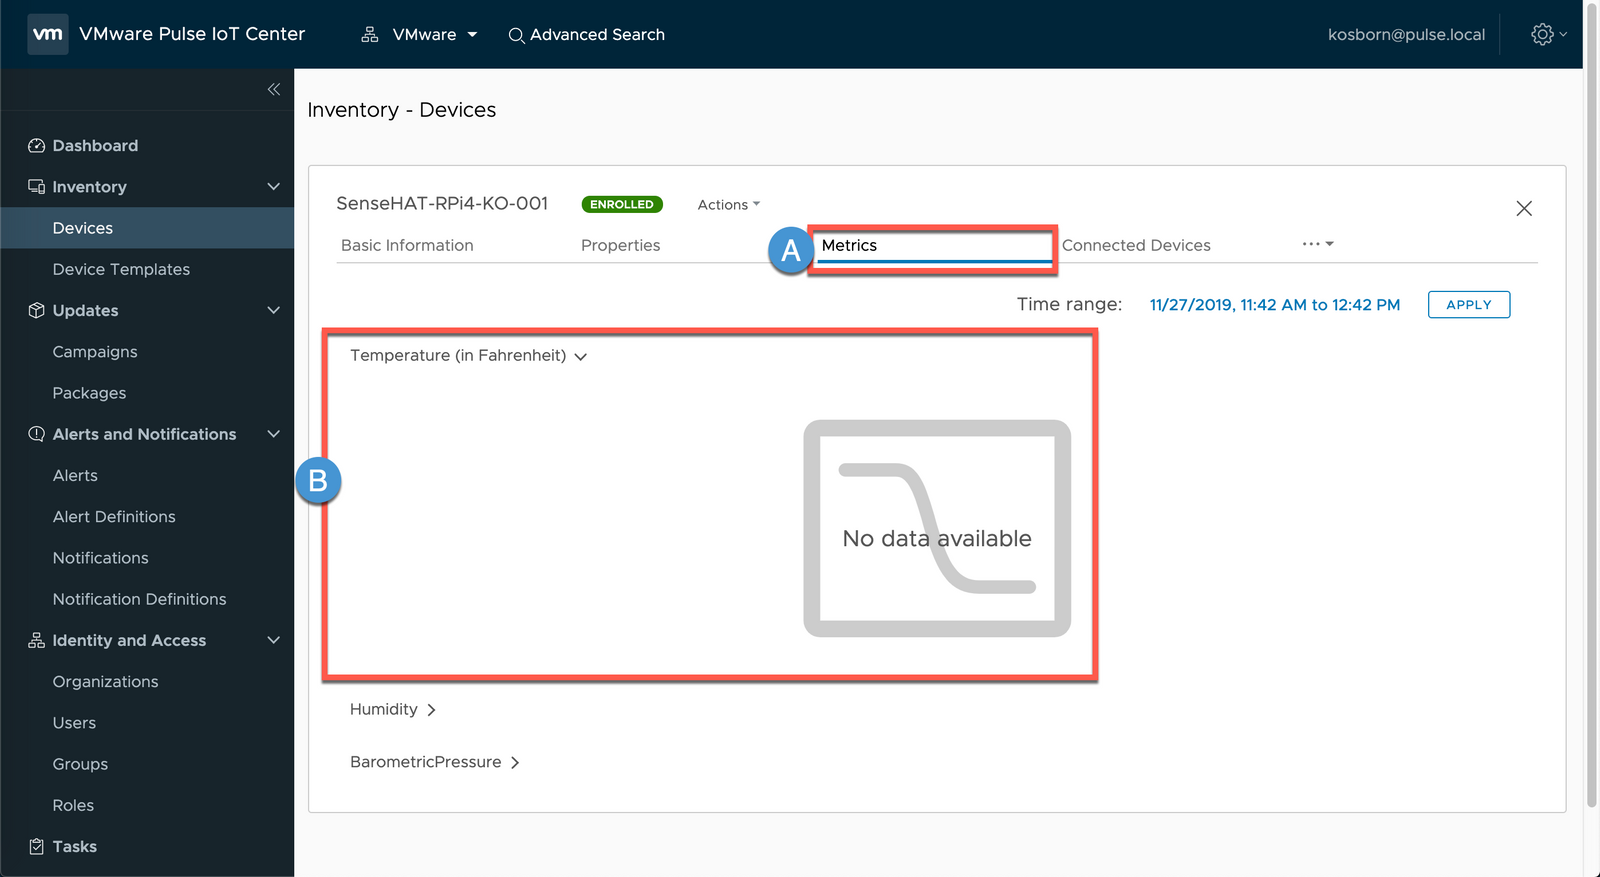
9A Click Metrics
9B Note that there is currently ’No data available’ (we will address this next via the Gateway)
Configure Gateway to send Thing Metrics to Pulse
1 Return to your SSH session and change into your /tmp folder
cd /tmp

2 Copy/Paste or Type the following to clone files from our pulse-eval GitHub
git clone https://github.com/IoT-Ken/pulse-eval.git

3 Change into the pulse-eval/sensehat directory
cd pulse-eval/sensehat

4 Type the following to create a new sensehat directory within /opt (in a moment, we are going to configure a new linux ‘sensehat’ service to utilize this location)
mkdir /opt/sensehat

5 Copy files to our newly created directory
cp * /opt/sensehat

6 Change into the /opt/sensehat directory and list out the contents
cd /opt/sensehat
ls

7 Note that we have 3x Python (.py) scripts and and 1x Bash (.sh) script. Issue the following to return the current temperature from your sensehat board
python temperature.py

In a moment, we will see how the sensehat.sh script calls the python scripts to return variable values for Temperature, Humidity and BarometricPressure
8 Set your sensehat.sh script to executable
chmod +x sensehat.sh

9 Execute the sensehat.sh script
./sensehat.sh

Our sensehat script is gathering environmental data and sending that to Pulse! While we let this script run for awhile, let’s examine the contents of the script and explain how it is working.
10A This portion of the script sets a variable containing the path to the Pulse Agent /bin folder

11B In the next section we set variables equal to the Unique ID values for our Gateway and SenseHat Thing using the DefaultClient ‘get-devices’ parameter

12A Next we start a while loop
12B We then create Variables for Temp, Humidity and Pressure (which retreive their values by calling the associated Python scripts)

13A Here we create an UP variable that retreives the Uptime of the Gateway

14A Next we utilize the DefaultClient ’send-metric’ and ’send-properties’ parameters to send our Sensehat Environmental metrics and Gateway Uptime to Pulse

15A Finally, we set a sleep command that tells the While loop to repeat every 30 seconds

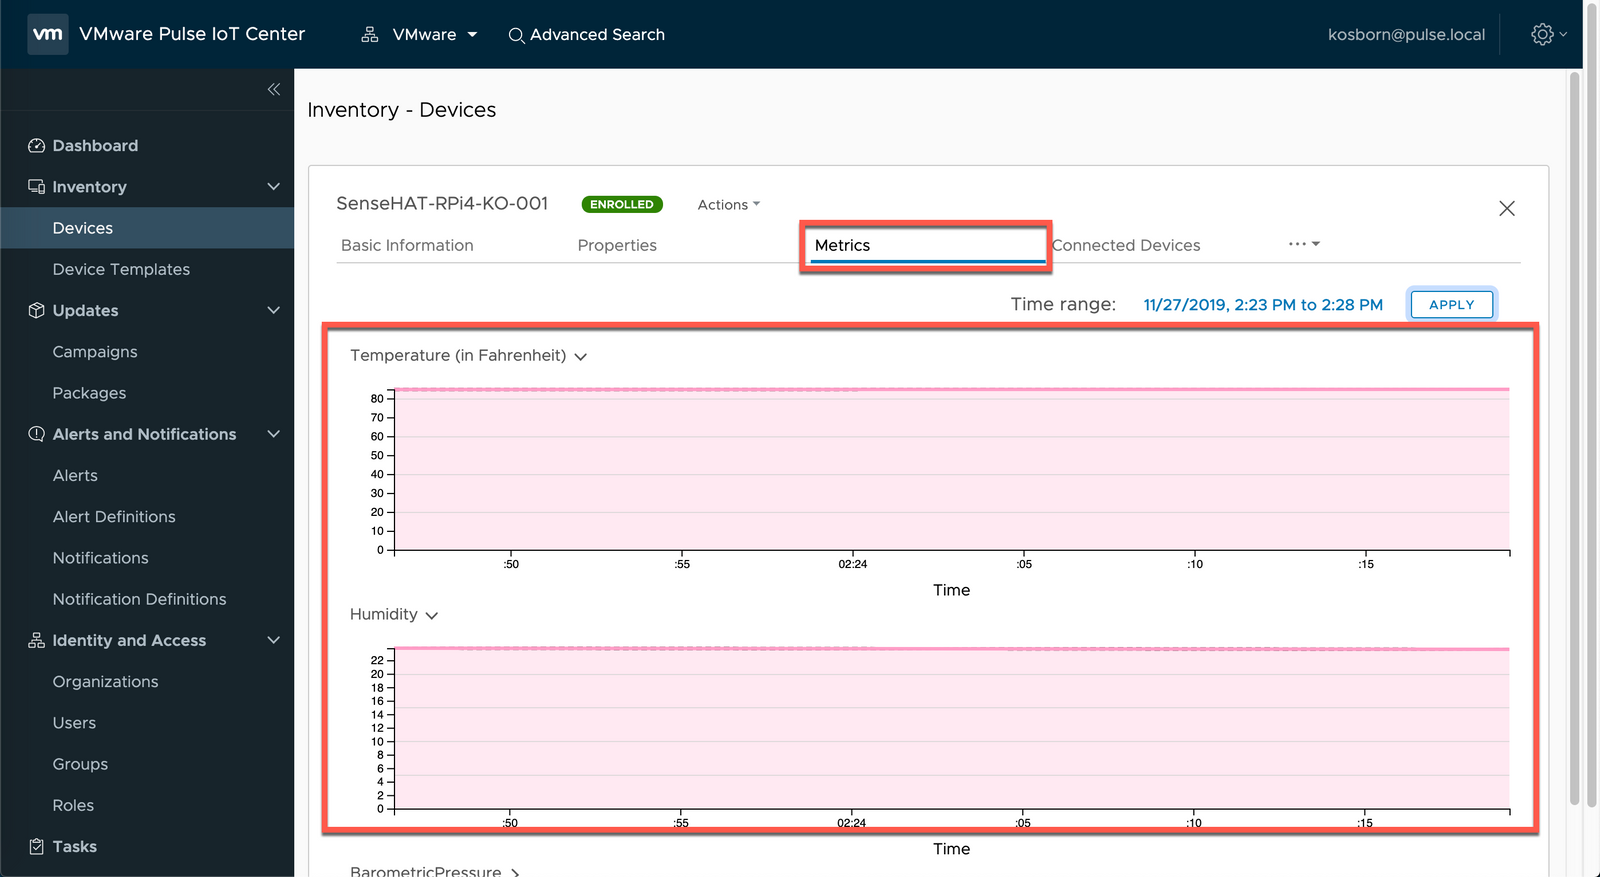
16A Return to the Pulse Console and note that the SenseHAT is now reporting environmental Metrics
Configure SenseHAT Linux Service
For our final step, let’s configure a Linux Service to call the sensehat.sh script programatically so we don’t have to run the script manually
1 In your SSH session, press CTRL-C or Q to exit the script runtime then change into the /etc/systemd/system directory
cd /etc/systemd/system
2 Use Nano to create a service descriptor file
nano sensehat.service
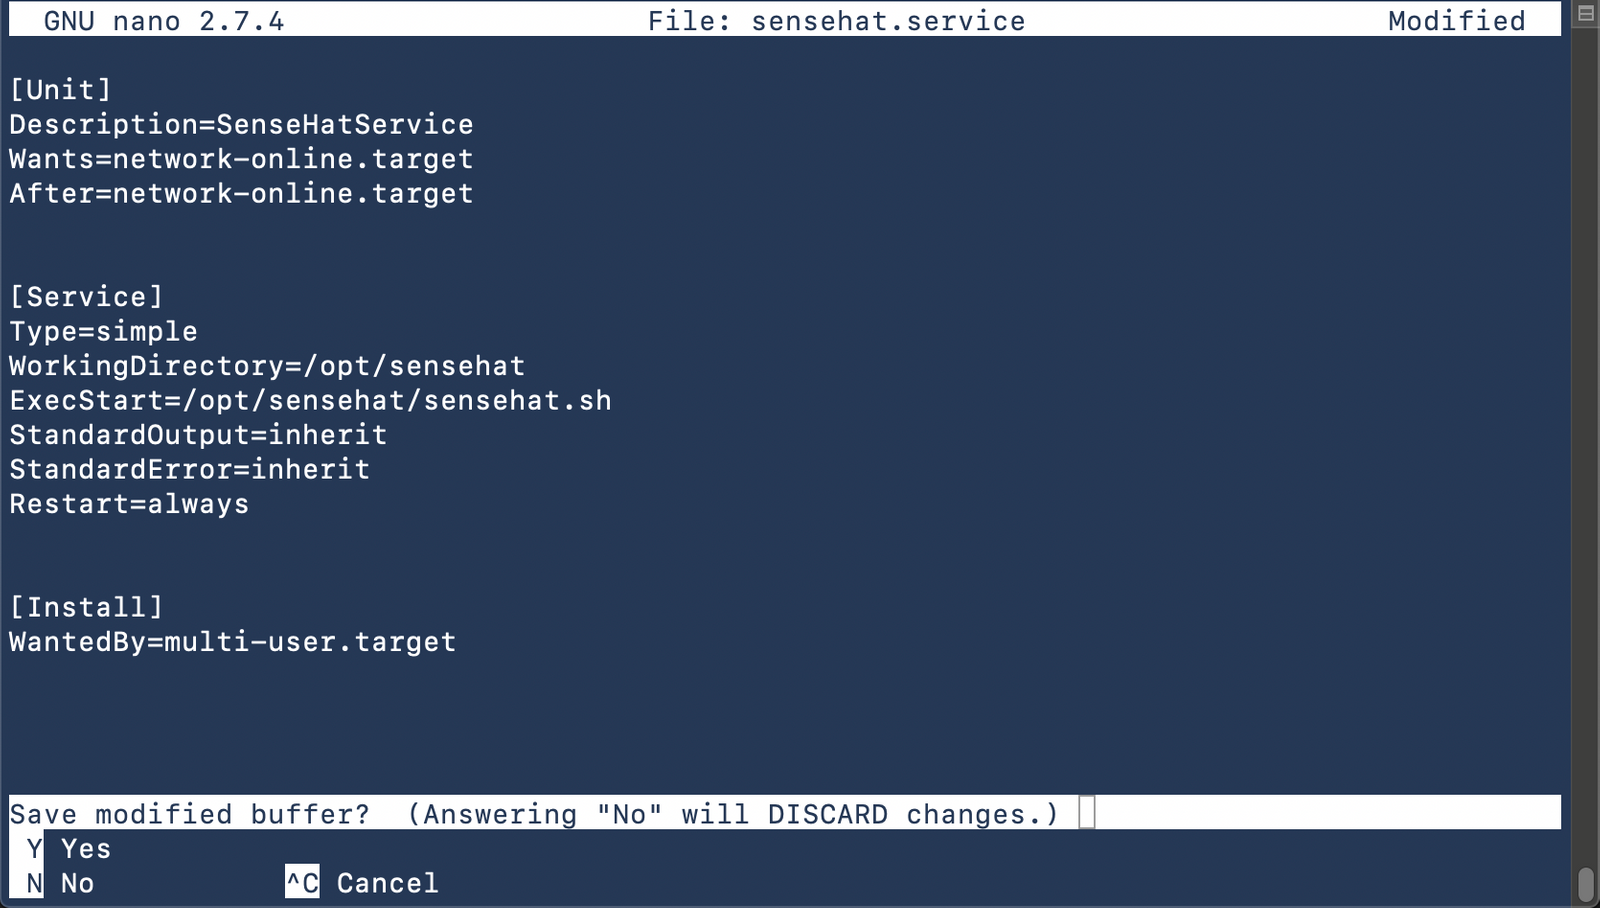
3 Copy/Paste in the following contents
[Unit]
Description=SenseHatService
Wants=network-online.target
After=network-online.target
[Service]
Type=simple
WorkingDirectory=/opt/sensehat
ExecStart=/opt/sensehat/sensehat.sh
StandardOutput=inherit
StandardError=inherit
Restart=always
[Install]
WantedBy=multi-user.target
4 Press Ctrl-X to Exit and then press Y followed by Enter to save
 5 Set the proper file permissions
chmod 644 sensehat.service

6 Reload your linux services
systemctl daemon-reload

7 Enable the sensehat service
systemctl enable sensehat.service

8 Start the sensehat service
systemctl start sensehat

9 Check the service status
systemctl status sensehat
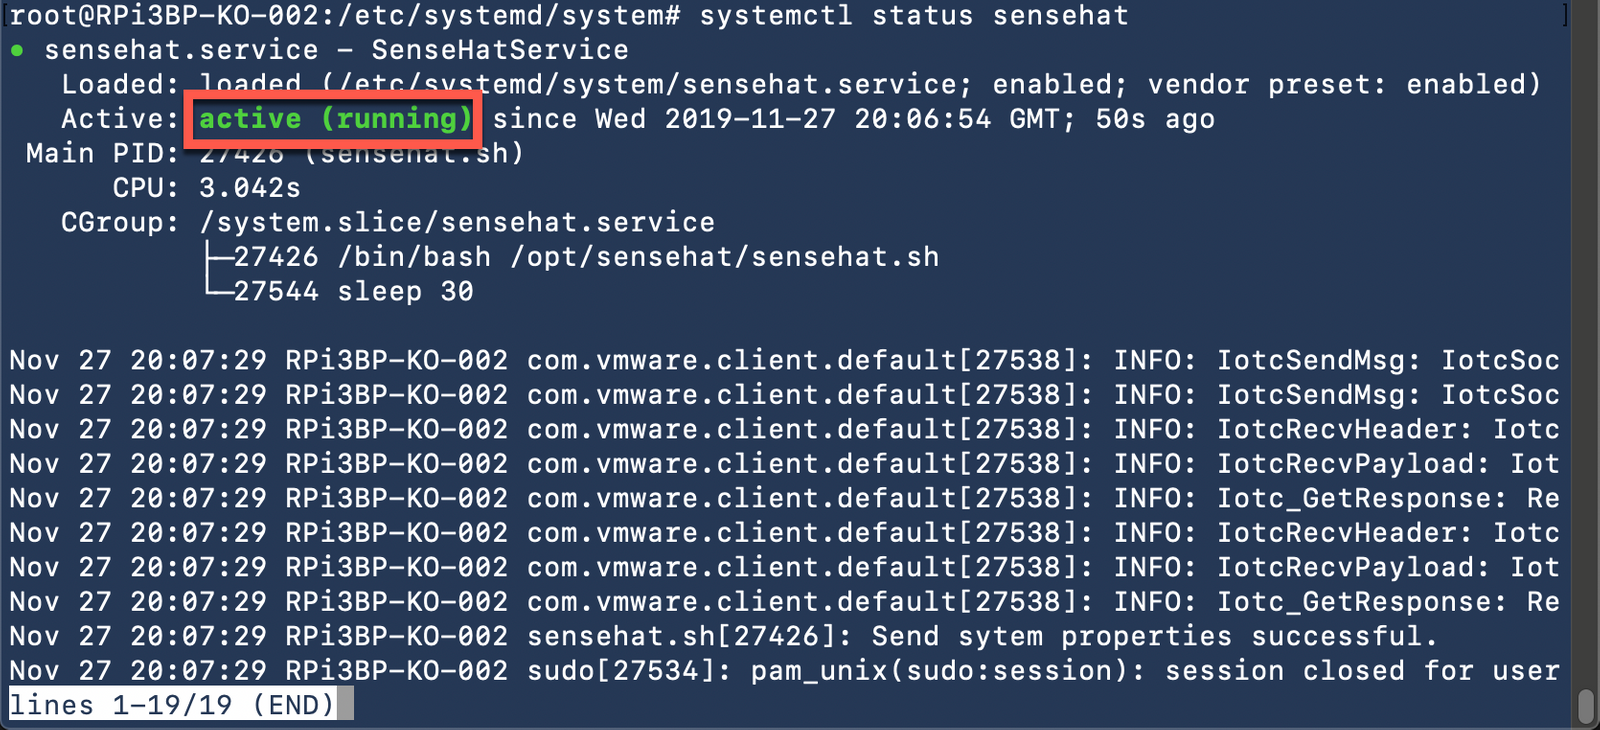
Your SenseHat is now programatically sending Environmental Data to Pulse.
Thank you - this concludes our ‘Onboard Things’ Step
comments powered by Disqus