Overview
1 Create Device Template via Pulse UI
2 Download and Install Pulse Agent
3 Onboard Gateway using Token Authentication
This guide is written to apply for onboarding a Raspberry Pi as an IoT Gateway into Pulse. A similar methodology can be applied to other Gateway types; however, there will need to be modifications performed if not using an ARM based Gateway, as one example.
Steps
Create Device Template via Pulse UI
Login to Pulse Console
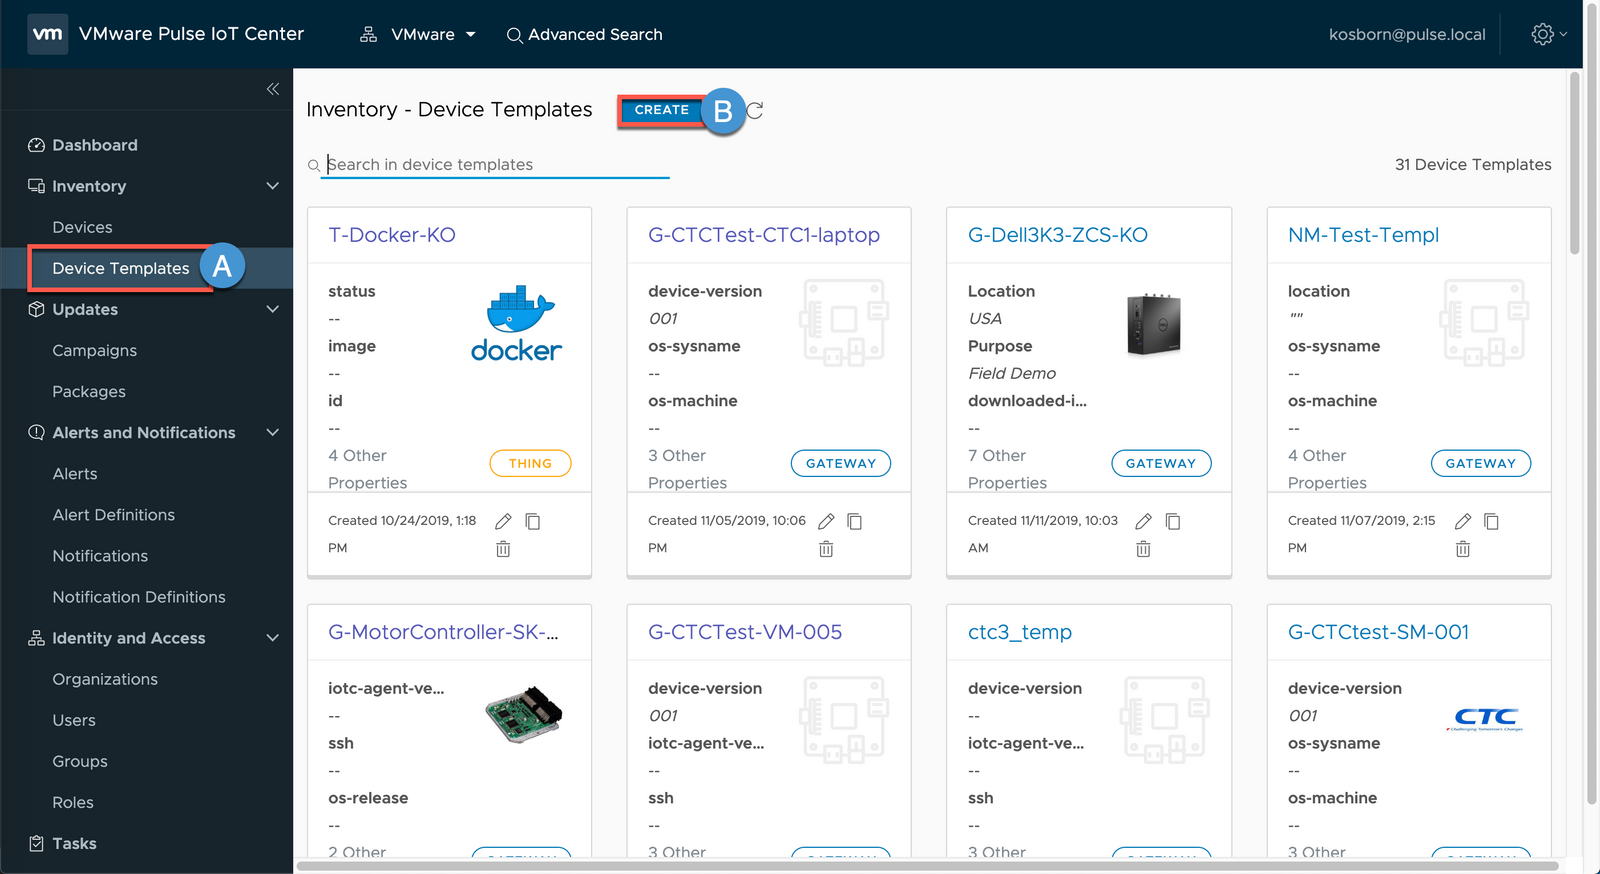
1A Select Inventory\Device Templates
1B Click Create
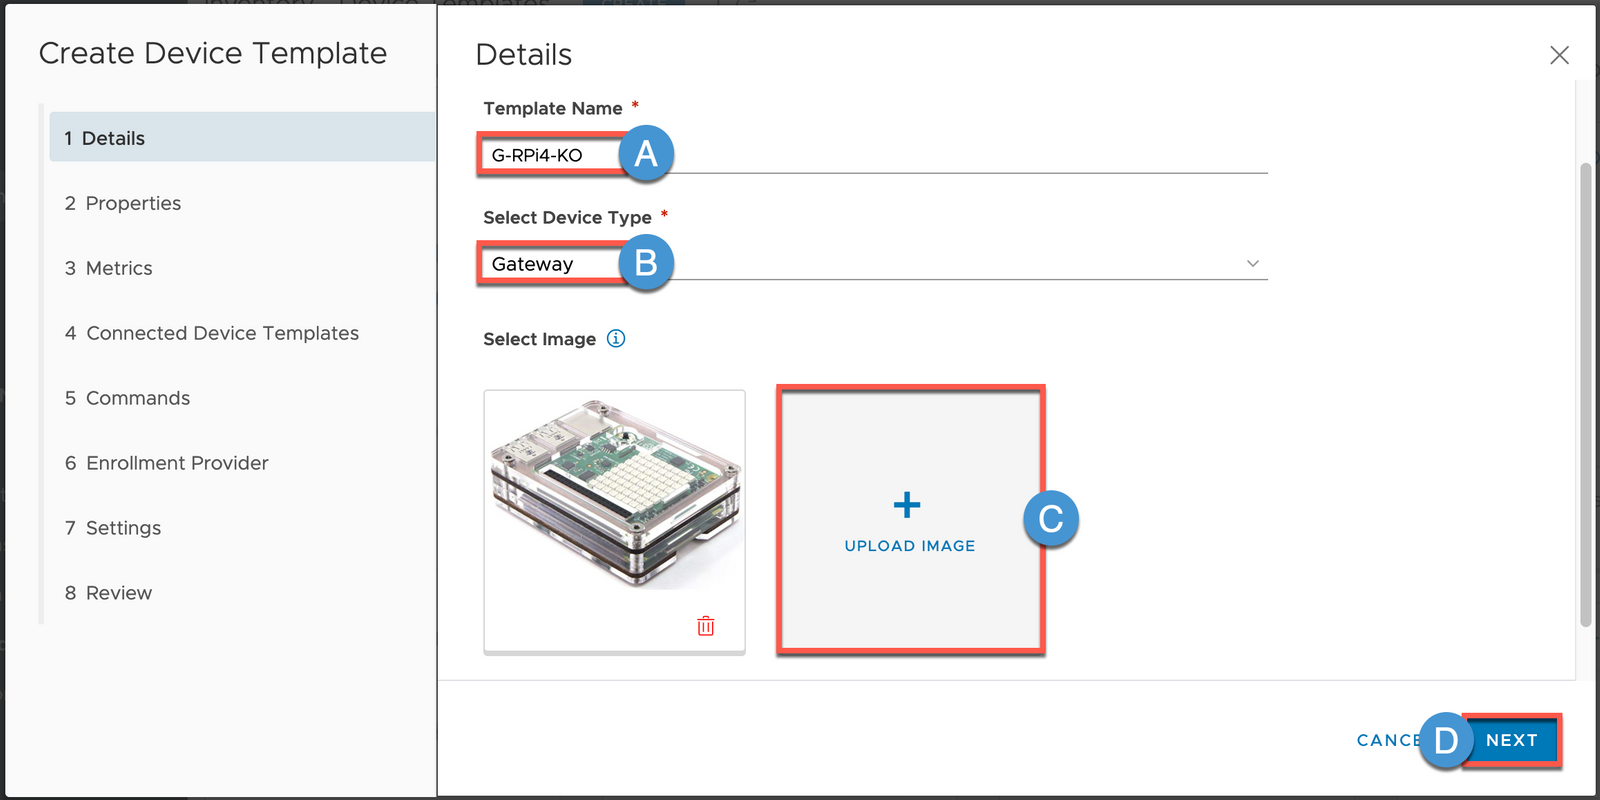
2A Enter Template Name
2B Select Gateway for Device Type
2C (Optional) Upload Image
2D Click NEXT
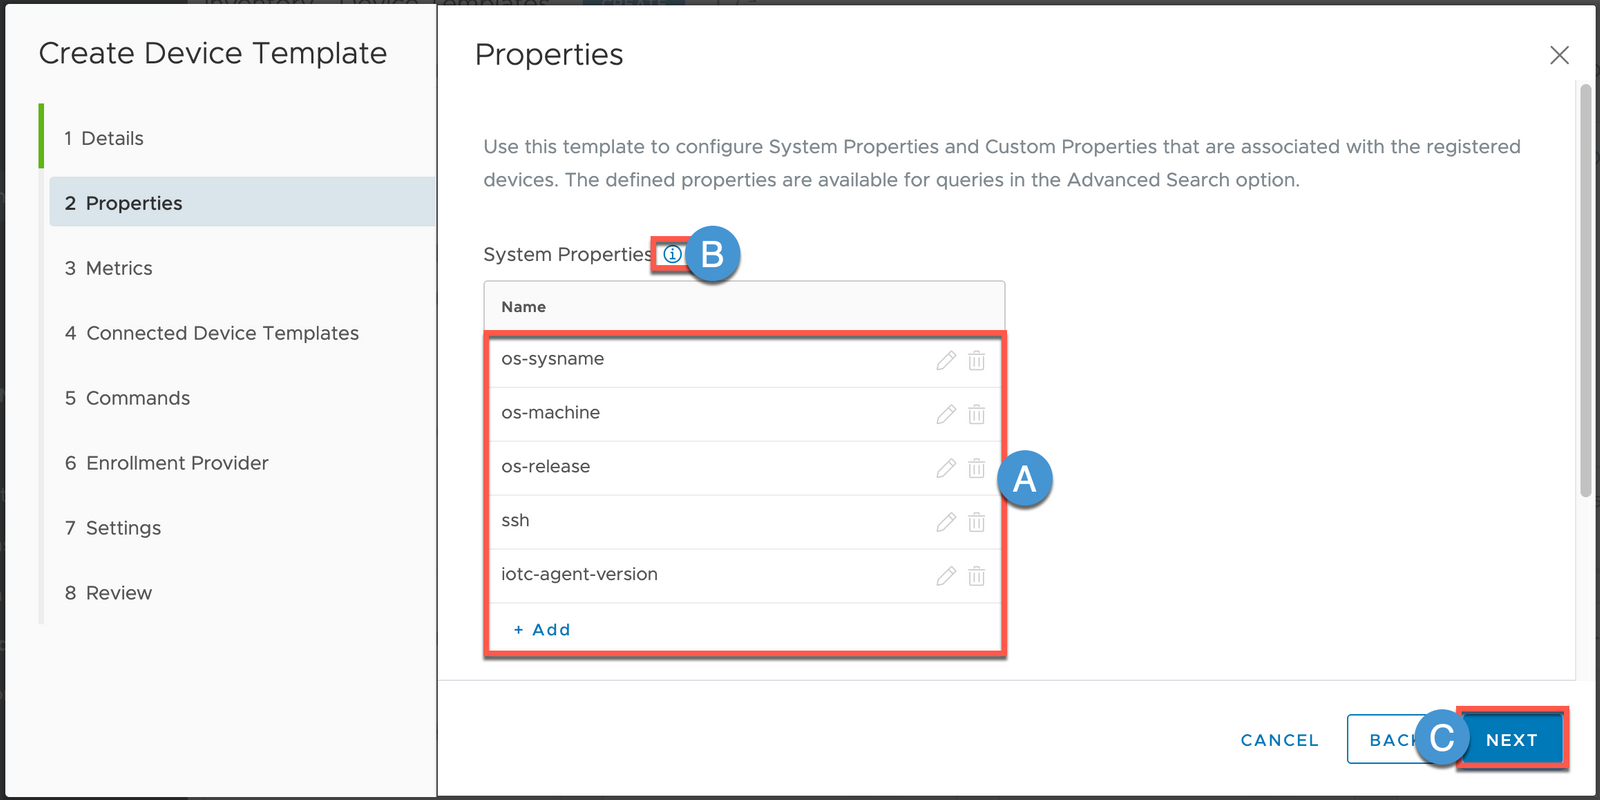
3A Additional System Properties and Custom Properties can be configured. For now, we will accept the default System Properties.
3B Note that you can mouse over the (i) tooltips for additional information)
3C Click NEXT
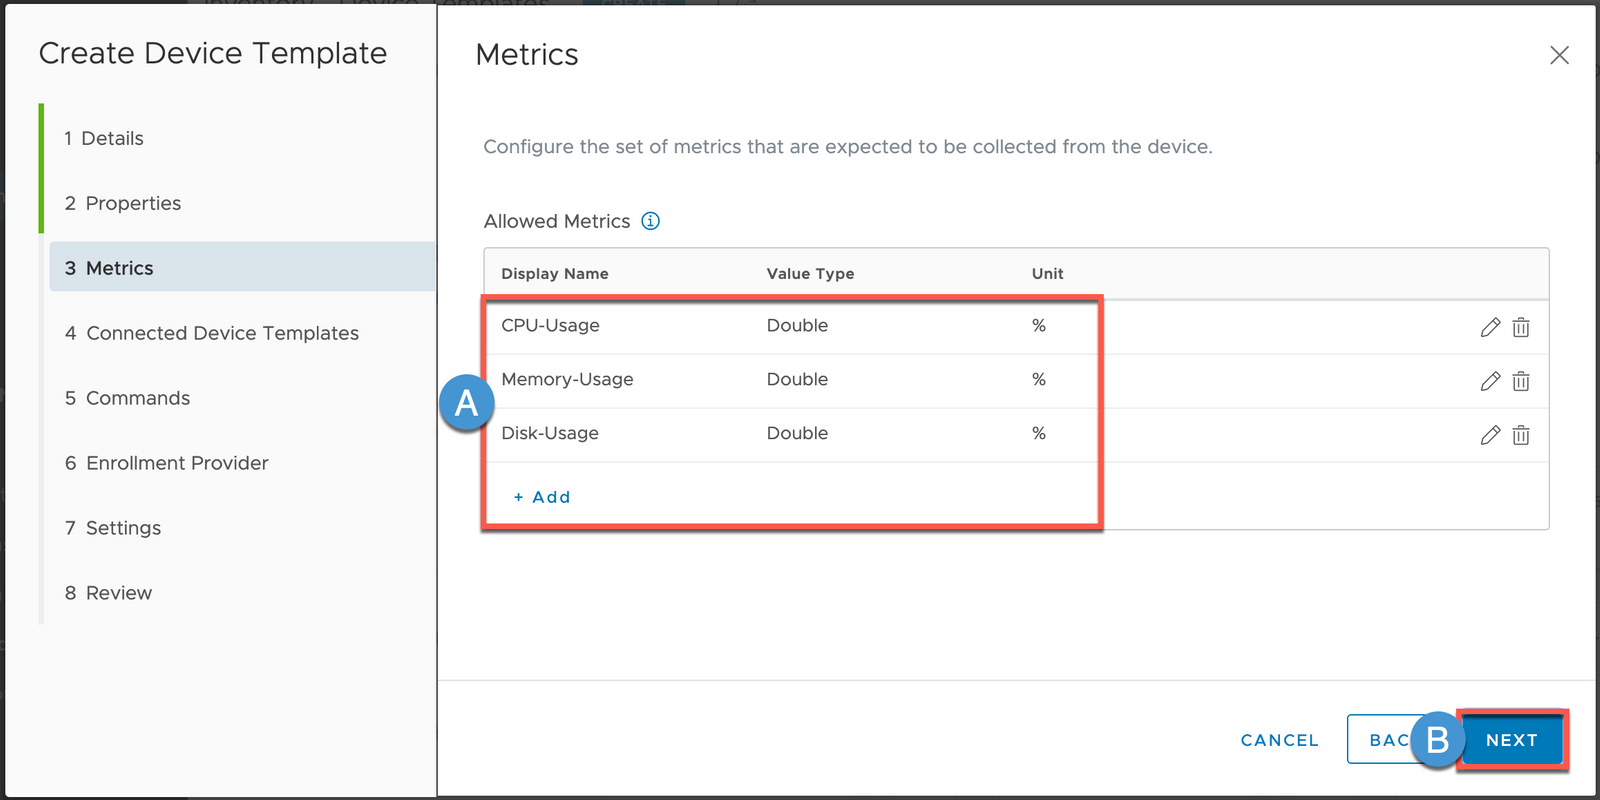
4A Additional Metrics can be configured. For now, accept the defaults Metrics.
4B Click NEXT
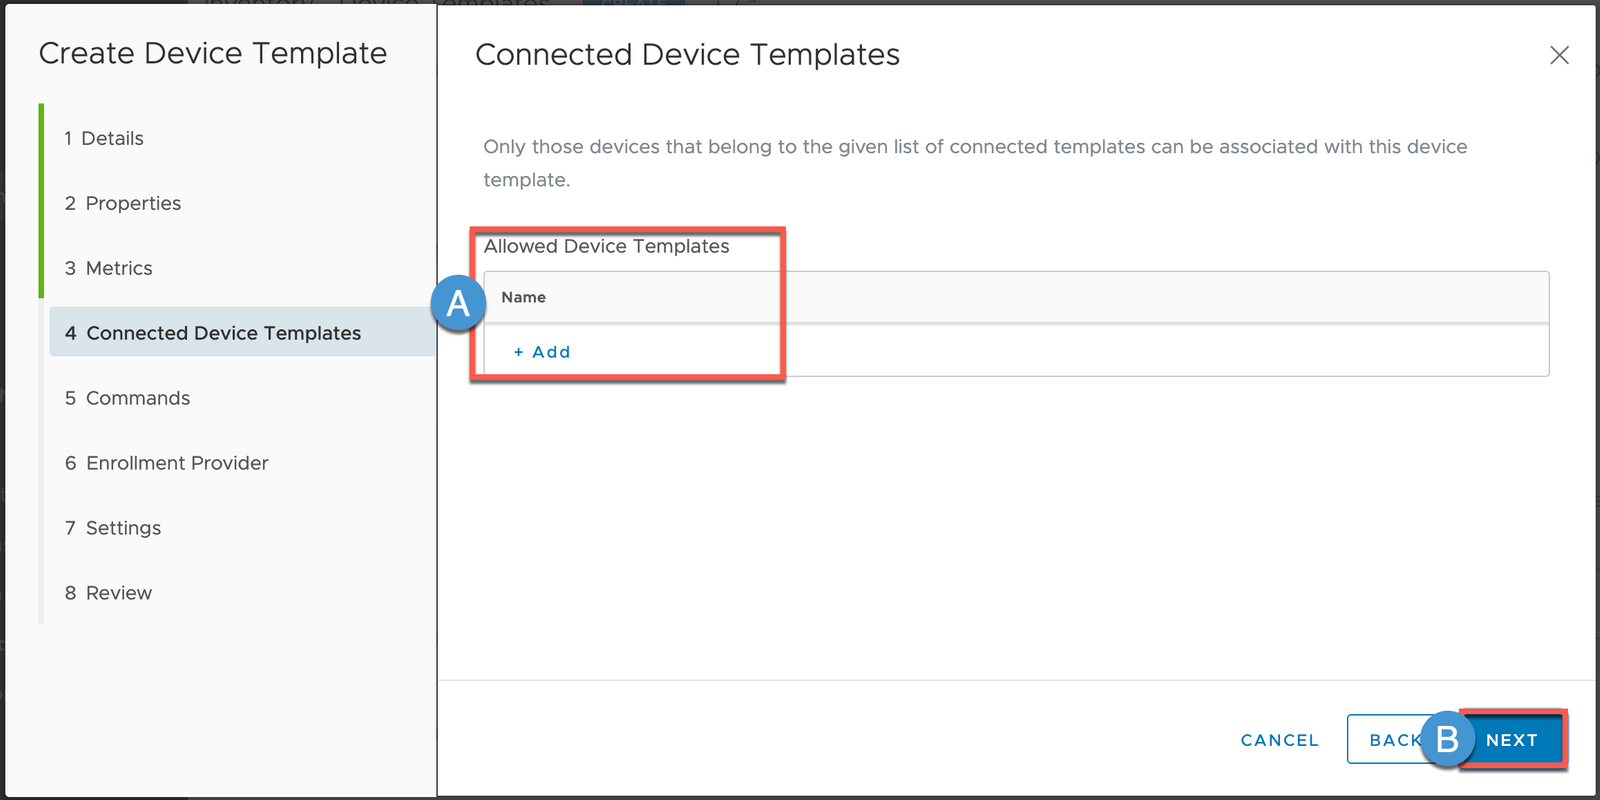
5A Here you can add Whitelisted (or ‘allowed’) Connected Things. We will modify the template later during the ‘Onboard Things’ Guide.
5B Click NEXT
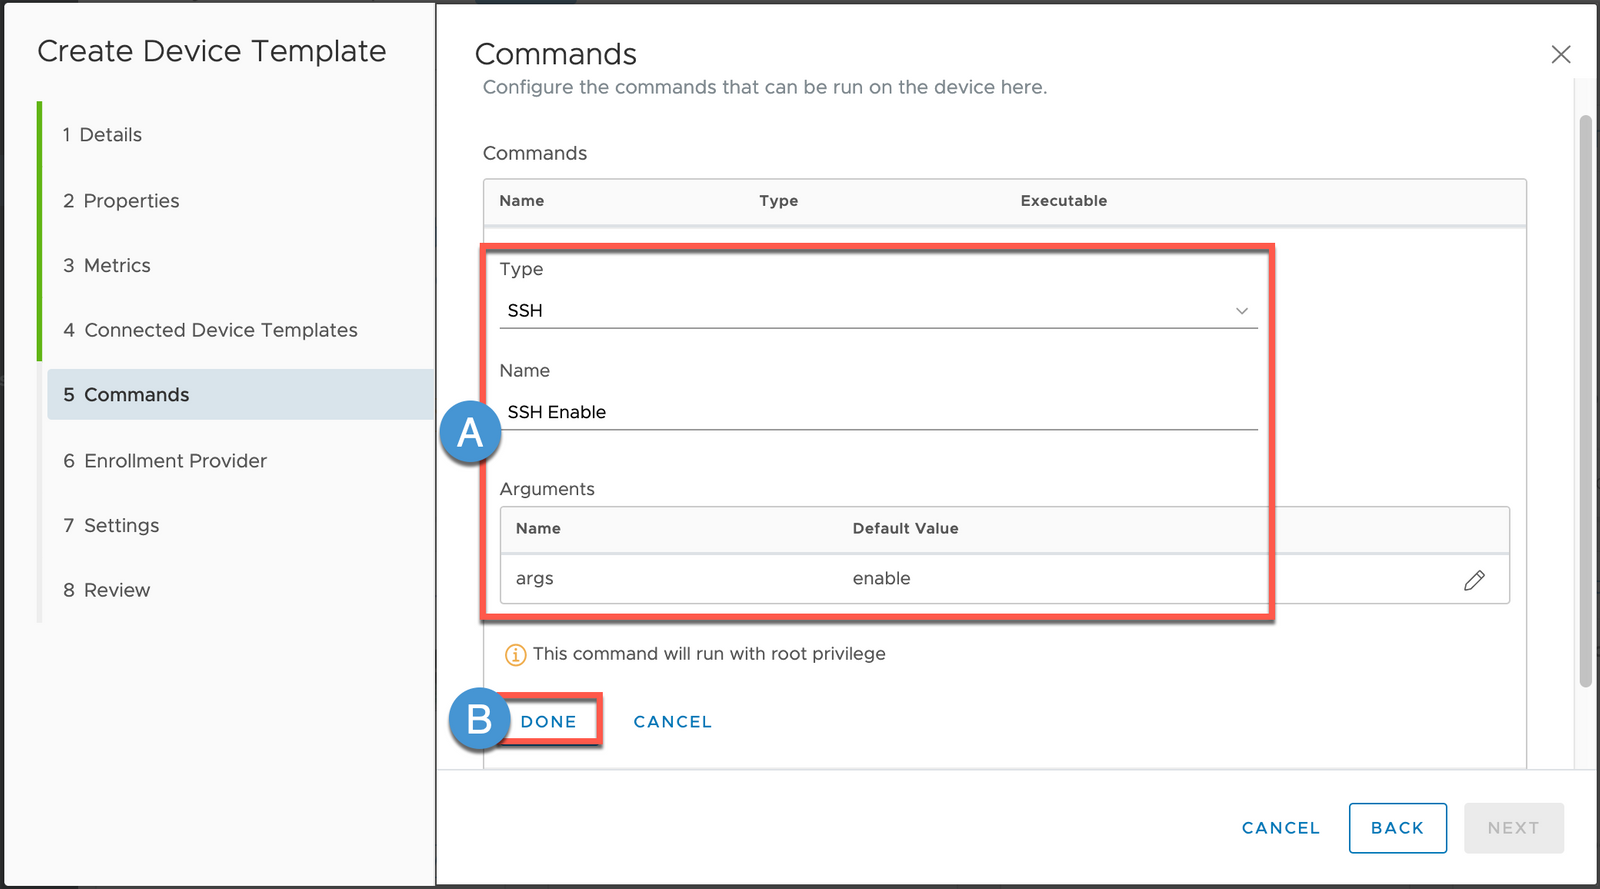
Pulse allows you to Send Commands to remote Gateway(s).
6A Click + Add and build out the following:
Type: SSH
Name: SSH Enable
Confirm Arguments Name: args
Confirm Arguments Default Value: enable
6B Click DONE
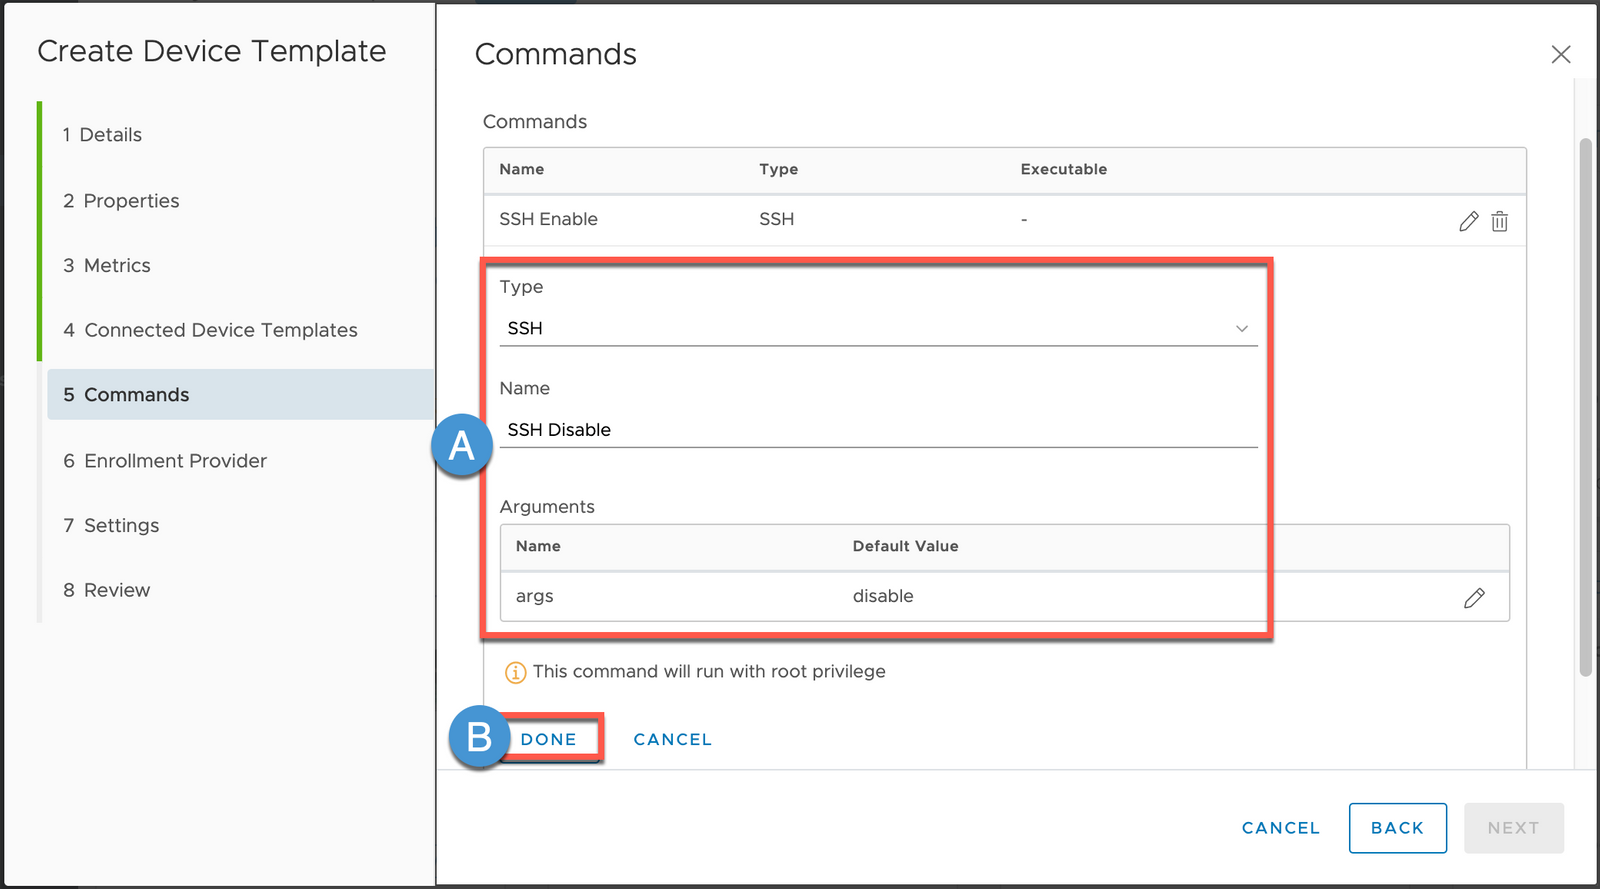
7A Click + Add and build out the following:
Type: SSH
Name: SSH Enable
Confirm Arguments Name: args
Edit Arguments Default Value: disable
7B Click DONE
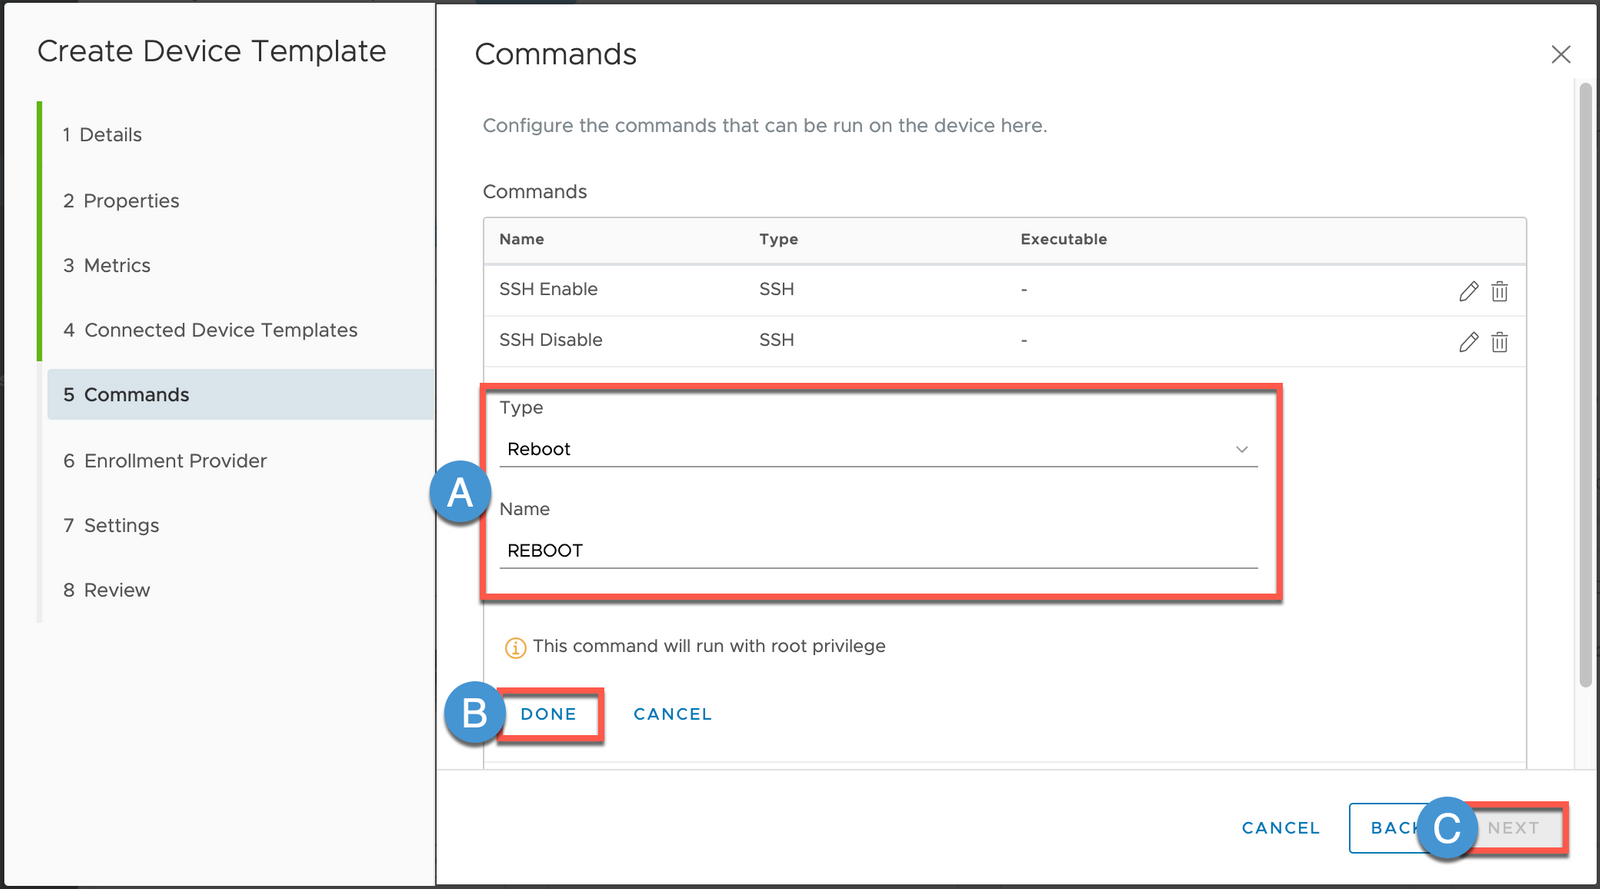
8A Click + Add and build out the following:
Type: Reboot
Confirm Name: REBOOT
Edit Arguments Default Value: disable
8B Click DONE
8C Click NEXT
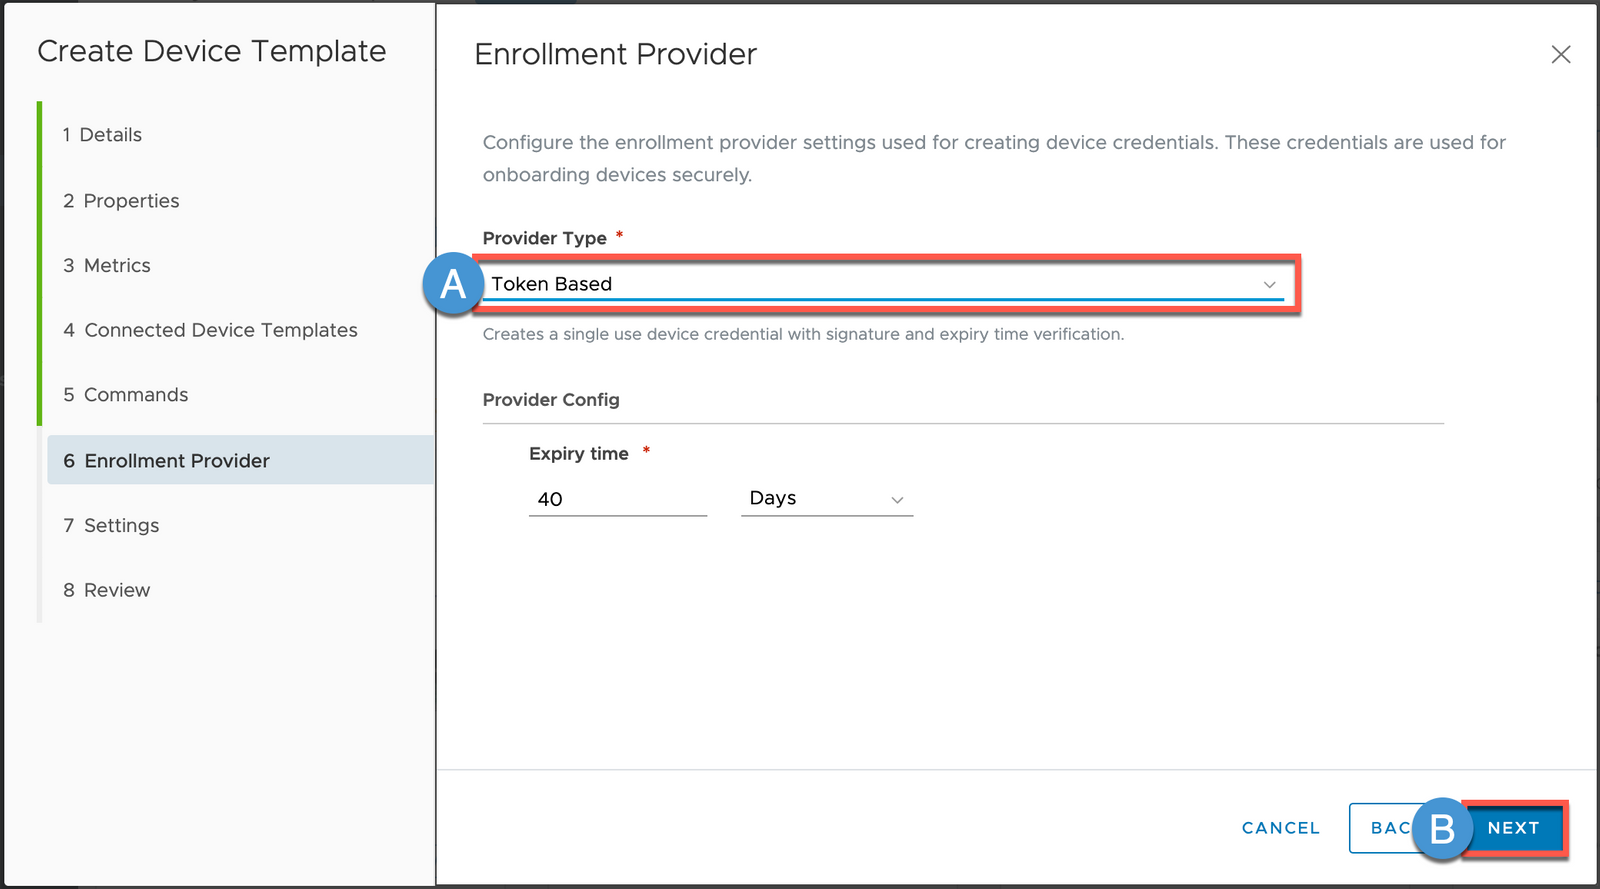
There are several Enrollment Provider types available to utilize for Device Onboarding. We will go into more detail on how utilize the different types later in this Eval Process.
9A For now, select the default Token Based and
9B Click NEXT
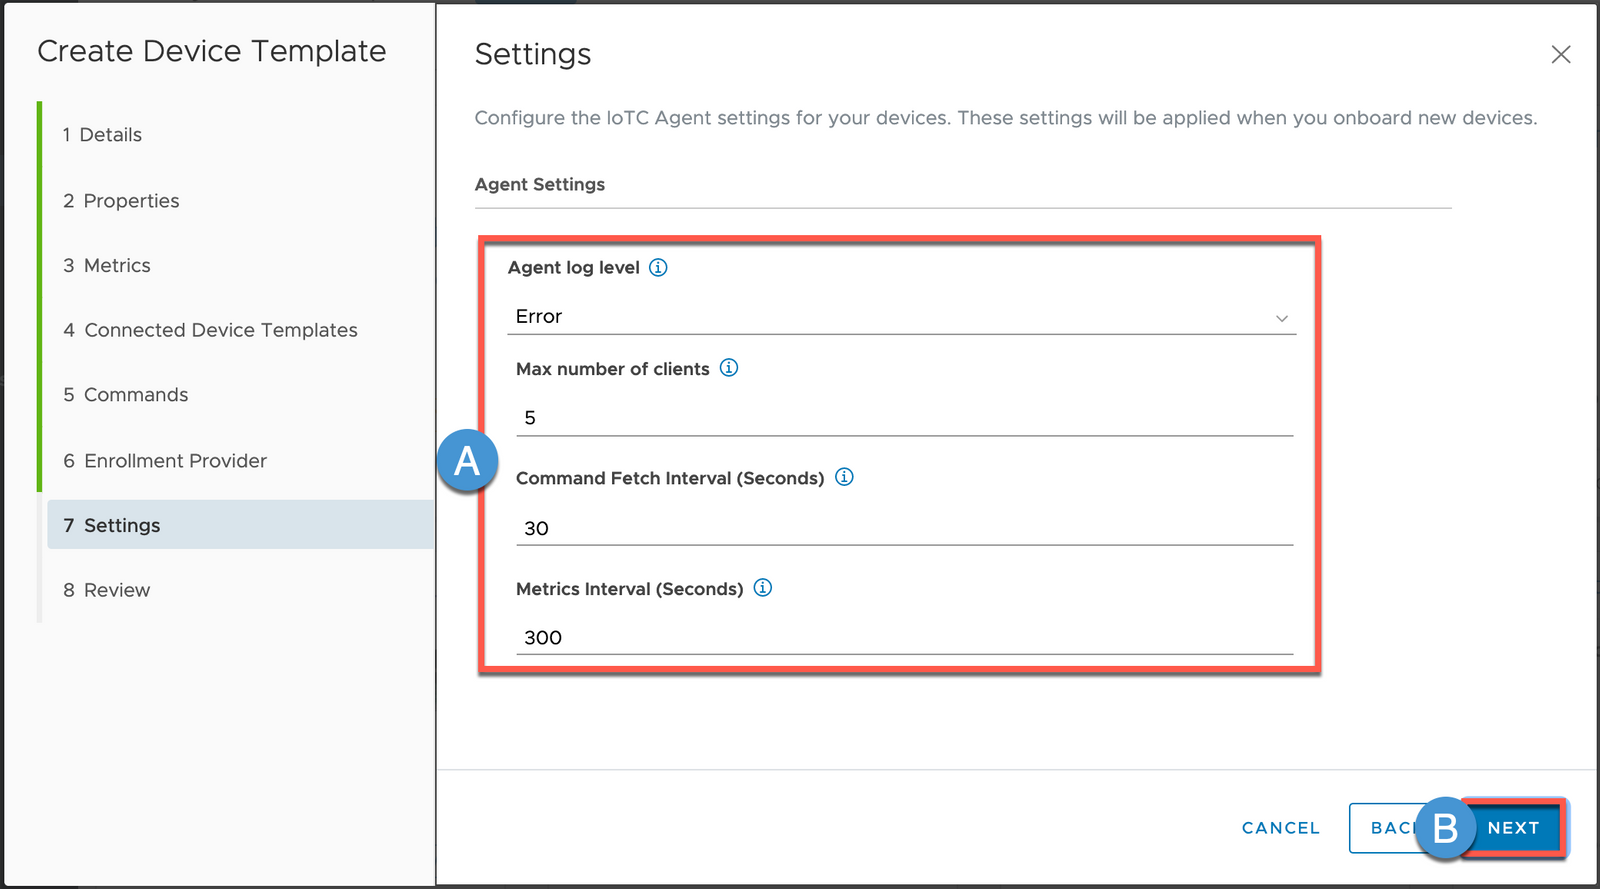
10A Mouse over the tooltips (i) that describe the various settings
10B Leave the default settings in place and click NEXT
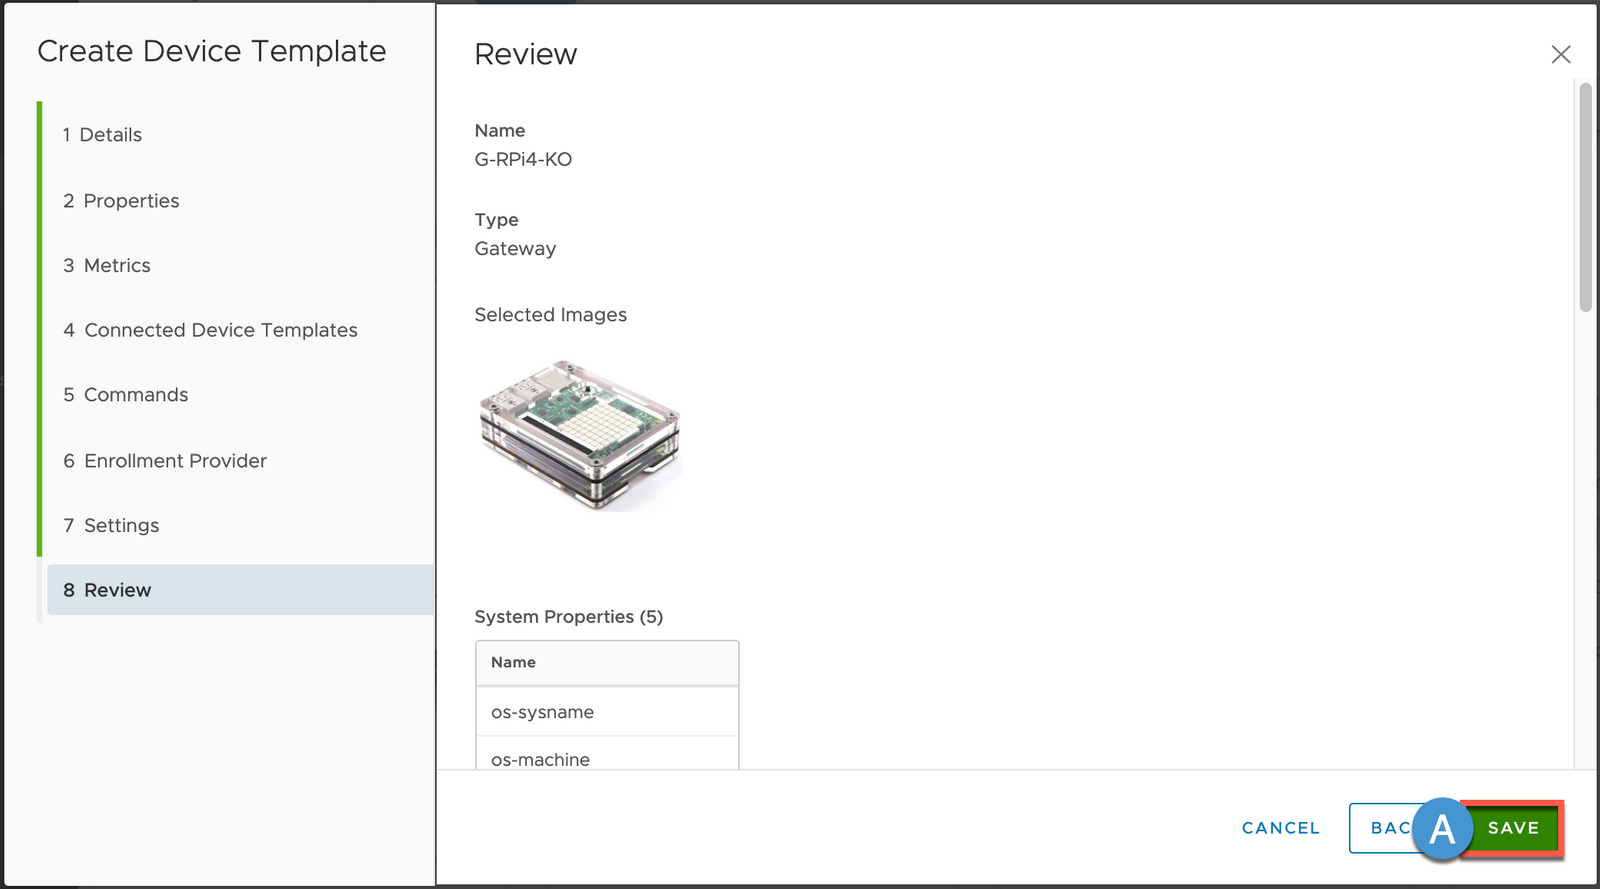
11A Click SAVE
Download and Install Pulse Agent
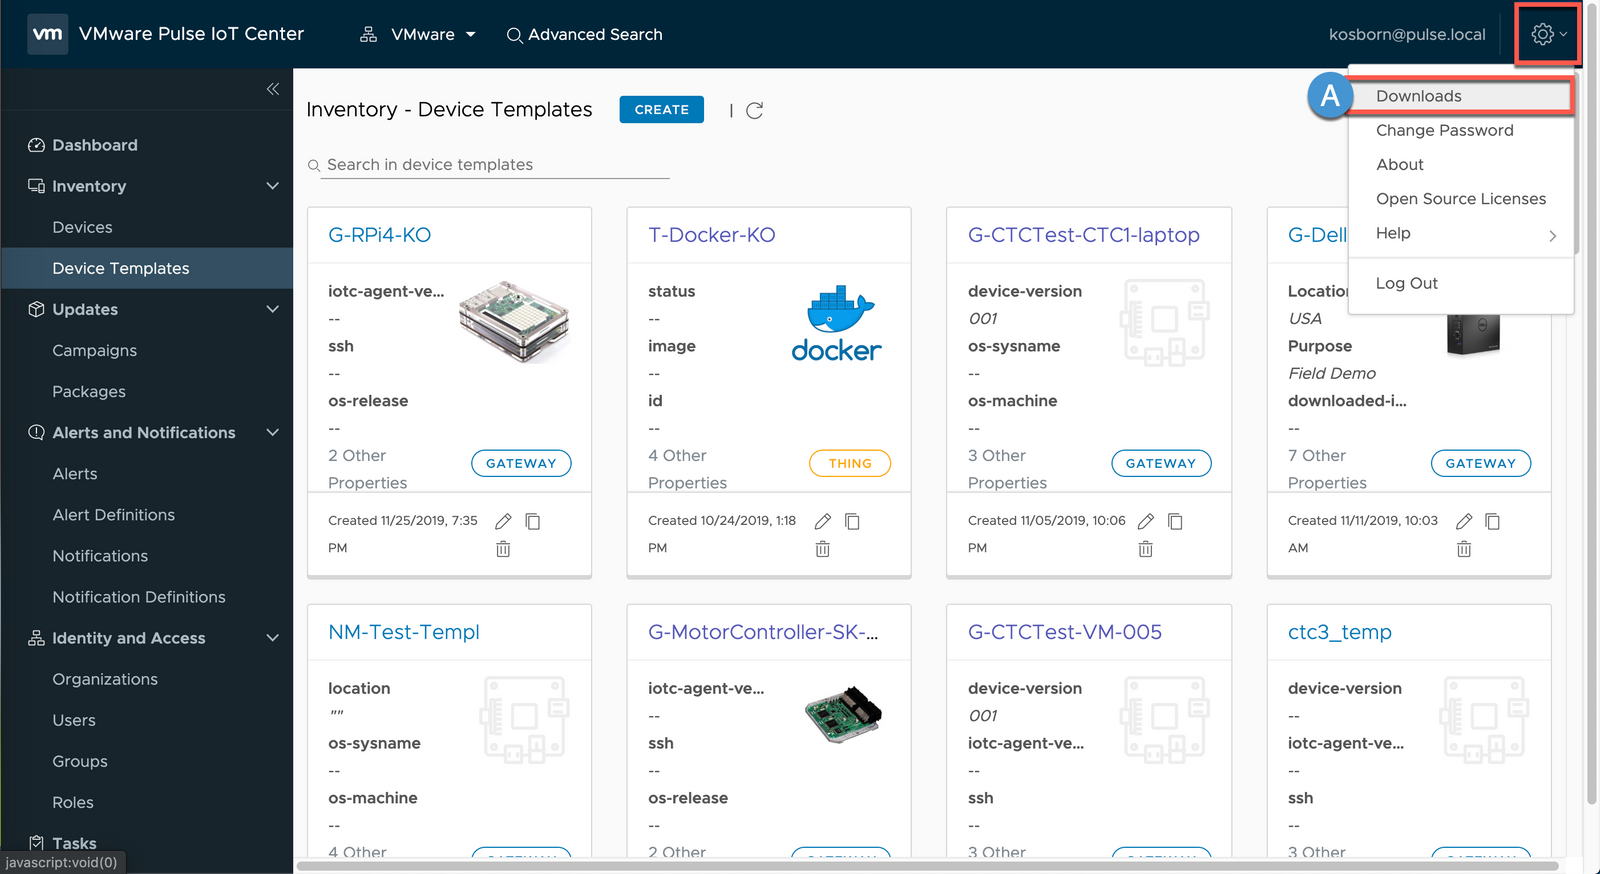
1 Return to the Pulse Console
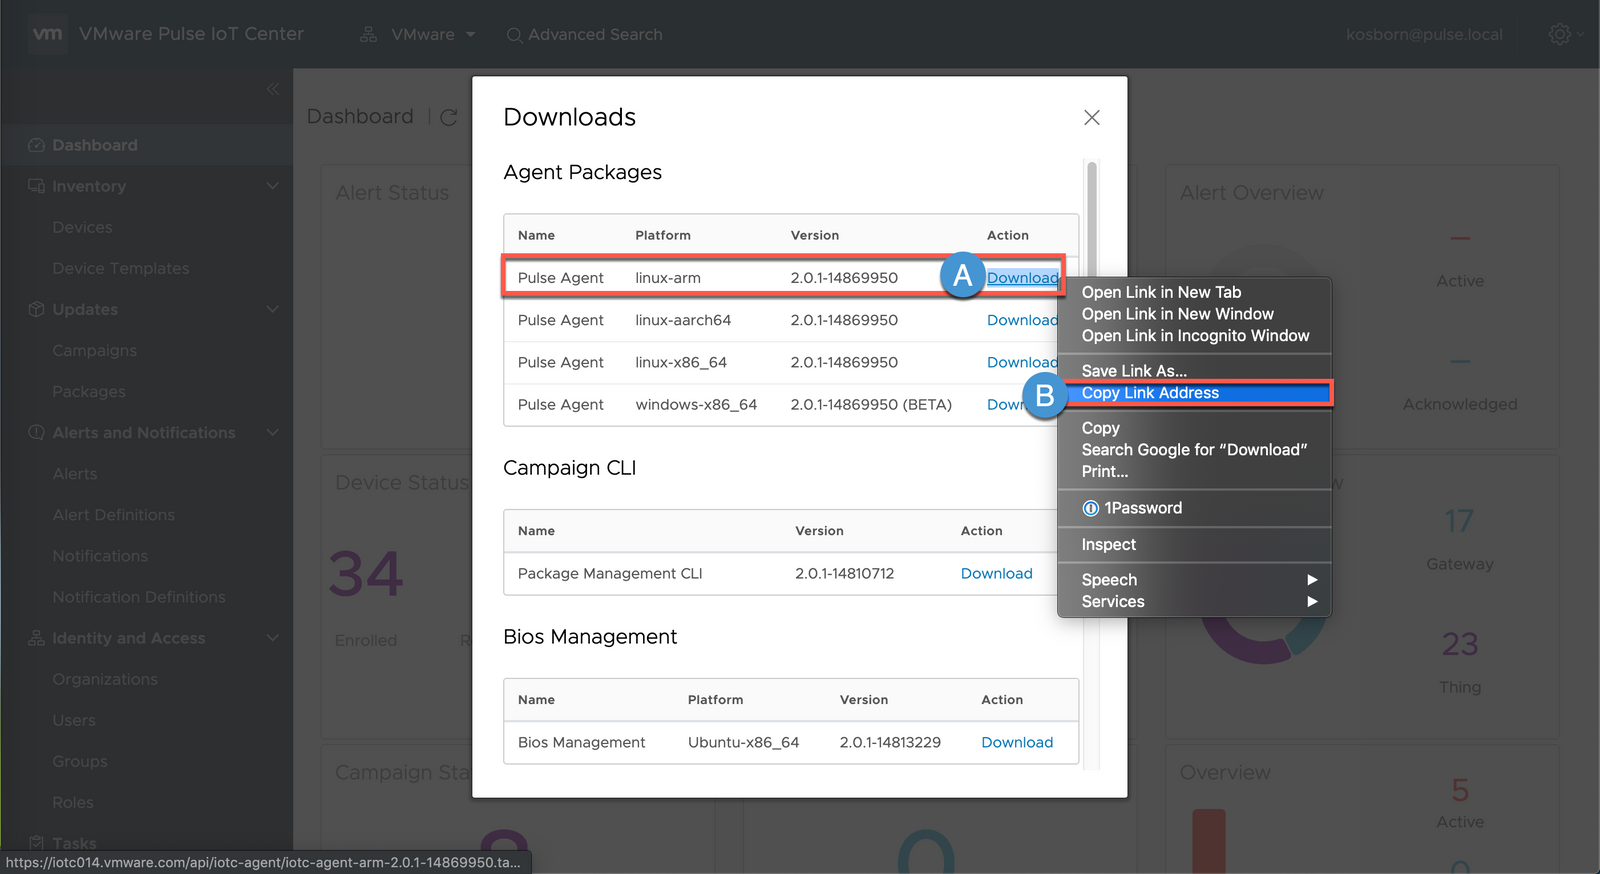
2A Click the Gear Icon and Select Downloads
4A Right-click the 'Pulse Agent linux-x86_64 2.0.1-14869950 Download' link
4B Select Copy Link Address
5 SSH to your Raspberry Pi
ssh username@[IP address]

6 su up
sudo su

7A cd /tmp then issue the following command
curl -o iotc-agent.tar.gz (paste in download link from your clipboard)

8 Extract the downloaded tarball, change into the expanded directory and run ./install.sh
tar -xvf iotc-agent.tar.gz
cd iotc-agent
./install.sh

9 Confirm that the Pulse Agent is running (note that you may see errors in your output - these are expected at this time)
service iotc-agent status

(Press Ctrl-C or Q to exit)
Onboard Gateway using Token Authentication
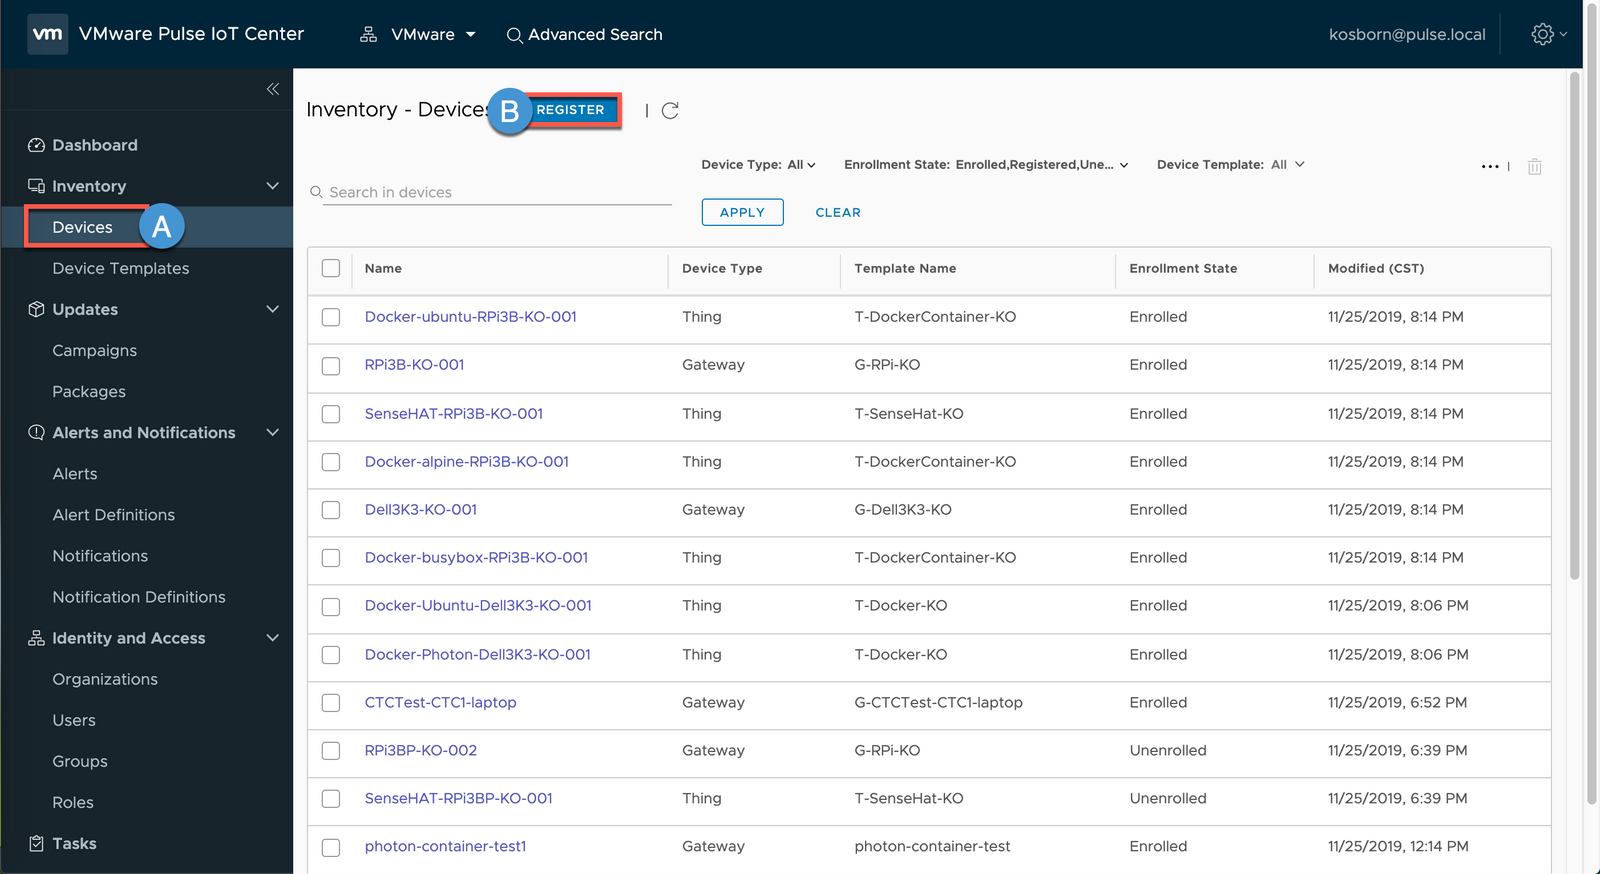
1A Return to the Pulse UI and select Devices
1B Click REGISTER
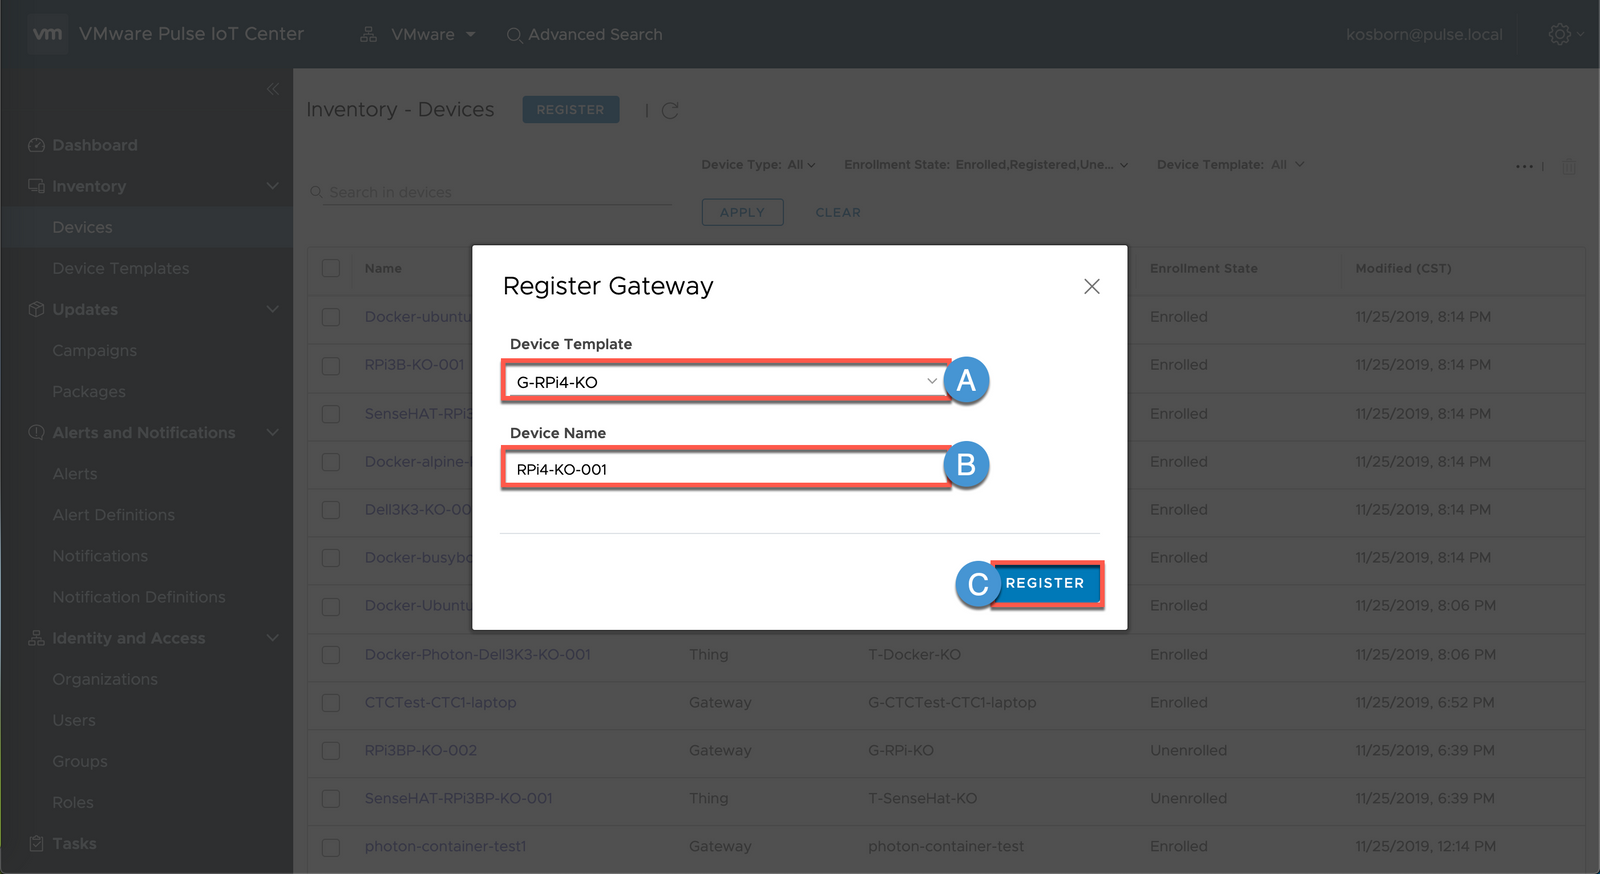
2A Select the Device Template that you created previously
2B Enter Device Name
2C Click REGISTER
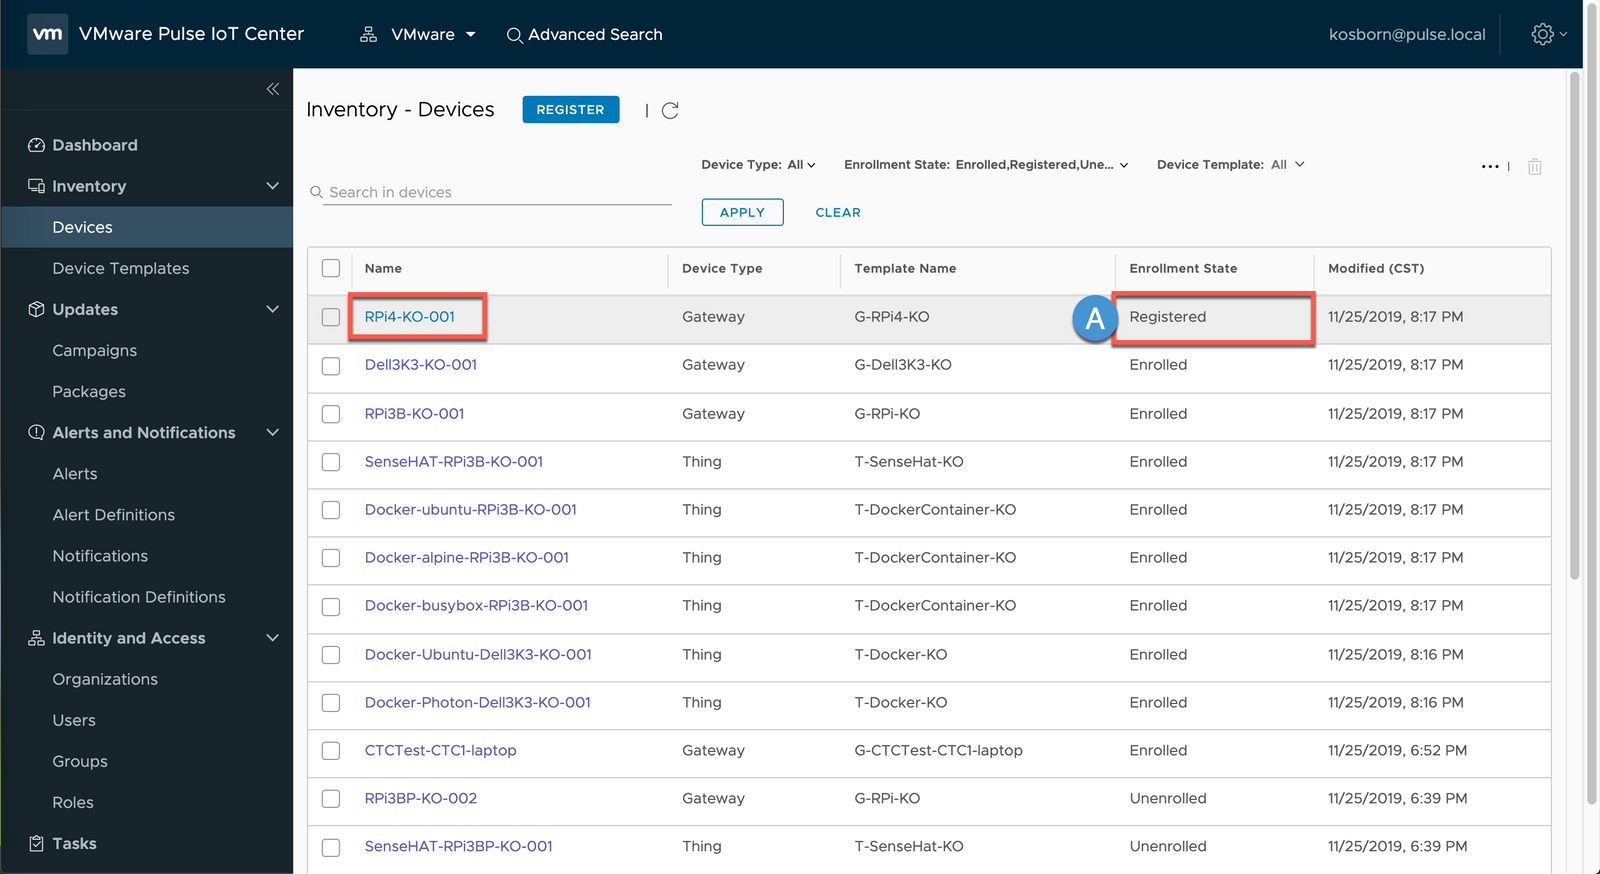
3A Note that the Gateway is in a Registered State (but not yet Enrolled, which we will take care of momentarily)
3B Click your Gateway
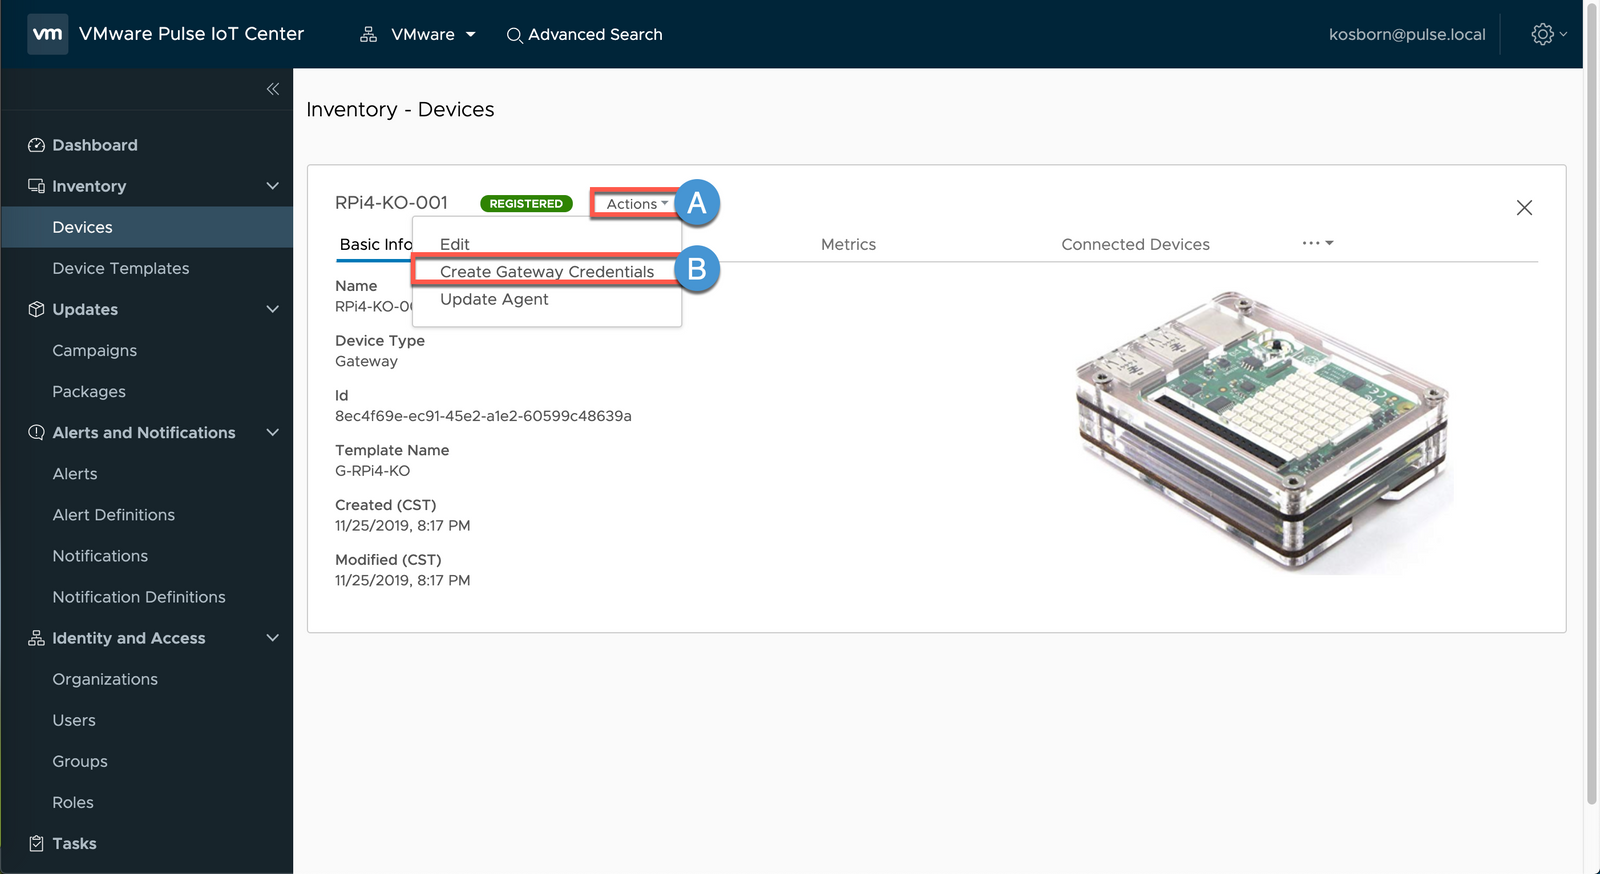
4A Select Actions pull-down menu
4B Click Create Gateway Credentials
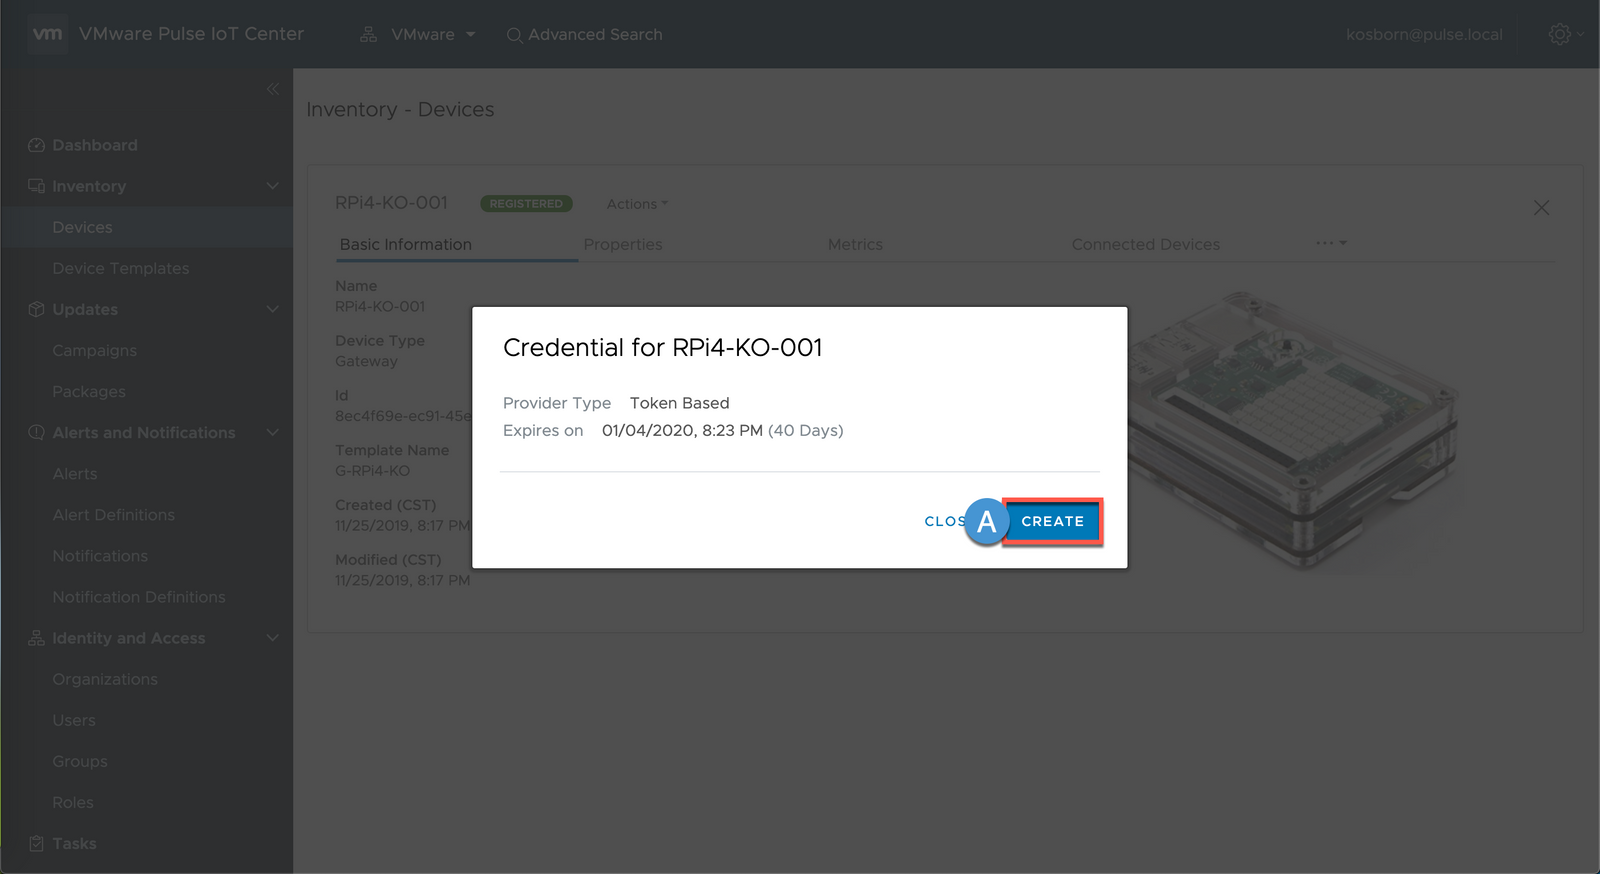
5A Click CREATE
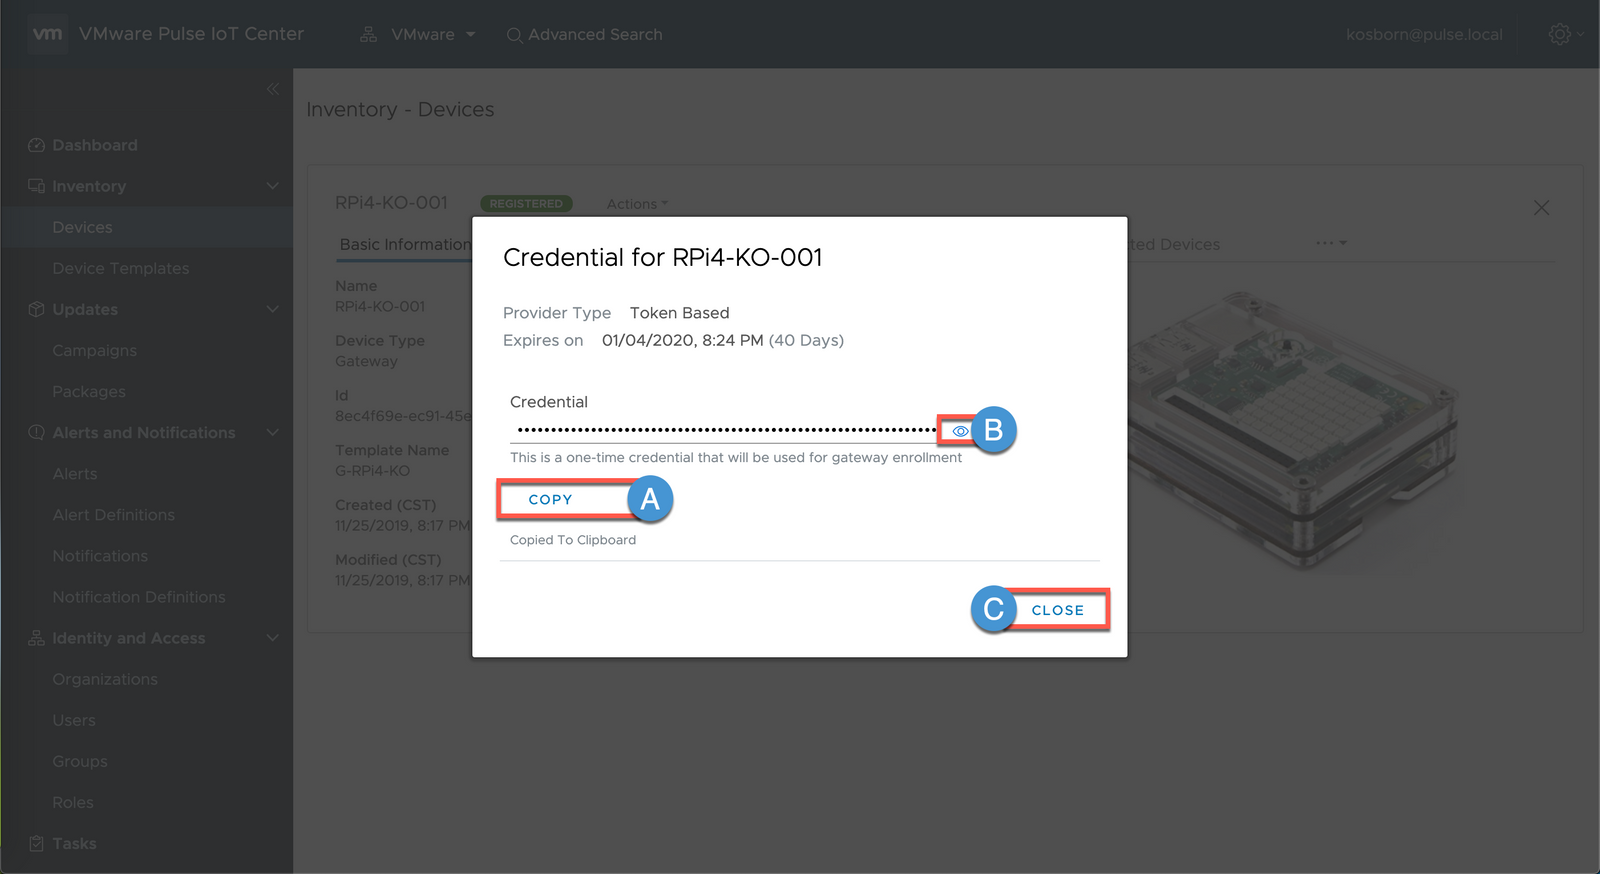
6A Select COPY
6B (Optional) click Eye icon to view Credential
6C Click CLOSE
4 Return to your Raspberry Pi SSH Session and change into the Pulse Agent bin directory
cd /opt/vmware/iotc-agent/bin

5 Run the DefaultClient with the help parameter to examine commands that are available (note the various ‘enroll’ options near the top).
./DefaultClient help | more
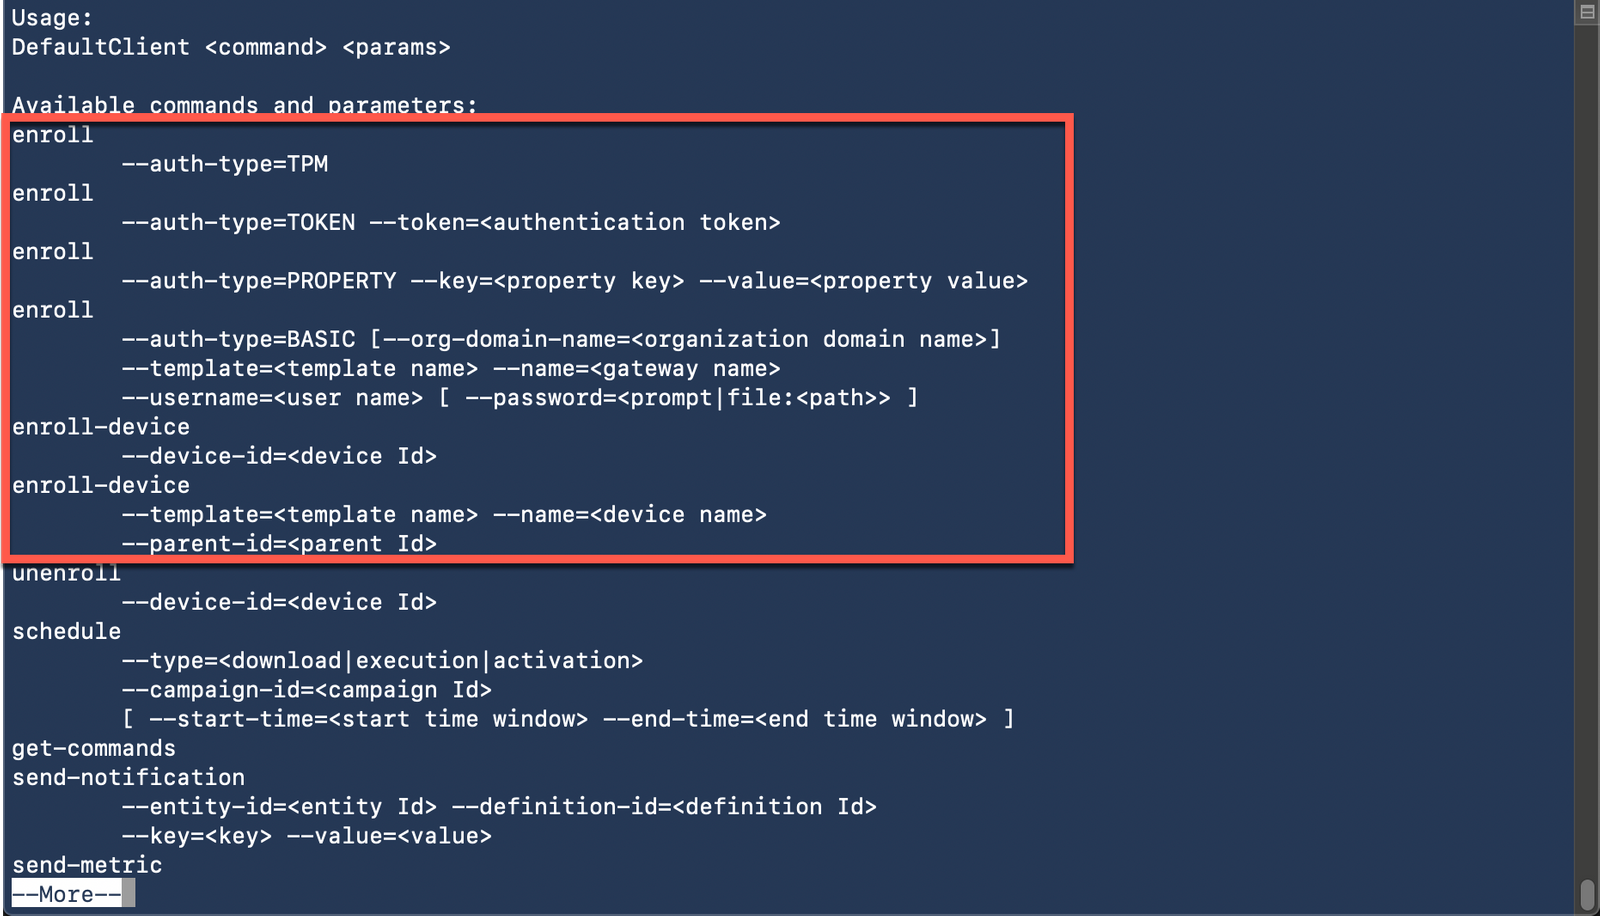
(Press Q or CTRL-C to exit, or press any key to continue scrolling)
6 Type the following command to onboard your Gateway using TOKEN enrollment
./DefaultClient enroll --auth-type=TOKEN --token=(paste in your clipboard contents)

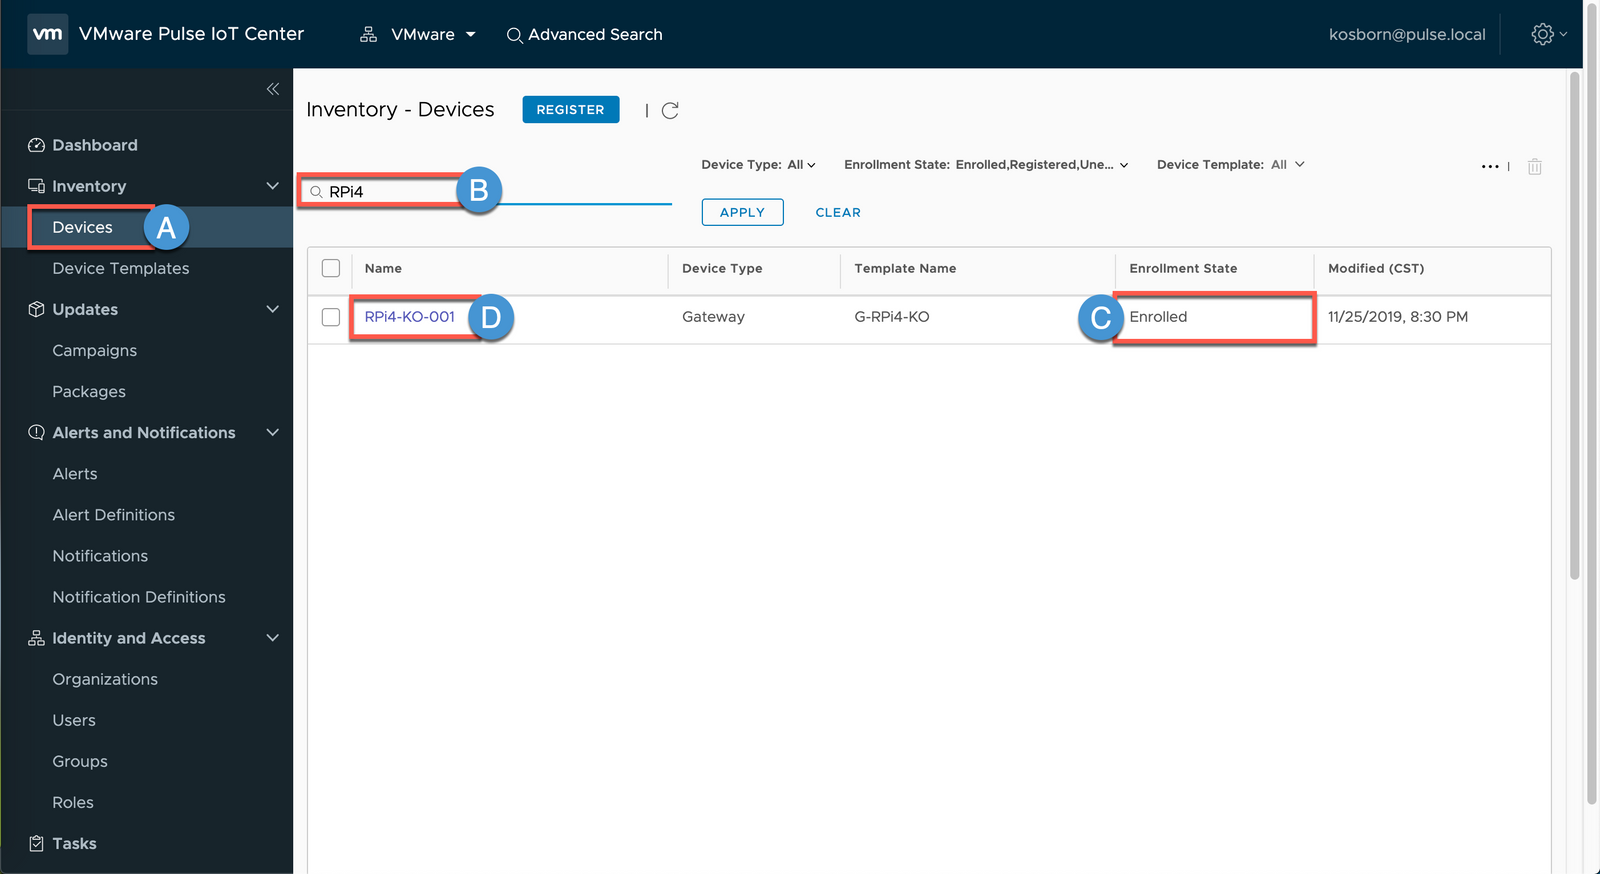
Note that the gateway device was enrolled successfully and that Pulse generated a Unique Device Id for the Gateway
7A Return to the Pulse Console and select Devices
7B (Optional) Set a Search Filter using all or a portion of your Gateway Name
7C Note that the Gateway is now in an Enrolled state
7D Click your Gateway
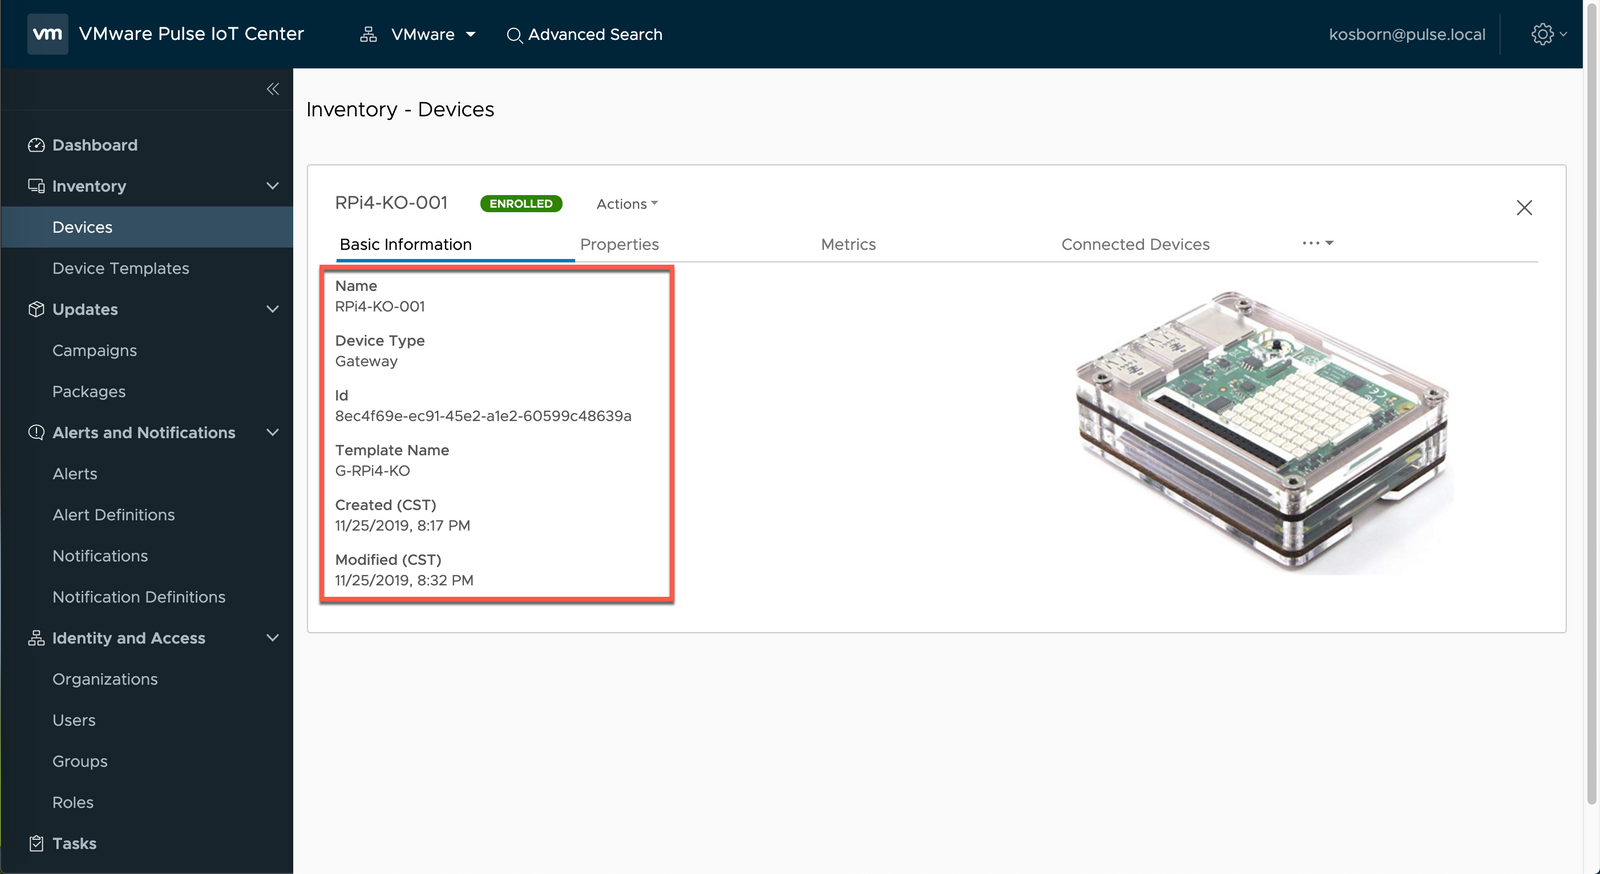
8 Note the Basic information that is present (Friendly Gateway Name, Unique Id, Template that the Gateway was enrolled via, etc.)
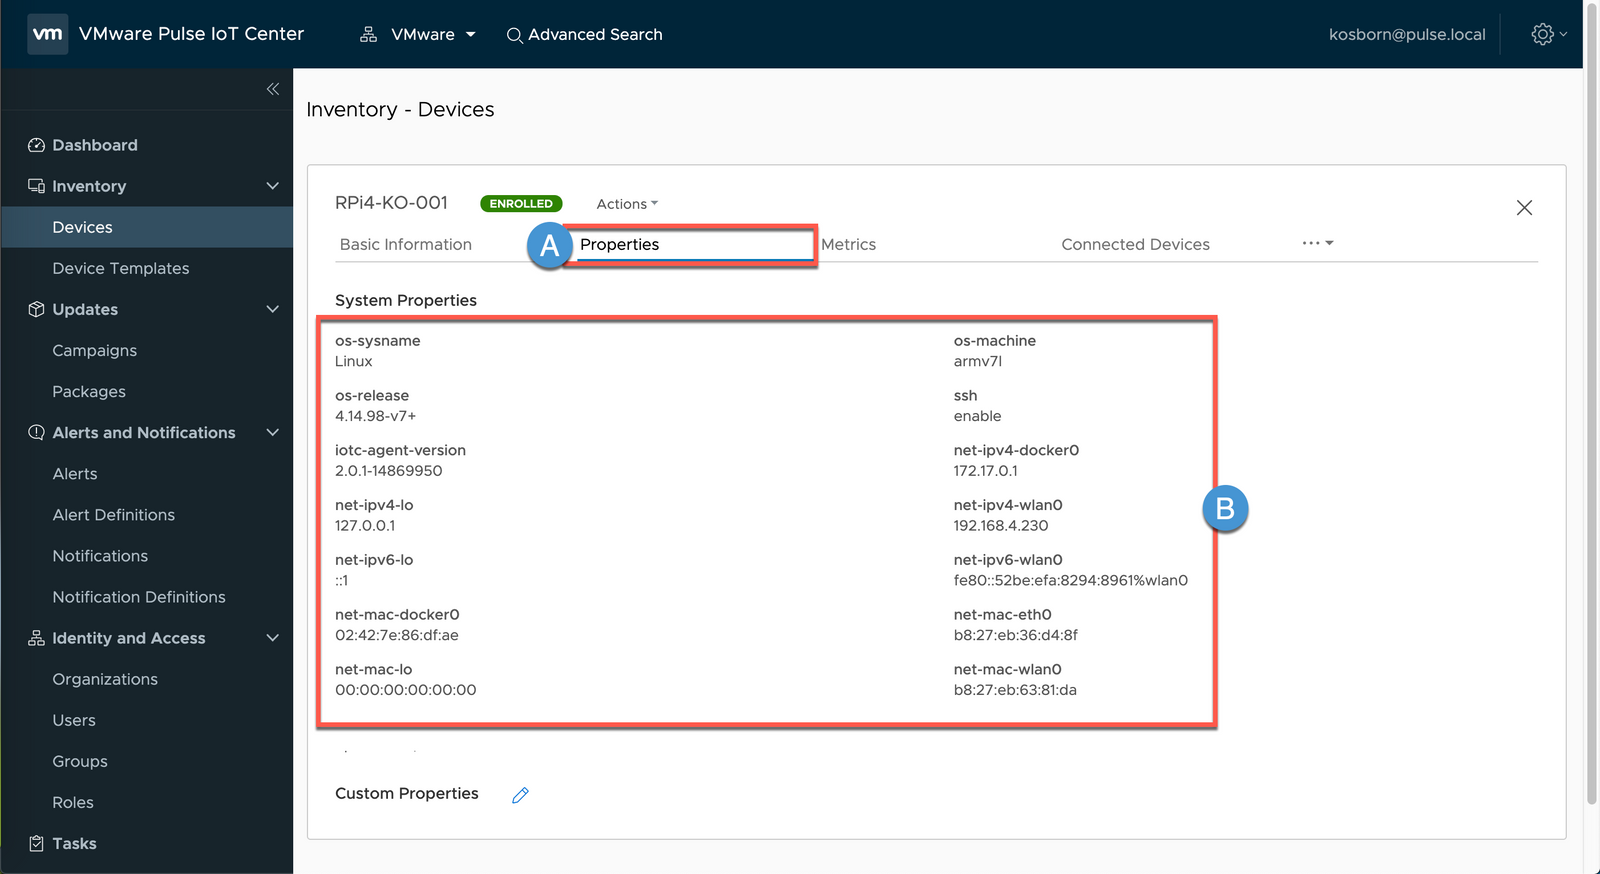
9A Select Properties
9B Note the information that is present (this information is being populated via the Pulse Agent on the Gateway and is customizable. We can - and will later in this Eval Guide - send in additional Properties like Docker related information, etc.).
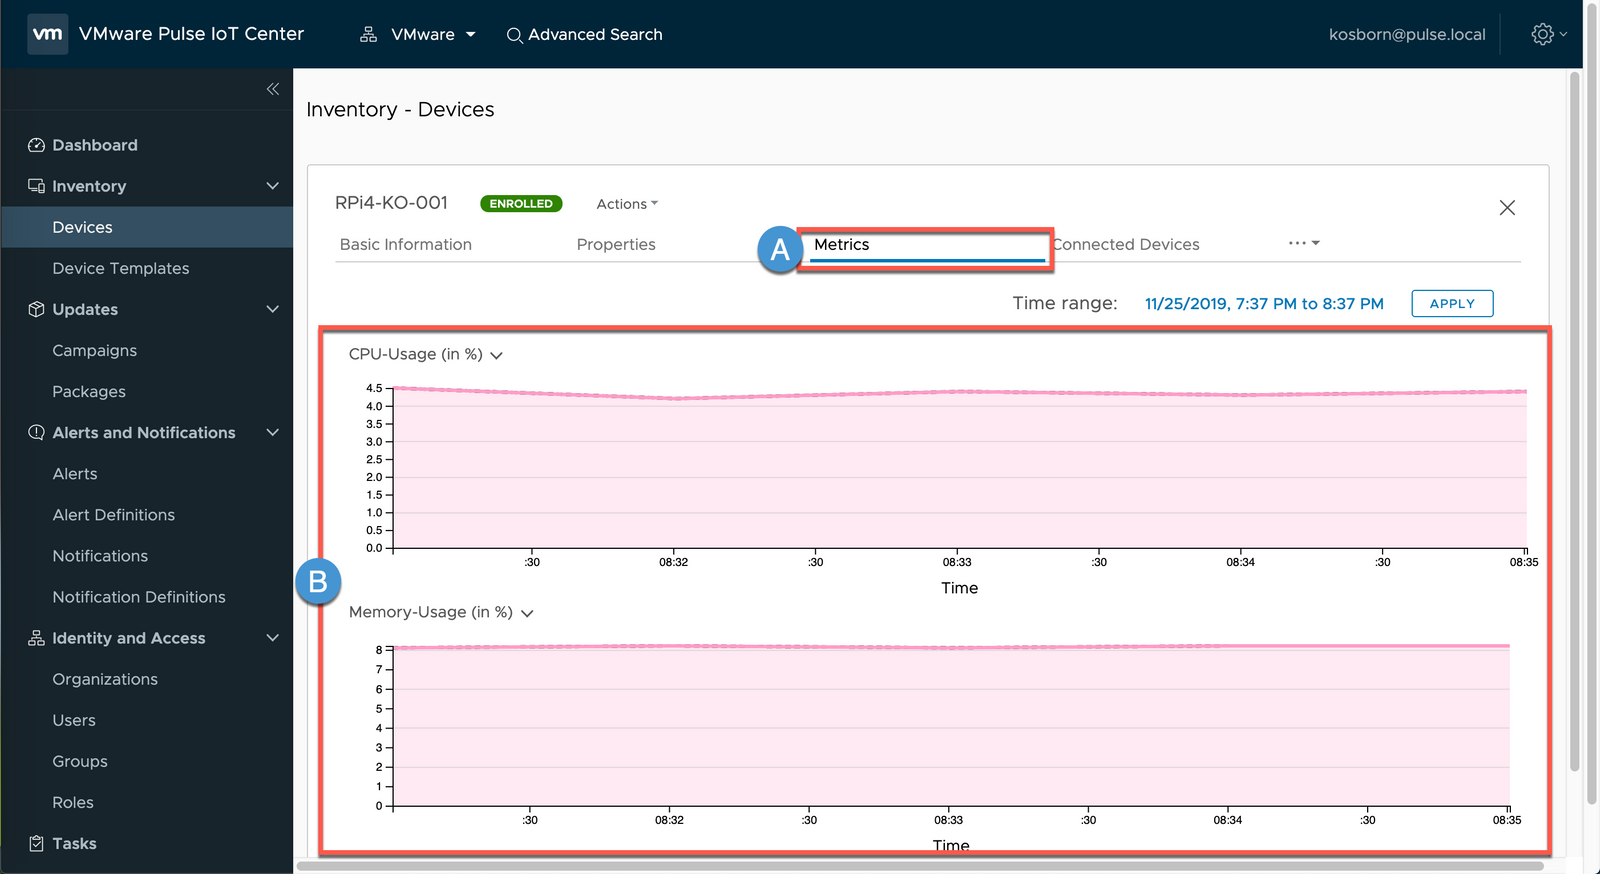
10A Select Metrics
10B Expand the Utilization Graphs (note that it can take 5-10 minutes for your Metrics to start populating, thank you for your patience)
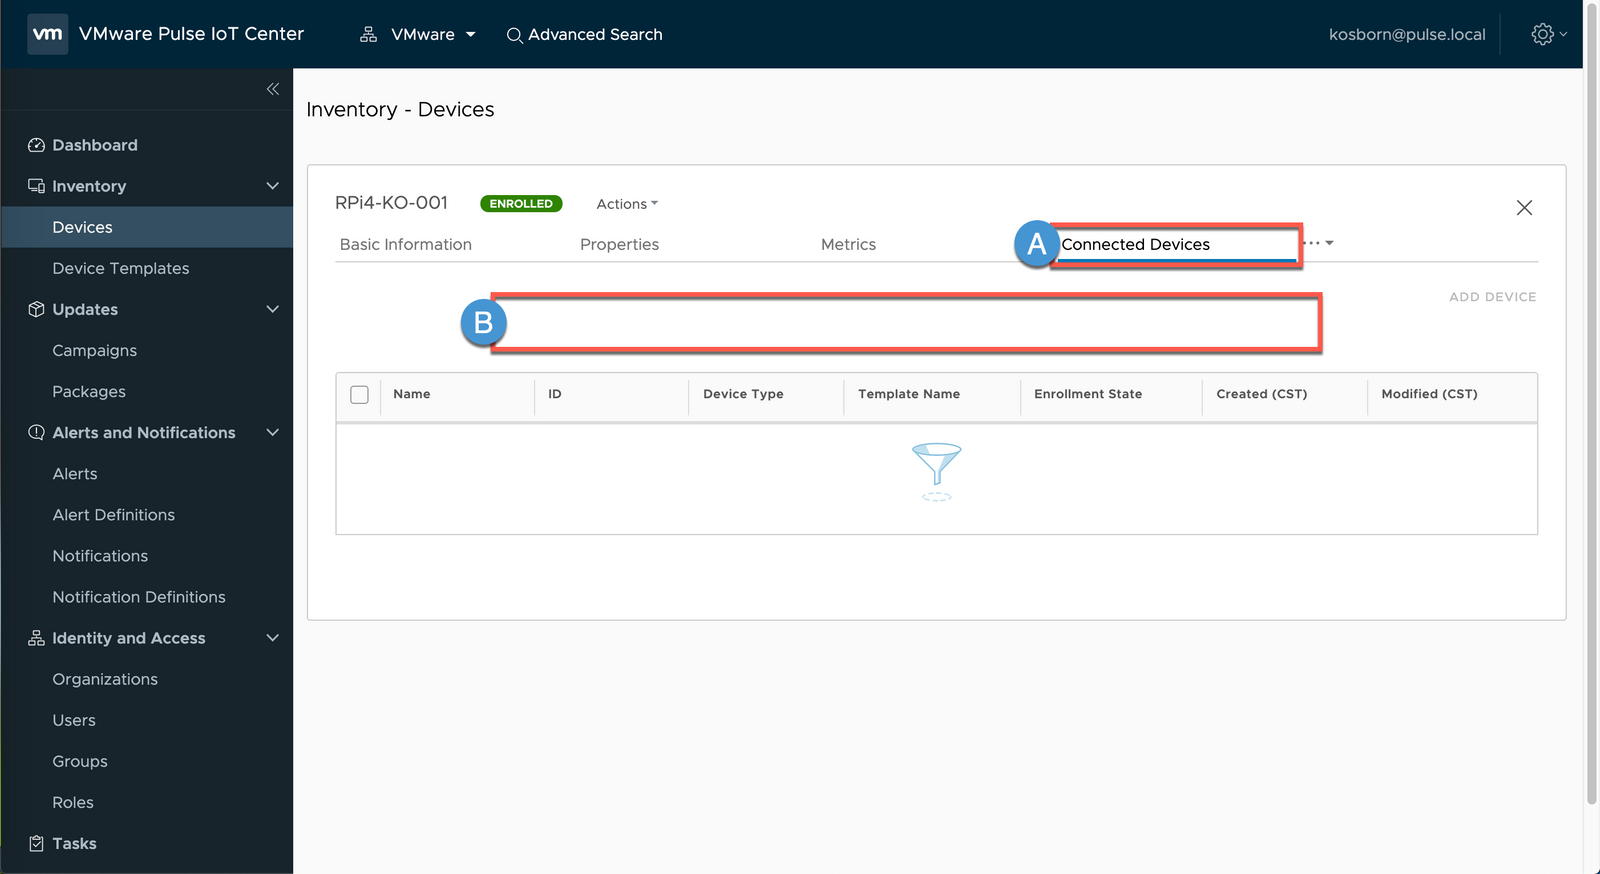
11A Select Connected Devices
11B Note that we currently have no IoT Connected Things associated with the Gateway (we will add a SenseHAT Connected Thing in our Onboard Things lesson)
Thank you - this concludes our ‘Onboard Gateway' Step
comments powered by Disqus