Overview
The following items are required in order to participate during the Workshop Lessons
1 Laptop with Internet Access
2 VMware Fusion (MacOS) or Workstation (Windows) Installed
3 Ubuntu 18.04 LTS Virtual Machine (performing the role of a Virtual IoT Gateway)
4 Putty Client (for Windows users, only) (link)
5 Chrome Web Browser
Steps
Laptop with Internet Access
1 Make sure that you bring your Laptop (and Power Cable) the day of the Workshop!
VMware Fusion (MacOS) or Workstation (Windows) Installed
1 Installing Fusion/Workstation is outside of the scope of this Guide; however, information on downloading a Trial Evaluation of either Product can be found here.
2 We will be using Fusion (MacOS) for the remainder of this Guide (steps should be similar for Workstation on Windows)
Ubuntu 18.04 LTS Virtual Machine Creation
1 Download Ubuntu 18.04 LTS Server install image (link)
2 Launch Fusion and select your Virtual Machine Library
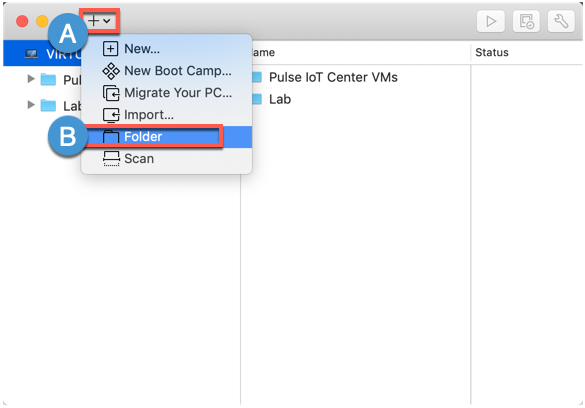
2A Select + Drop-Down
2B Click Folder (Name: Pulse IoT Center Workshop)
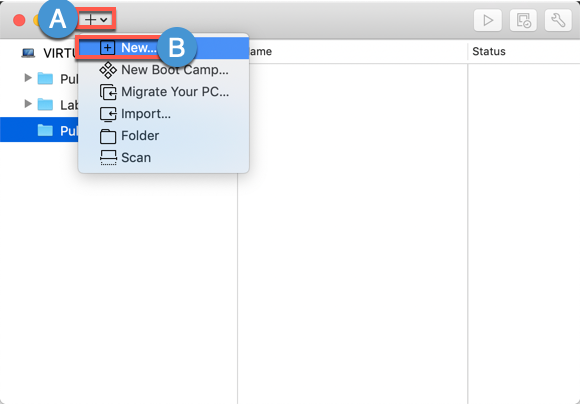
3A Select + Drop-Down
3B Click New…
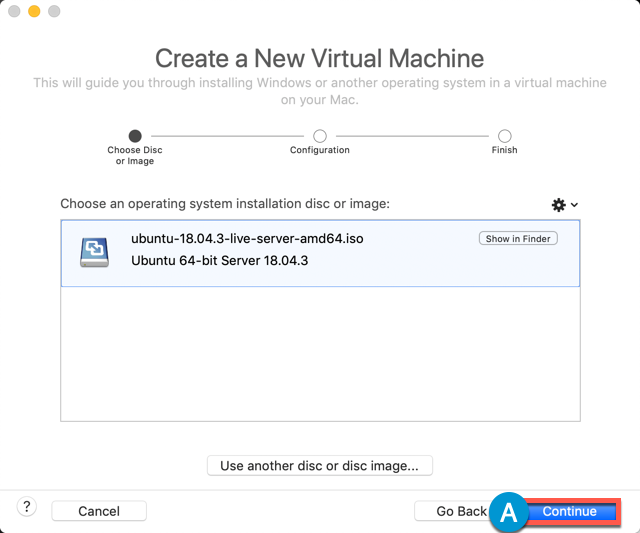
4 Drag the Ubuntu .iso you downloaded via Step 1
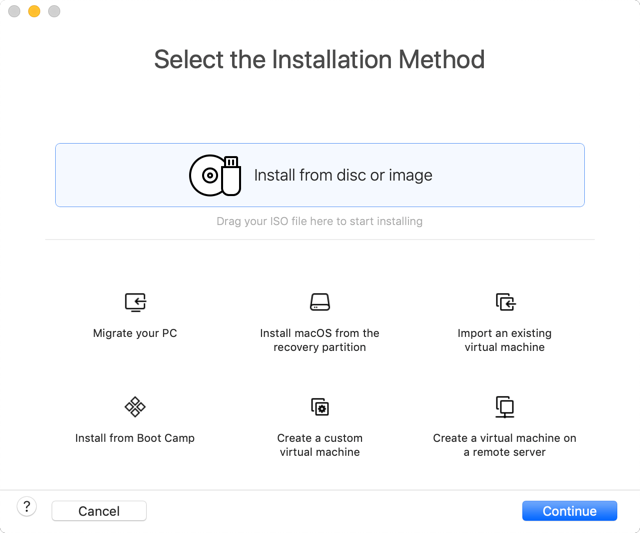
5A Click Continue
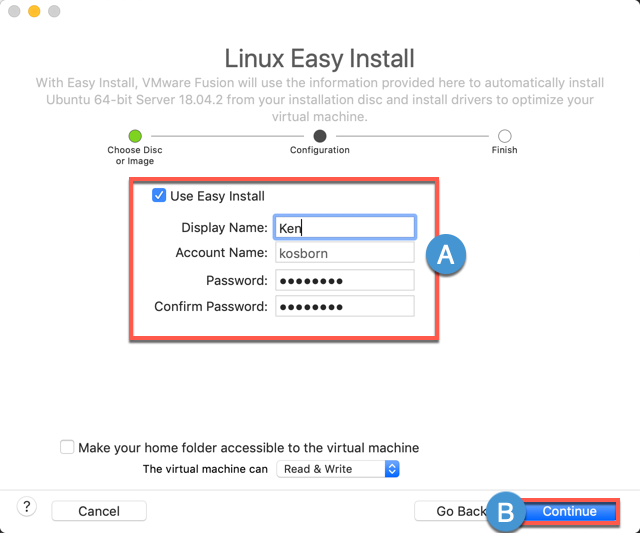
6A Leave ‘Use Easy Install’ Enabled and enter your Display Name, Account Name and Password (suggest using VMware1! for the latter to keep things simple)
6B Click Continue
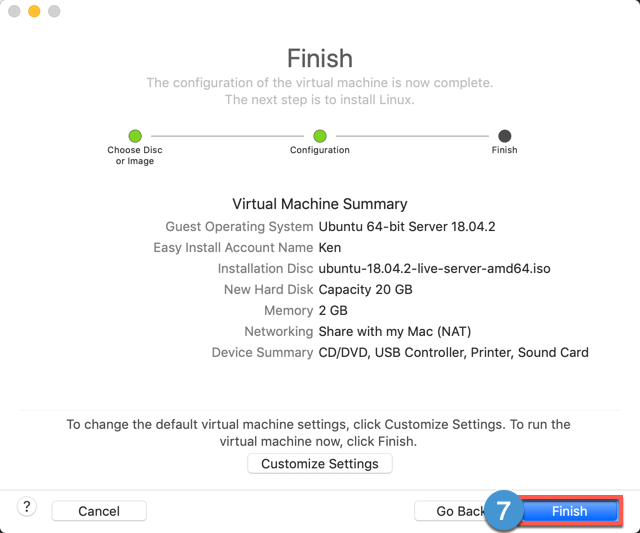
7 Click Finish
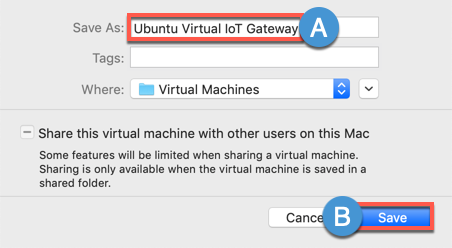
8A Enter Save As: Ubuntu Virtual IoT Gateway
8B Click Save (Your newly created Virtual Machine will startup)
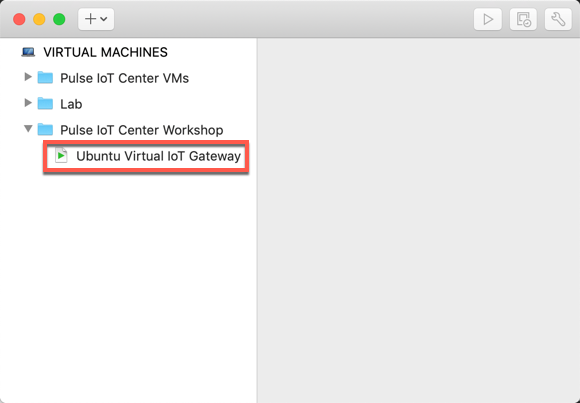
9 Drag and Drop your Ubuntu Virtual Machine into the Folder you created in Step 2B
Ubuntu 18.04 LTS Virtual Machine Configuration
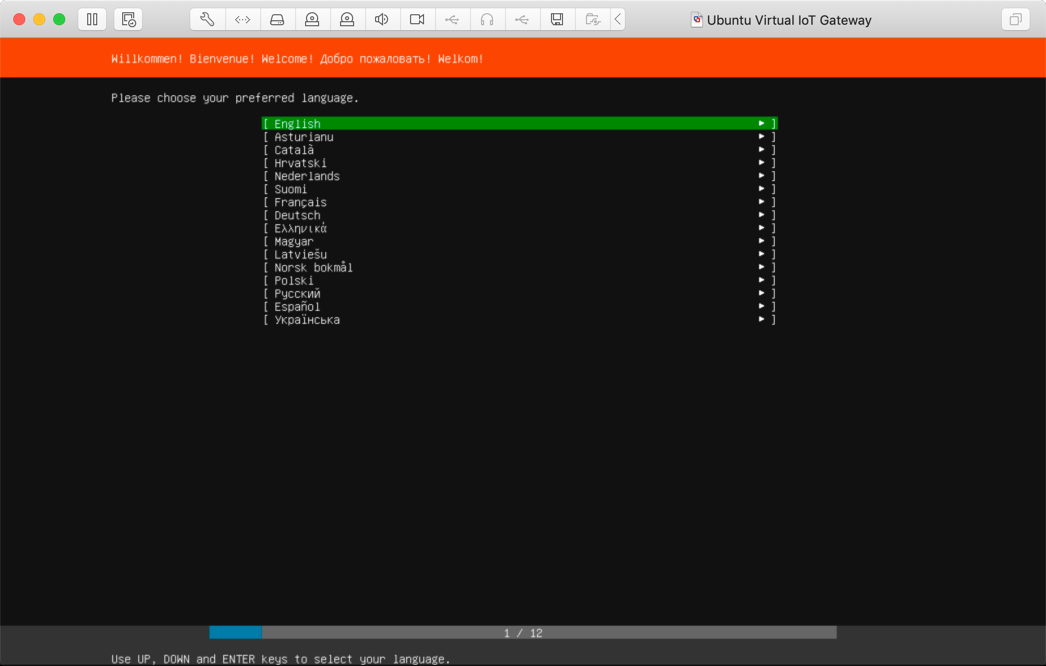
1 Select Language and Press Enter
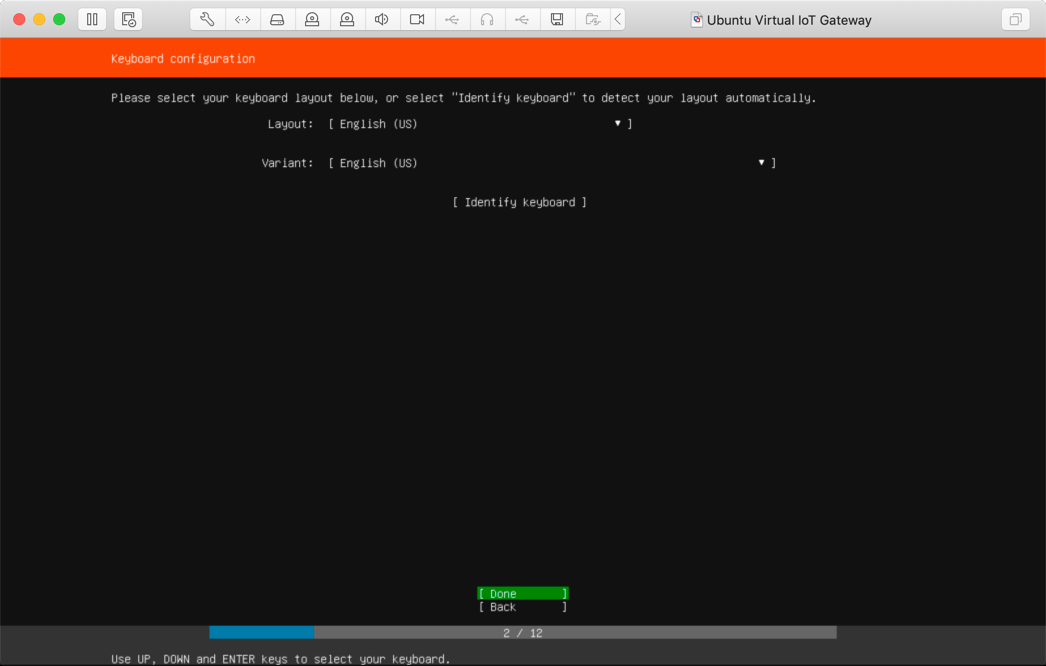
2 Confirm Keyboard Setting and Press Enter
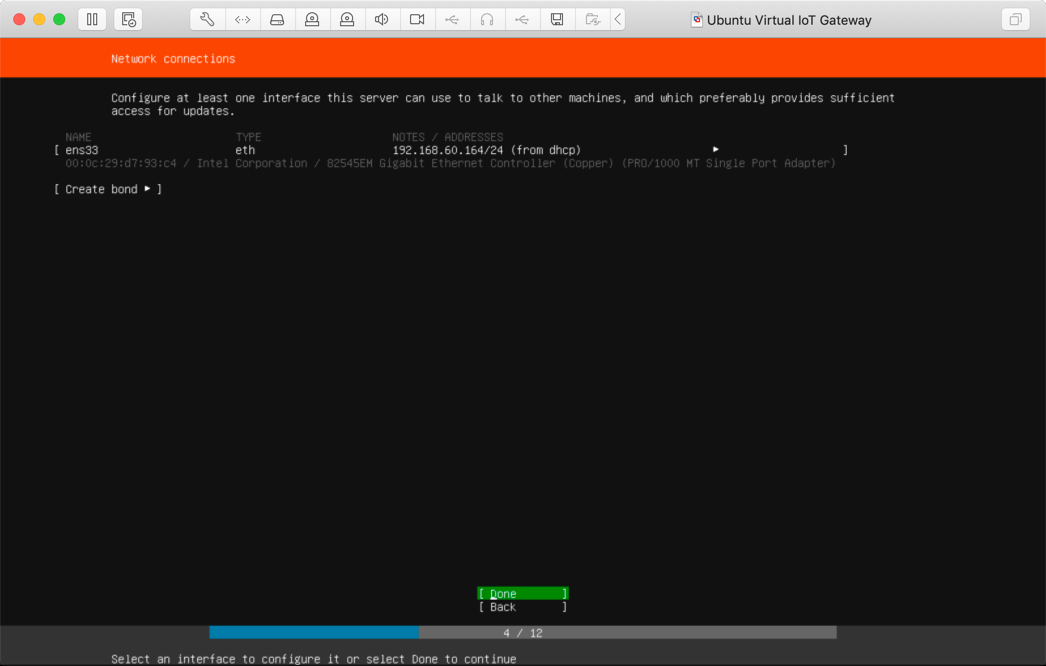
3 Confirm that an IP address is assigned via DHCP and Press Enter
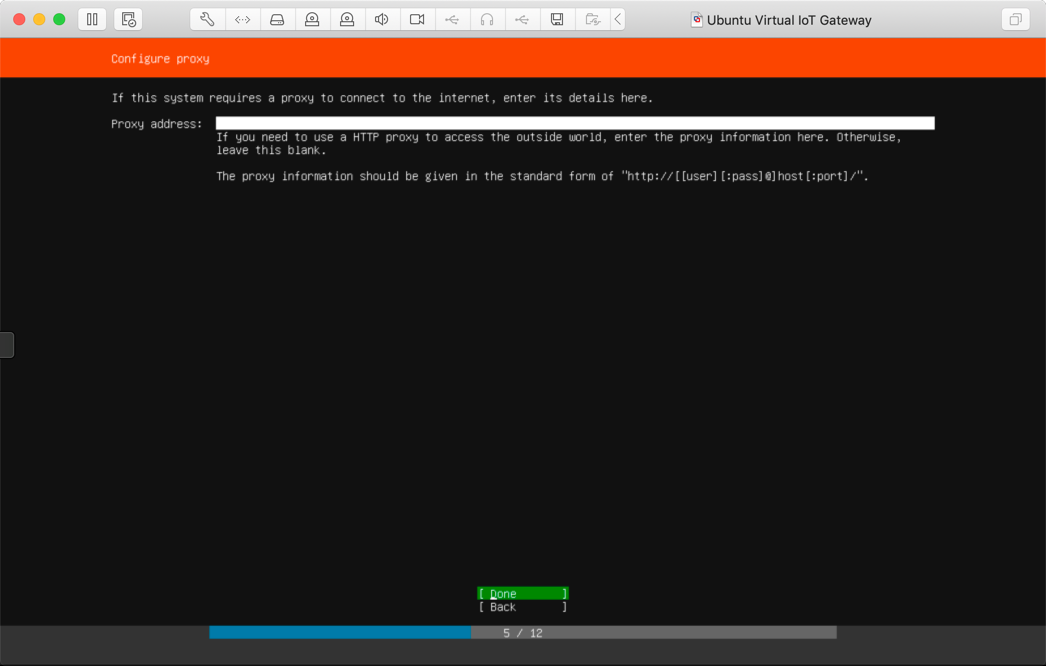
4 Press Enter (A Proxy Address should not be necessary)
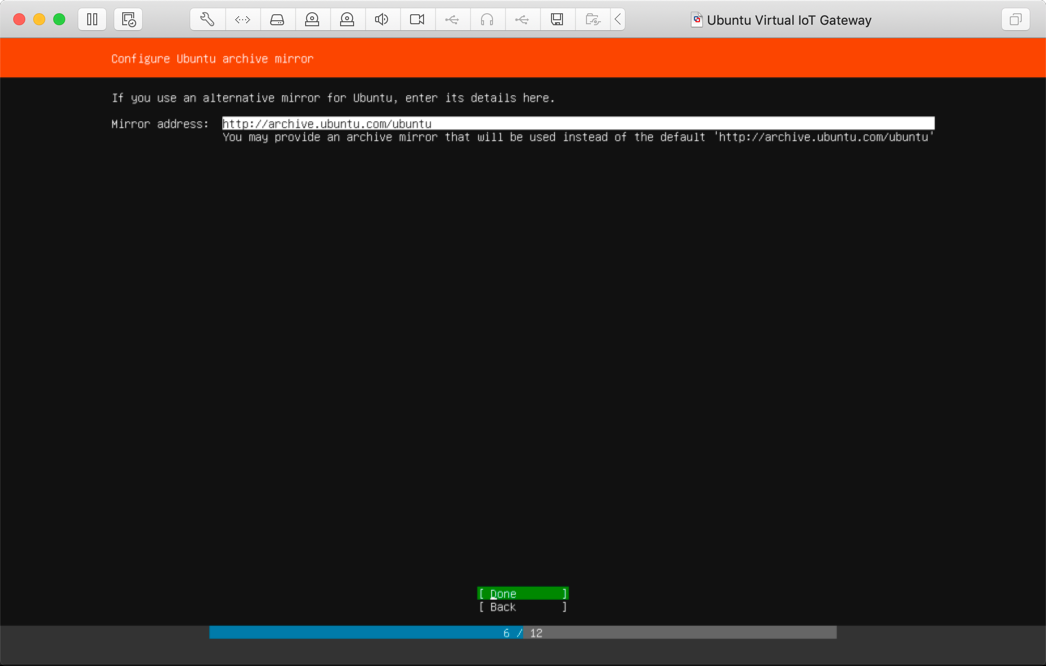
5 Leave default mirror address and Press Enter
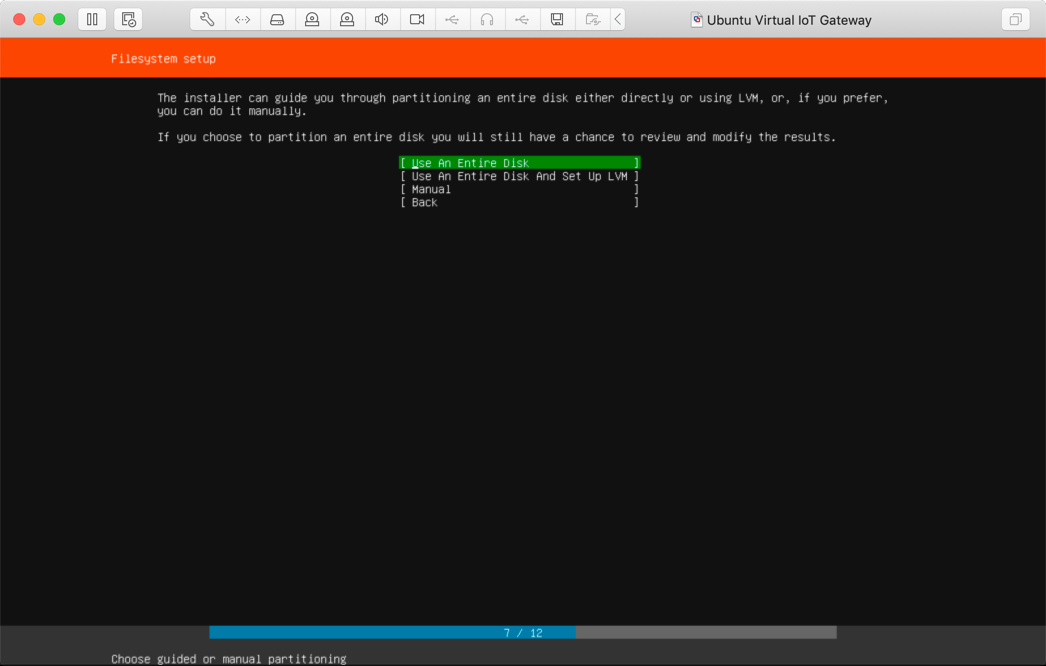
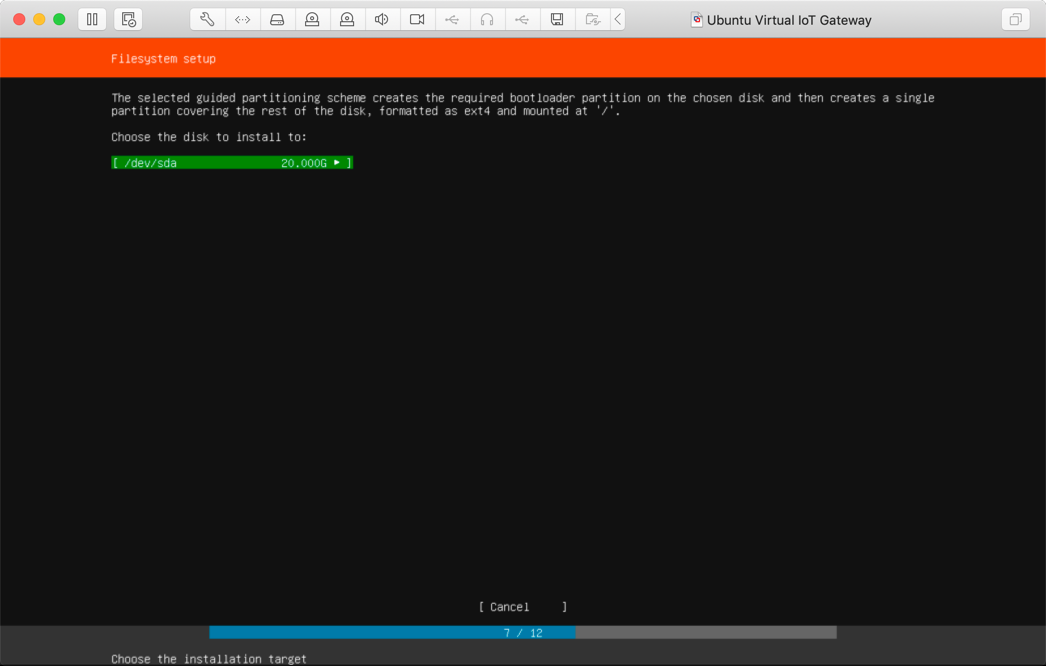
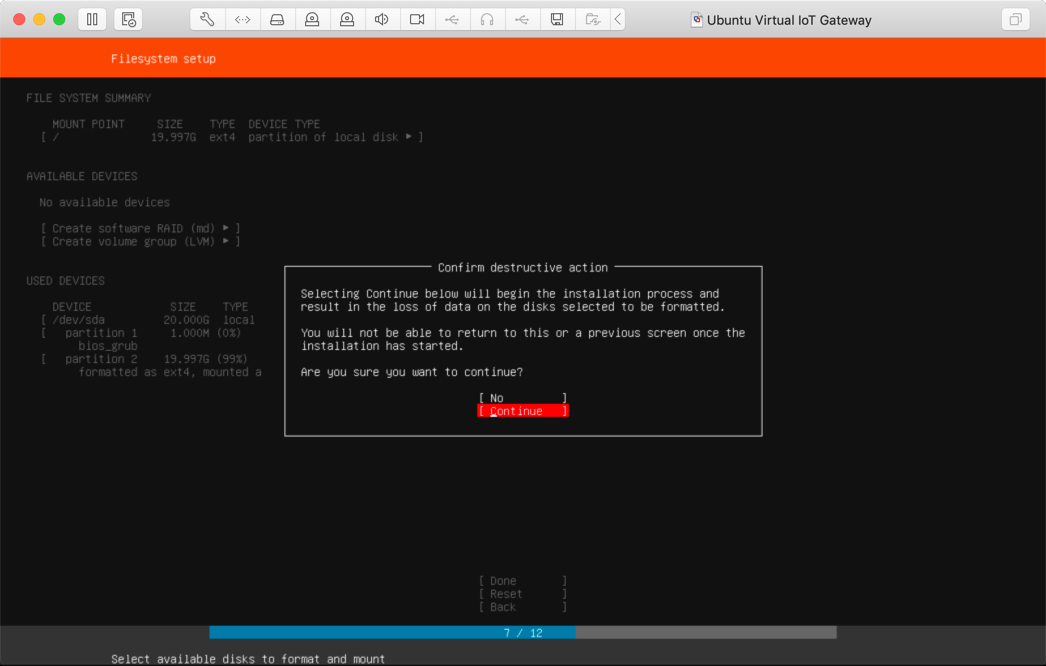
6 Confirm Use An Entire Disk is selected and Press Enter
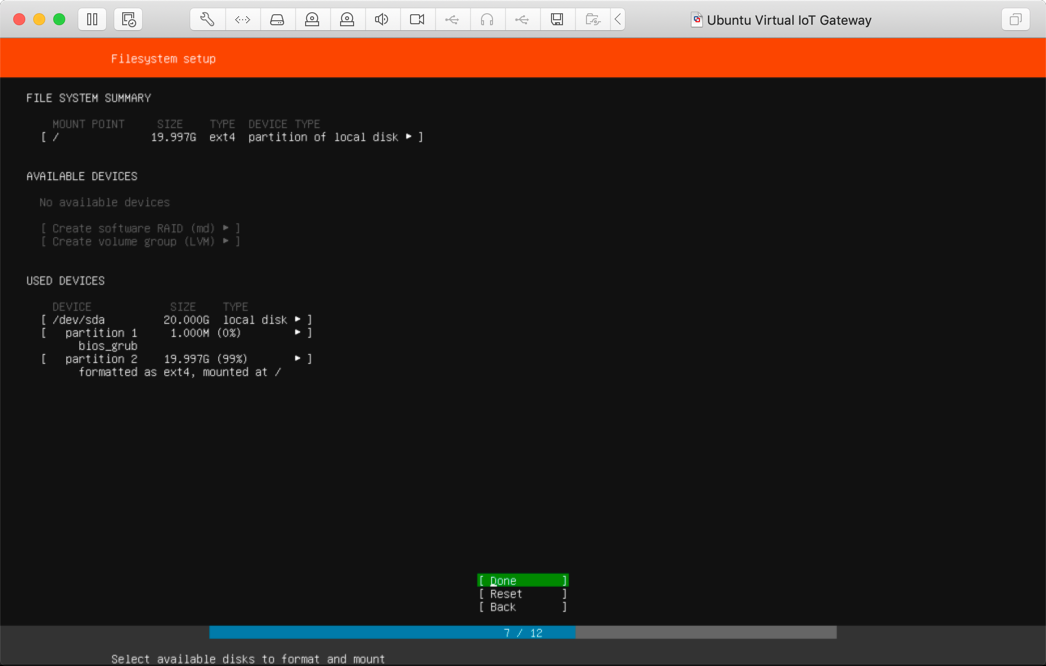
7 Press Enter
8 Press Enter
9 Down Arrow to Continue and Press Enter
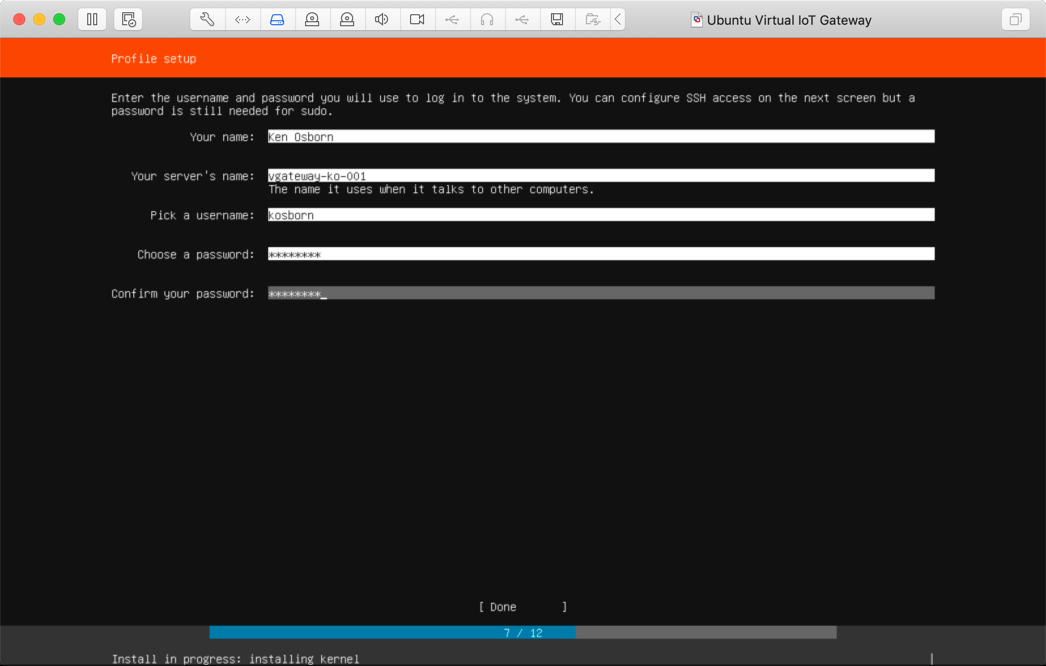
10 Your name: [enter your name]
Your server’s name: vgateway-[your initials]-001
Pick a username: [username]
Choose a password: VMware1!
Press Enter (twice)
11 Use Spacebar to enable Install OpenSSH server, Tab twice to Done and Press Enter
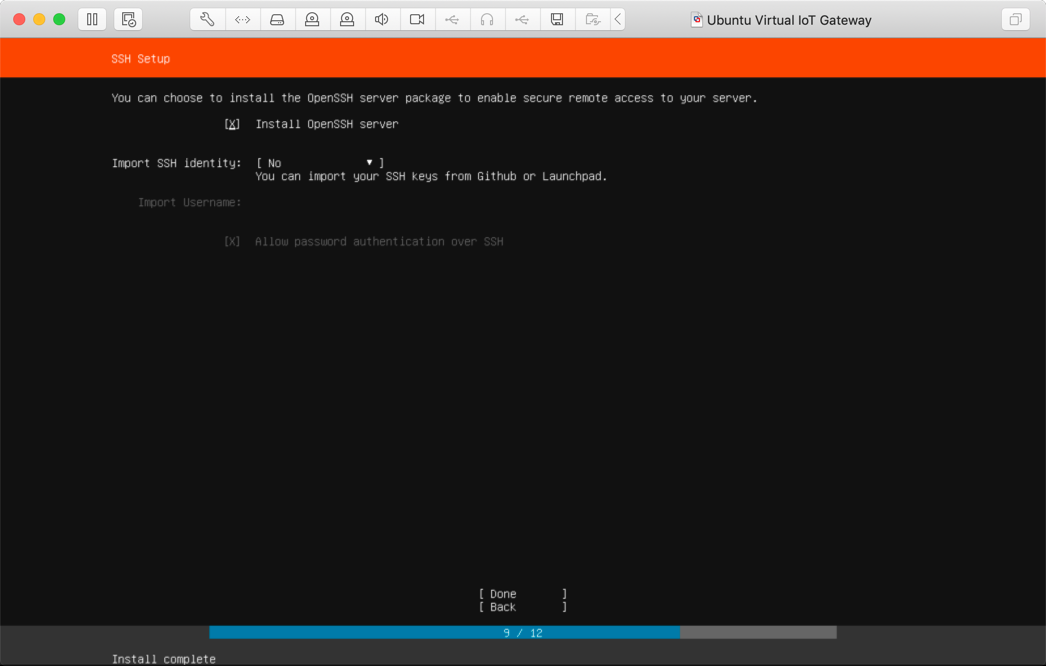
12 Tab once to Done and Press Enter
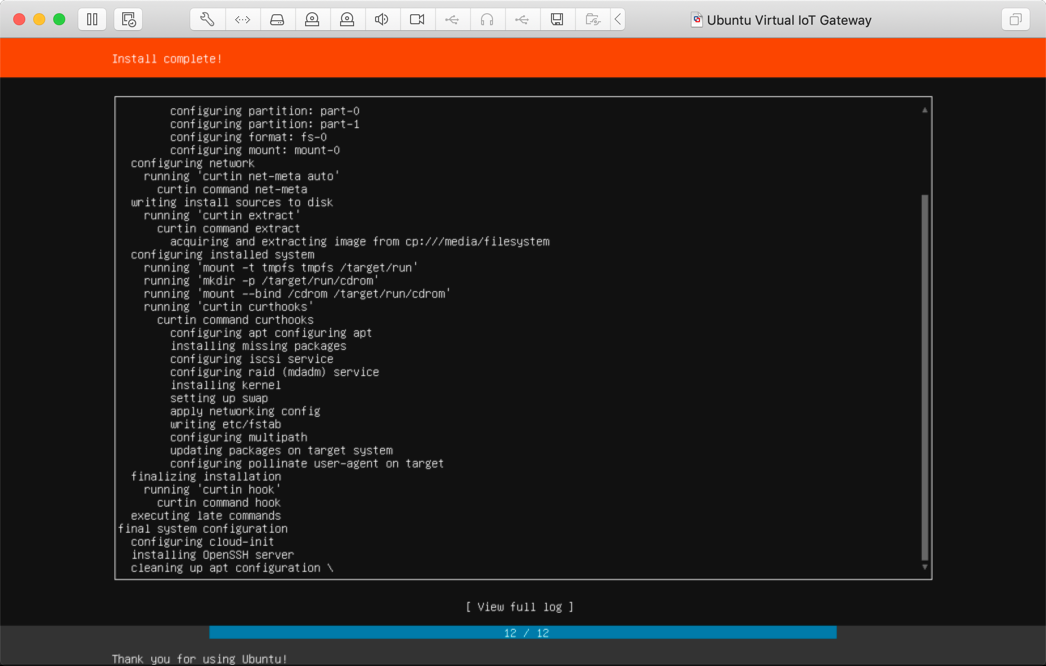
13 Monitor Until Complete
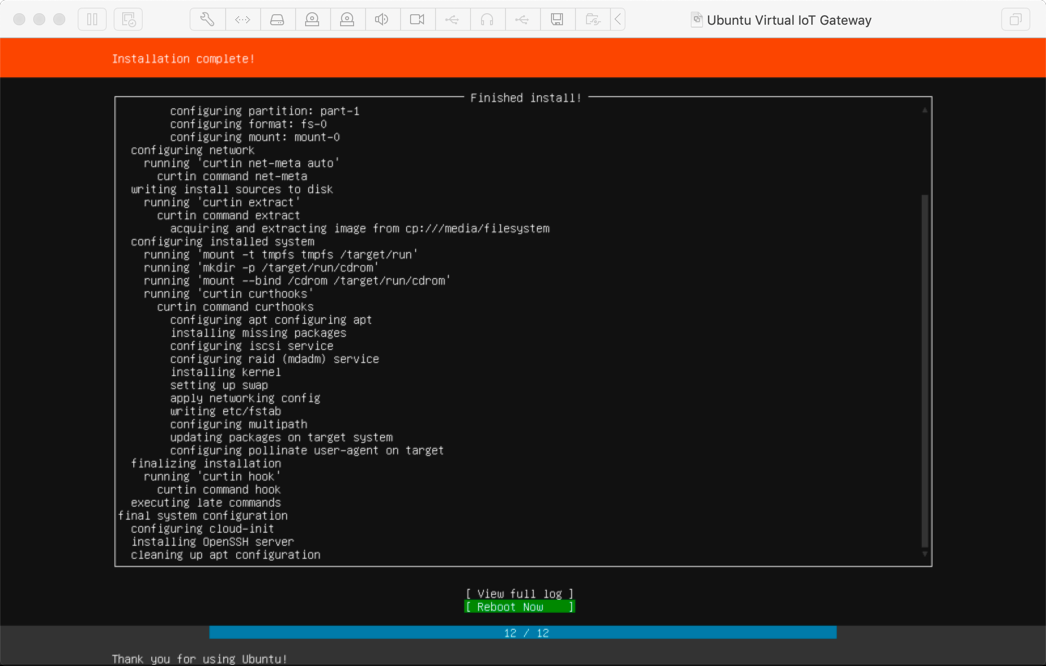
14 Press Enter to Reboot Now
Ubuntu 18.04 LTS OS Configuration
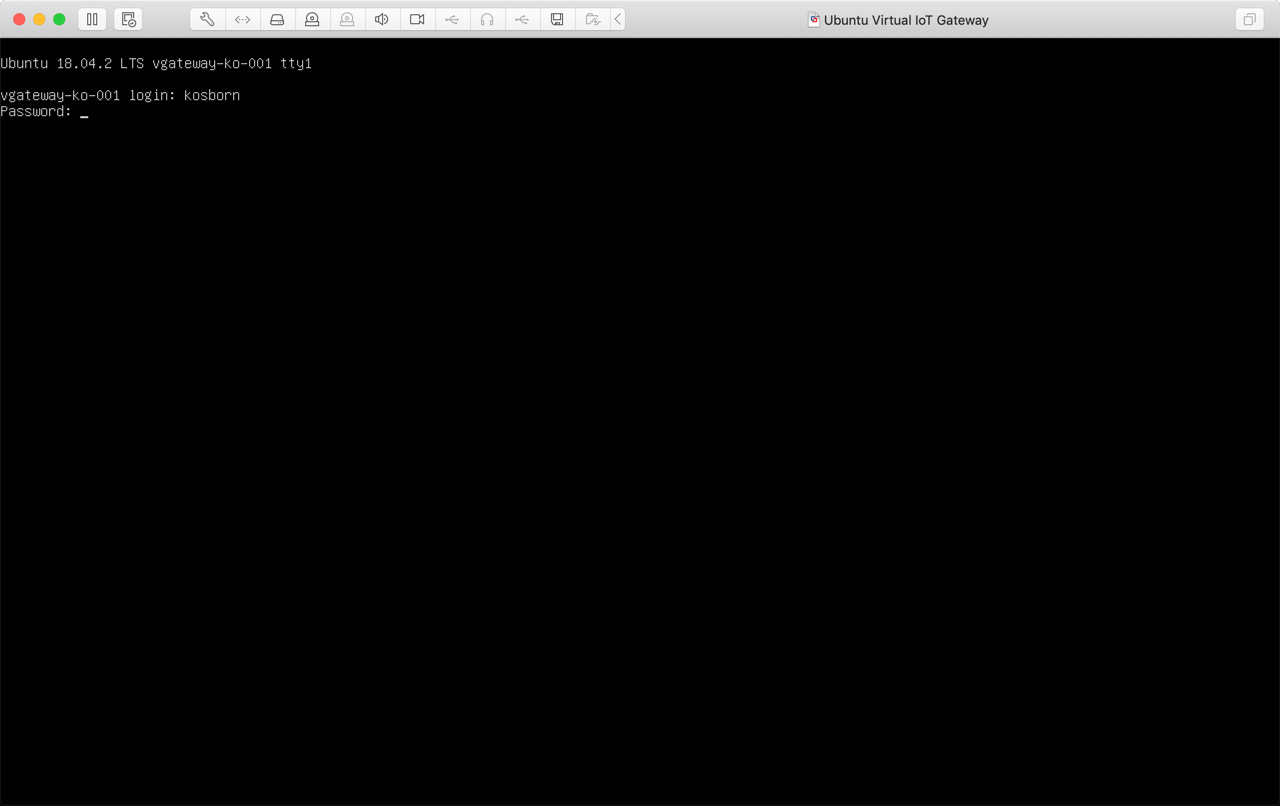
1 Enter login (username) and password then Press Enter (you may need to press enter to get this login prompt to initially appear)
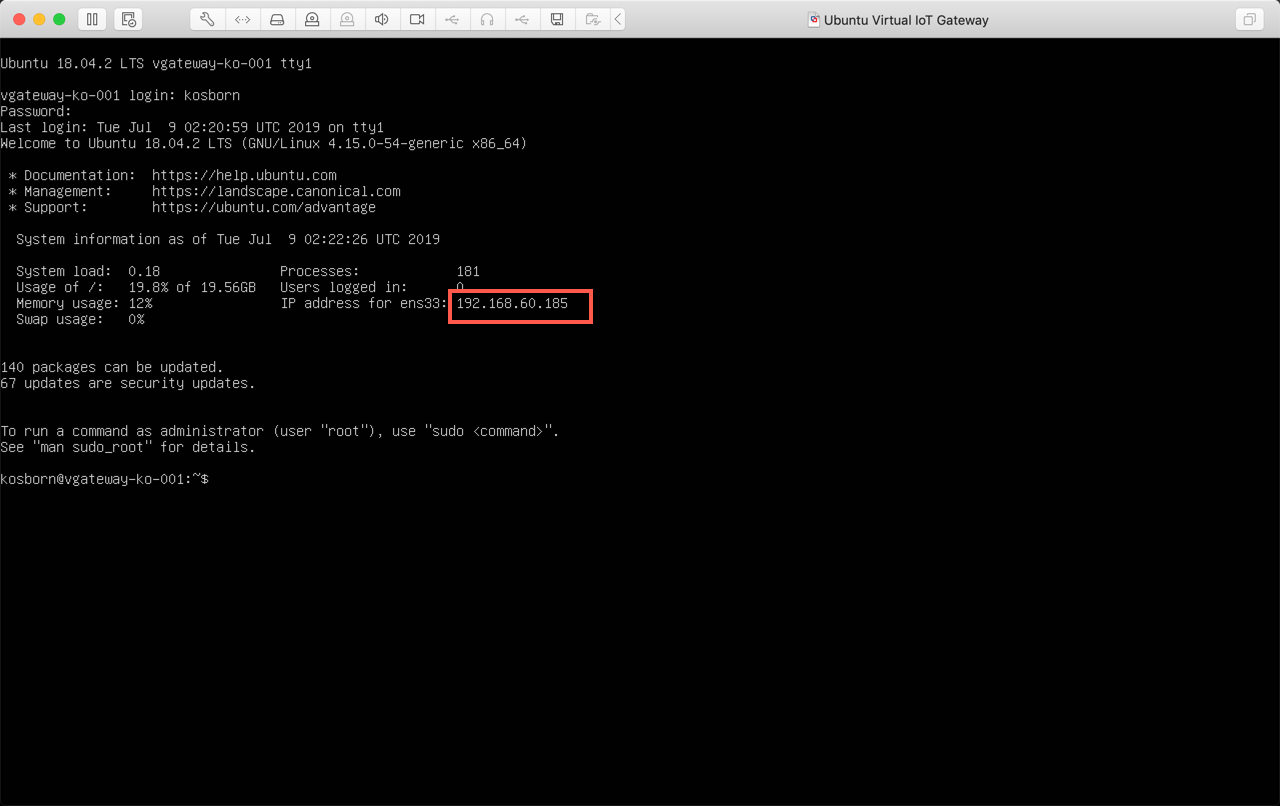
2 Make note of IP Address
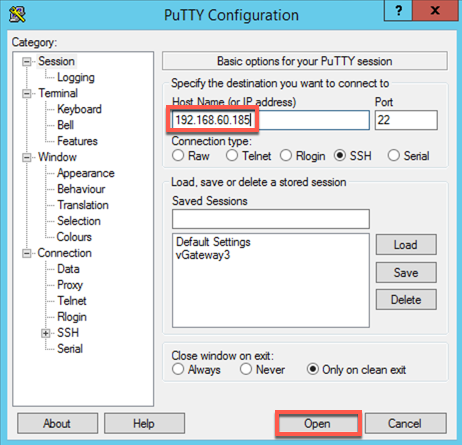
3 Launch MacOS Terminal (or Putty.exe if using Windows) and SSH to your Ubuntu Virtual Machine (indicate ‘yes’ for connecting and enter your password)

3 (Windows Putty.exe Screenshot Example)
4 su up utilizing the following command (enter password)
sudo su
Note: sudo commands will take longer than usual to execute until we modify the Hosts file (next)
5 Edit Hosts file utilizing the following command (replace FQDN and Host shortname values with your OS name)
nano /etc/hosts
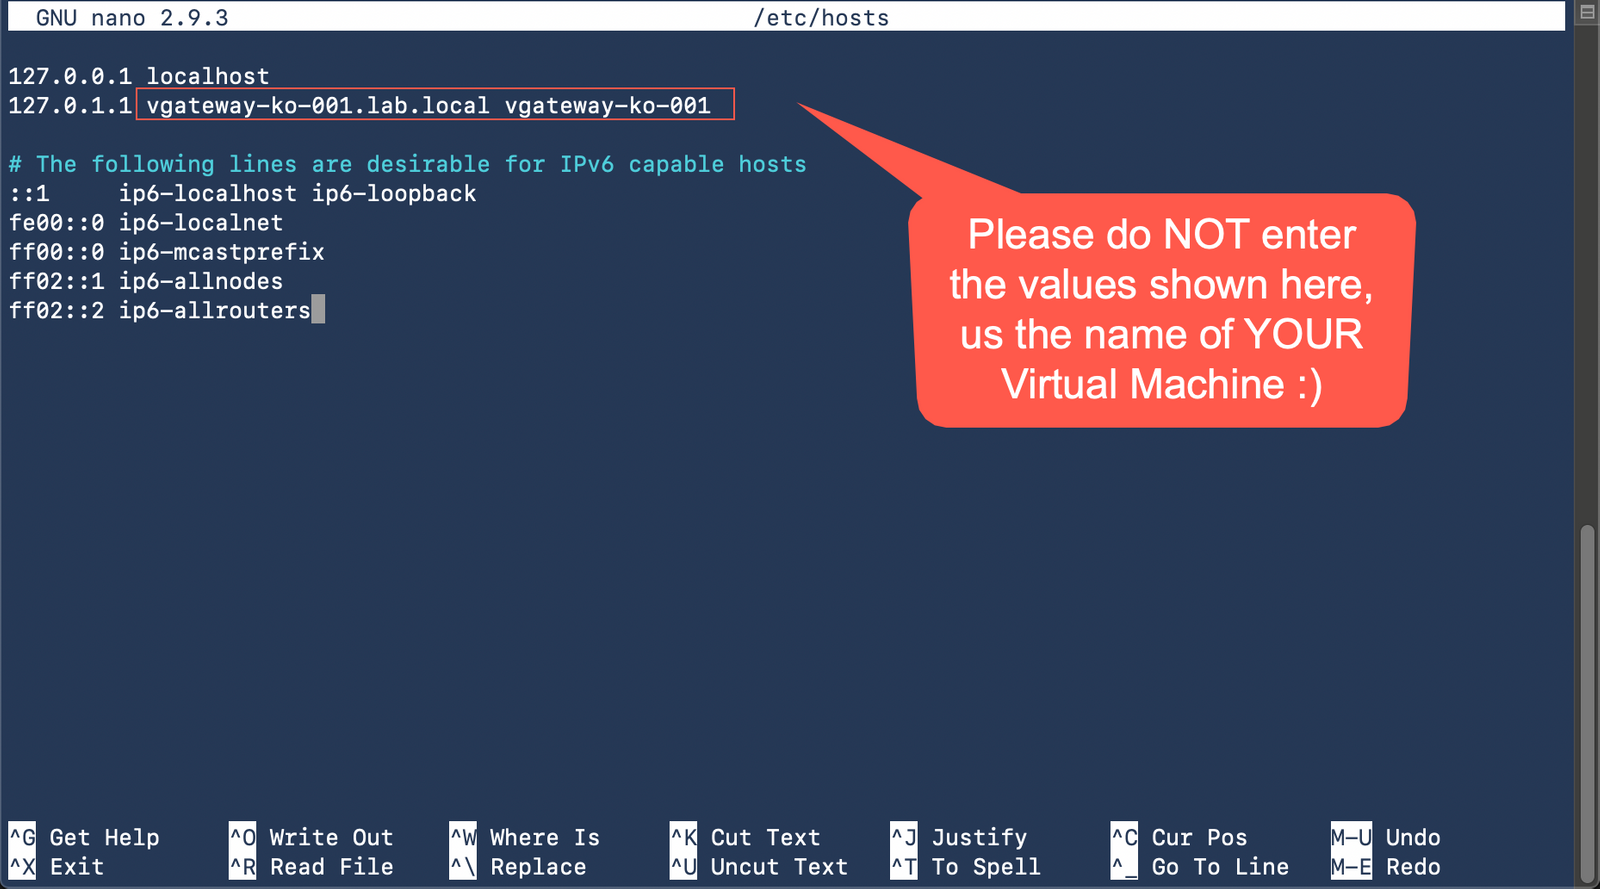
CTRL-X to Exit
6 Install httpie utilizing the following command
apt-get install httpie
Press Enter for Y
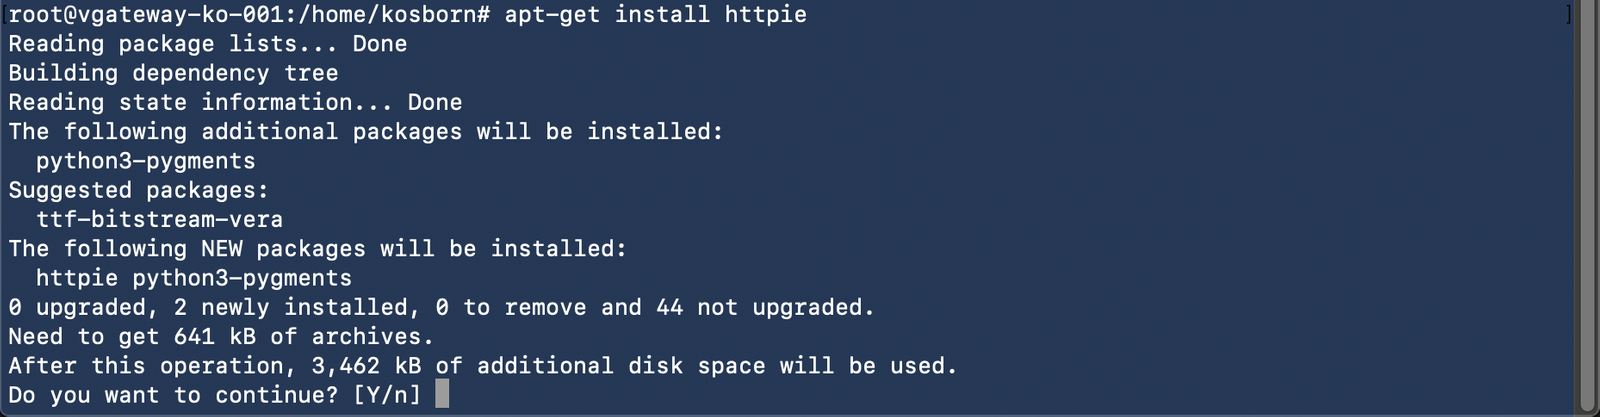
7 Monitor until complete
<Thank you - this concludes our 'Before You Attend' Guide>
Please ping Ken Osborn ( kosborn@vmware.com ) with any questions/comments/concerns (or enter Comments below), prior to the Workshop, thank you!
comments powered by Disqus